

I remember the first time I replaced a side mirror myself, feeling pretty proud of saving some bucks. But then, as I drove down the street, that irritating whistling wind noise started to drive me crazy. It was as if my car had developed a whole new sneaky sound—louder than ever in the quiet moments of my drive. That moment might sound familiar if you’ve ever experienced a new noise after a simple repair, feeling both annoyed and overwhelmed about where to start troubleshooting.
Dealing with Unexpected Wind Noise After a Mirror Swap
Many car owners, myself included, don’t anticipate that replacing a side mirror could lead to such a persistent and bothersome issue. It’s tempting to think, “I just swapped out the mirror; how hard can it be?” But sometimes, these minor tasks reveal overlooked details that can cause bigger headaches. Wind noise is more than just a nuisance—it can signify improper sealing, misaligned parts, or loose panels that compromise your vehicle’s aerodynamics and even fuel efficiency.
If you’ve encountered this problem, you’re probably wondering what went wrong and how to fix it without turning your car into a workshop. Well, I’ve been down that road, making mistakes early on—like underestimating the importance of thoroughly sealing the mirror after installation. That initial mistake delayed my fix, but it also taught me valuable lessons about attention to detail. Today, I want to share the step-by-step process that helped me eliminate the wind noise and ensure a proper fit that lasts.
But first, let’s explore whether this issue is common and worth your attention in the context of your ongoing car maintenance. Did you know that poorly sealed or installed mirrors can cause airflow disruptions that lead to increased wind noise? In fact, some experts suggest that a small gap or misalignment can significantly affect your driving comfort—sometimes even more than the original reason you replaced the mirror.
If you’re tired of the constant whistling and want a quiet, peaceful drive, you’re in the right place. I’ll guide you through the practical steps I used, based on personal experience, to troubleshoot and resolve wind noise issues after a mirror replacement. Ready to dive in? Let’s get started and turn that annoying noise into a thing of the past. This article offers some interesting insights into airflow problems that might be related.
Are you facing a persistent wind noise that just won’t go away after replacing your side mirror? Keep reading—I’ve got you covered.
Check Mirror Sealing and Fit Properly
Recall the first time I faced wind noise after replacing my side mirror; the culprit was a loose seal. To address this, carefully examine the perimeter of the new mirror for gaps or misalignment. Use a flashlight to spot tiny openings that let air in. Once identified, apply a high-quality automotive sealant along the edges to ensure a tight fit, similar to sealing a leaky pipe. Remember, a good seal prevents air from sneaking through, much like how weather stripping keeps out drafts.
Ensure All Screws and Bolts Are Secure
In my experience, loose mounting hardware caused not only wind noise but also minor vibrations. Use a torque wrench to tighten all screws to manufacturer specifications. Think of it as tightening lug nuts on a wheel: if they’re loose, everything vibrates and rattles. Double-check each fastener by gently tugging on the mirror—if it moves, tighten further until it feels solid. This step is crucial because even a slight wobble can disrupt airflow, creating that irritating whistling sound.
Inspect and Adjust Mirror Alignment
Sometimes the mirror isn’t perfectly aligned with the car’s body, causing airflow turbulence. Carefully adjust the mirror angle so it sits flush with the door panel. During my fix, I noticed that narrowing the gap at the top minimized wind disturbance. Visualize the air like water flowing smoothly around a rock—if the rock is crooked, water splashes and makes noise. Use a level or your visual judgment to get the mirror aligned precisely, improving aerodynamics and reducing noise.
Test for Air Leaks and Fine-Tune the Seal
After sealing and tightening, perform a simple test: hold a piece of paper against the mirror’s edge while driving at a moderate speed. If the paper flutters or falls, there’s still a leak. In my case, I applied additional weatherstripping to the sealing points. Imagine the shifts as tiny leaks in a balloon that let air escape; sealing these leaks restores the smooth airflow. Repeat this process until the paper stays put, indicating a tight seal.
Verify with a Drive and Listen Carefully
Finally, take your car for a test drive on a quiet road. Listen for the wind noise and observe if it diminishes. In my test, I noticed the whistling was significantly reduced after sealing and tightening everything. Think of it like tuning a musical instrument: small adjustments can make a big difference in the sound. If noise persists, re-inspect the seal, hardware, and alignment. For persistent issues, consult a professional or check relevant articles such as this guide for airflow disturbances that could be related. Fine-tuning these details ensures your drive remains peaceful and quiet.When it comes to vehicle maintenance, many car owners fall into the trap of oversimplifying complex processes like collision repair, transmission service, or brake repairs. While it’s easy to believe that a quick fix or a routine service guarantees long-term reliability, the reality is far more nuanced. As an experienced auto technician, I’ve seen firsthand how common misconceptions can lead to costly mistakes or missed symptoms that worsen over time.
Why Is the Popular Belief About One-Size-Fits-All Repairs Misleading
Most people assume that all collision repairs or transmission services are standardized, but in my experience, this couldn’t be further from the truth. For instance, many DIY enthusiasts think applying generic sealants or lubricants will solve issues like leaks or slipping transmissions. However, studies show that improper sealing or use of incompatible fluids can accelerate wear or cause secondary damage, which a seasoned technician can identify and mitigate effectively. Relying on generic solutions often ignores the subtle differences in vehicle make, model, or even the specific symptom—missed clues that reveal the true cause. For example, an incorrect transmission fluid choice might initially seem fine but gradually lead to overheating, a problem detailed in this comprehensive guide on [transmission overheating during long road trips](https://collisionrenew.com/why-your-transmission-overheats-during-long-road-trips).
The Maintaining your vehicle’s performance over time requires more than just basic checks; it demands the right tools and a strategic approach. I personally rely on a combination of high-quality diagnostic software and precision hand tools to ensure each repair is accurate and durable. For electronic diagnosis, I use **OBD-II scanners like the BlueDriver**, which provide comprehensive data streams and troubleshooting capabilities. This tool helps me quickly identify issues such as transmission slips or engine misfires, especially when subtle symptoms like momentary slipping occur during towing or long drives. Carefully interpreting live data allows me to plan effective fixes and avoid unnecessary part replacements.My Go-To Diagnostic Software
Beyond physical tools, specialized software like **AutoEnginuity or Bosch’s Diagnostic Tools** enables me to dive deep into vehicle modules. These programs give access to manufacturer-specific codes and real-time parameter monitoring. For instance, when addressing transmission overheating issues, I consult these diagnostics to spot sensor discrepancies or solenoid failures without invasive transmission disassembly. This proactive approach often prevents costly damage and extends the vehicle’s lifespan.
Quality Hand Tools Make the Difference
Reliable hand tools are essential for precise work. I prefer **Snap-on or MacTools** for their durability and ergonomic design, especially when working with tight fits like brake caliper bolts or shock absorber components. Using the correct socket sizes, torque wrenches, and pry bars ensures the job is done right the first time. For example, correctly torquing suspension bolts not only ensures safety but also preserves the integrity of your vehicle’s alignment over thousands of miles.
Long-Term Results and Scaling Up
As your skills grow, investing in **automotive lift systems or wheel alignment racks** becomes a smart move. These tools facilitate more comprehensive repairs like replacing alloy wheel scuffs or correcting alignment angles after minor accidents or pothole impacts. Think about it—proper alignment and wheel balancing can improve fuel efficiency, reduce uneven tire wear, and extend suspension component life, saving you money over the long run. Technology is also advancing rapidly; I predict that **AI-powered diagnostics** will eventually make vehicle maintenance more predictive, allowing replacements before symptoms manifest, similar to how predictive maintenance works in industrial settings.
How do I keep my car in top shape over time?
Regularly updating your diagnostic tools and scheduling professional inspections at intervals recommended by your manufacturer is key. Checking your basic measurements, like brake fluid clarity or transmission fluid color, can alert you to impending issues. For example, monitoring the bubbling level of transmission fluid can prevent overheating during long trips, which you can learn more about in this detailed guide on [transmission overheating during long road trips](https://collisionrenew.com/why-your-transmission-overheats-during-long-road-trips). Moreover, maintaining a well-stocked toolkit with reliable equipment ensures quick fixes, preventing small issues from becoming major headaches.
Practicing these strategies increases your confidence and keeps your vehicle performing reliably for years to come. Don’t forget to regularly calibrate your diagnostic tools as technology evolves, and consider investing in advanced equipment like **interactive repair guides or modules** that integrate with your diagnostic software. Take the tip of using precision torque wrenches for tightening suspension components—that small investment can save thousands in future repairs and ensure your vehicle’s safety.”}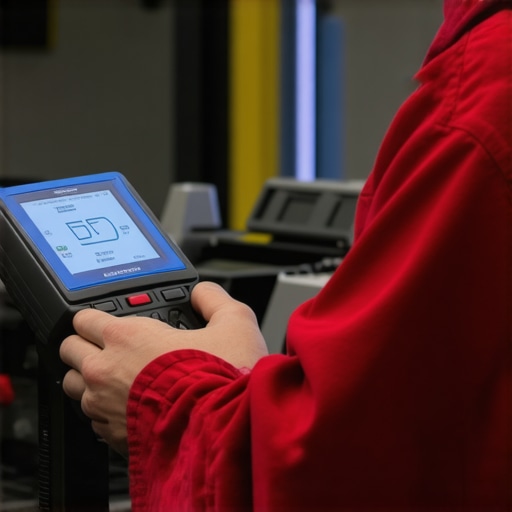
Replacing a side mirror might seem like a straightforward task, but the lessons learned through my own experiences reveal that attention to detail is where true mastery begins. I’ve discovered that achieving a quiet, wind-noise-free drive requires patience, careful inspection, and a dash of ingenuity. Remember, overlooked sealing gaps or misaligned parts subtly sabotage your efforts, turning a simple repair into an unwelcome symphony of turbulence. When tackling such issues, always think beyond the immediate fix—consider how airflow interacts with every component and seal in your vehicle.
Embracing this mindset transforms your approach from mere troubleshooting to proactive prevention. Regularly inspecting seals, tightening hardware, and aligning mirrors not only silences annoying noises but also preserves your car’s aerodynamic efficiency—saving fuel and reducing long-term wear. Each small adjustment deepens your understanding of your vehicle’s unique quirks, turning maintenance from a chore into a satisfying craft. So, next time you face an unexpected wind noise, remember: precision and patience pave the way to a smoother, quieter ride.
Insider Wisdom for Keeping Your Drive Peaceful
- Sealing is Everything: I learned that even tiny gaps can turn a peaceful drive into a whistling contest. Applying high-quality sealant and double-checking fitment prevented recurring issues.
- Hardware Matters: Loose screws and bolts don’t just rattle—they disrupt airflow. Tightening everything to manufacturer specs ensures stability and silence.
- Align for Aerodynamics: Proper mirror alignment reduces turbulence. A simple visual check or level helps me achieve the perfect angle for quiet cruising.
- Test and Fine-Tune: Using a paper test while driving revealed leaks I hadn’t noticed. Small tweaks made a big difference in sound levels.
- Stay Curious and Patient: Troubleshooting wind noise taught me patience and the value of meticulous inspection—skills that pay off across all vehicle repairs.
The Tools That Changed My Approach
- Automotive Sealant: Trusted for long-lasting seals, it is my go-to for filling tiny gaps that cause noise.
- Torque Wrench: Ensures every screw is tightened to perfect specifications, preventing vibrations and leaks.
- Level or Visual Guides: Helps align mirrors precisely, improving aerodynamics and appearance.
- Paper Test Method: A simple, effective way to detect leaks during drives.
Your Turn to Elevate Your Driving Experience
Every repair holds a lesson, and every quiet ride is a reward. By paying close attention and embracing a meticulous approach, you can turn minor fixes into lasting improvements that make your vehicle more enjoyable. Remember, the knowledge you gain here isn’t just about silence; it’s about cultivating a deeper connection with your car, understanding its quirks, and becoming your own mechanic. The road to mastery is paved with patience and curiosity—so go ahead, take control of your vehicle’s comfort and performance today.
What’s the most surprising thing you’ve noticed after a simple repair? Share your experience below and let’s learn together!
.