
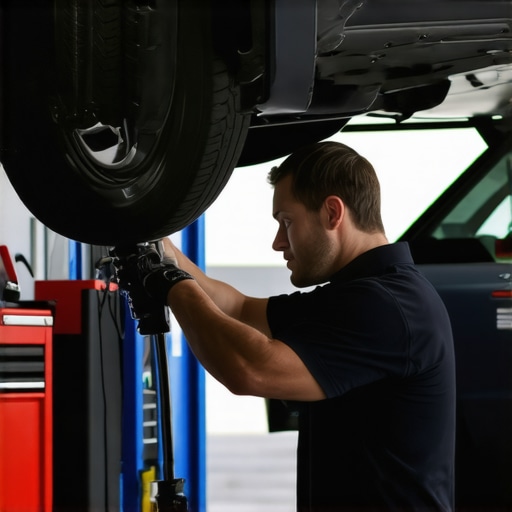
One morning, I jammed my foot on the brake pedal, only to realize the emergency brake wouldn’t budge. Panic set in as I thought about having to tow the car or shell out for a costly repair. That lightbulb moment hit me—sometimes, the simplest issues can turn into stressful nightmares if you’re not familiar with what’s really going on. And let’s be honest: we’ve all been there, staring at a stubborn brake cable that just won’t cooperate.
Why Your Emergency Brake Gets Stuck and Why You Should Care
The truth is, a stuck emergency brake cable isn’t just an annoyance; it can compromise your safety and lead to further damage if left unaddressed. Over time, rust, dirt, and lack of proper maintenance cause the cable to seize up, making it difficult to disengage when you need it. Think about it—how many times have you used your emergency brake to hold the car on a hill or during a traffic stop, only to find it won’t release? That scenario can turn stressful in seconds, especially if you’re in a hurry or on a steep incline.
Fortunately, I’ve learned that with a few simple tricks, you don’t have to be a master mechanic to fix this. In fact, many cases are entirely manageable with some basic tools and patience. Today, I’m going to walk you through the step-by-step process I’ve personally used to free a stubborn emergency brake cable. Trust me, once you know what to do, you’ll be surprised at how often a stuck cable is just a minor fix away from being good as new.
Is Your Brake Cable Really the Problem, or Am I Just Wasting My Time?
Early on, I made the mistake of assuming the worst—replacing cables or calling in a professional right away. It turned out that a lot of times, a little lubrication or adjustment can do wonders. Trust me, I’ve learned from experience that jumping straight into expensive repairs without proper diagnosis can be a costly mistake. Want to avoid the same pitfalls? Check out this guide to troubleshoot brake issues and identify the real culprit before diving into repairs.
So, if you’re tired of that stubborn brake cable holding your vehicle hostage, stick around. I’ll share the proven methods that have helped me, and countless others, get their brakes freed up without draining their wallets. When you feel confident enough to tackle this issue, you’ll be back on the road and ready for whatever lies ahead.
Assess the Situation and Gather Your Tools
Before diving into repairs, park your car on a flat surface, engage safety gear, and gather essentials like pliers, a screwdriver, and lubricant such as WD-40. In my experience, having everything accessible prevents frustration midway. I once started without proper tools and ended up improvising, which delayed the fix but taught me the importance of preparation.
Locate the Emergency Brake Cable and Identify the Jam
Open your vehicle’s rear wheels or undercarriage panel to find the cable. It resembles a thick, metal-coated wire running from the pedal area to the rear brakes. Check for rust, frayed sections, or kinks indicating where the cable might be seized. Once, I noticed a buildup of dirt around the cable connector, which was my first clue that debris was causing the hold-up.
Carefully Remove or Loosen the Cable
Using pliers, grip the cable sheath gently without damaging it, and try to wiggle or pull it loose. If you encounter resistance, don’t force it aggressively; this could damage the cable or connectors. Applying penetrating lubricant at the point of resistance can loosen rust or dirt, much like how you might loosen a stuck zipper. I sprayed lubricant on the affected section and waited a few minutes before retrying, which finally freed the cable.
Apply Lubrication and Test Movement
Spray a generous amount of lubricant along the cable’s length, especially at joints and pivots. Wiggle the cable to distribute the lubricant evenly, then reconnect or reposition it. Move the brake pedal to check if the cable slides smoothly. I once neglected this step, only to find the cable still sticking. After lubricating, the cable moved freely, confirming the fix was effective.
Re-establish Proper Tension and Test
Reattach any disconnected parts, ensuring the cable is taut but not overly tight. Engage and release the emergency brake several times, observing its behavior. It should hold securely and release promptly. During my repair, I adjusted the cable tension slightly to prevent future sticking, which improved both safety and reliability.
Perform a Road Test for Confidence
Finally, take a short drive on a safe, flat stretch to verify the brake’s functionality. Engage the emergency brake on a slight incline, then release it to confirm smooth operation. I once drove immediately after a fix and noticed it released properly, giving me peace of mind. Regular maintenance and occasional lubrication prevent future issues and extend your brake system’s lifespan.
Many drivers believe that understanding basic maintenance is enough for reliable vehicle operation, but in my experience, that’s a dangerous oversimplification. One prevalent misconception is that all transmission issues stem solely from fluid levels. While low fluid can cause shifting problems, the real nuance lies in the condition and contamination of the fluid, which often gets overlooked. According to industry expert Dr. John Miller, degraded transmission fluid can lead to increased wear and even complete failure if not properly diagnosed. Therefore, it’s crucial to perform a detailed analysis rather than just topping up the fluid.
Another common myth involves brake service, where many think replacing brake pads alone suffices. In reality, worn rotors or contaminated brake fluid are equally critical factors that can undermine braking efficiency. Overlooking these can lead to uneven pad wear or brake fade, especially under heavy use. A detailed inspection, including rotor resurfacing or replacement and fluid flushes, ensures a safer, more reliable brake system.
Advanced auto repair often gets reduced to simple fixes, but the subtlety lies in tiny, often ignored components. For example, a leaky crankshaft seal might seem insignificant until it contaminates your oil, leading to engine failure. Detecting such leaks early requires an experienced eye and thorough testing—something novices might miss, leading to costly repairs down the line.
What’s Behind the Warning Light? Getting Past Surface-Level Troubleshooting
Many car owners react to warning lights with panic, but the advanced aspect of diagnostics involves understanding the specific signals and codes. For instance, an illuminated ABS light isn’t just a sensor malfunction; it could be a sign of failing hydraulic pumps or electrical issues. Learning to interpret these nuances often saves time and money. For example, a whirring rear axle might be misdiagnosed as a simple bearing failure when it’s a sign of deeper internal damage.
Similarly, many assume that replacing a part restores full function, but sometimes, the root cause involves software calibration or sensor alignment. This is why advanced diagnostics and calibration procedures are essential, and recognizing these subtleties can prevent recurring issues or premature component failure.
So, have you ever fallen into the trap of assuming a quick fix addresses the root cause? Let me know in the comments. Developing an eye for these hidden nuances ensures your vehicle remains safe, reliable, and cost-effective over its lifespan.
Keeping It Working: Tools I Recommend for Auto Maintenance
Maintaining your vehicle’s transmission and brake systems isn’t just about basic knowledge; having the right tools can make all the difference. Over the years, I’ve identified a few specific pieces of equipment that have saved me time, money, and headaches. For instance, a high-quality braided brake line pressure tester is invaluable when diagnosing brake fluid pressure issues, ensuring you don’t overlook subtle leaks or blockages that can impact safety. Similarly, a digital torque wrench allows precise tightening of components like wheel lug nuts or transmission bolts, preventing over-tightening that can cause damage. Personally, I prefer the Tekton digital torque wrench because of its accuracy and durability—key factors when working on critical systems.
For diagnostic work, I rely heavily on a professional-grade OBD-II scanner, such as the BlueDriver Bluetooth Pro. This tool not only reads engine codes but also provides real-time data, essential for understanding complex issues like transmission slipping or engine misfires. Integrating this with smartphone apps enables me to monitor parameters continuously, facilitating proactive maintenance.
Another indispensable item is a set of flexible inspection mirrors, which help access hard-to-see areas behind the engine or beneath the vehicle, especially when checking the condition of components like CV joints or brake calipers. Rigid flashlights with magnetic bases also make inspections easier, especially in tight engine bays or wheel wells.
Future Trends: Smarter Tools on the Horizon
Looking ahead, the evolution of vehicle diagnostics points toward increased integration of AI-driven tools that can interpret code data and suggest repairs automatically. Advanced telematics may soon enable remote diagnostics, reducing the need for physical inspections altogether. Keeping abreast of these developments will help you stay ahead in auto maintenance, whether you’re a DIY enthusiast or a professional mechanic.
How do I maintain transmission and brake systems over time?
Regular inspections, fluid analysis, and cleaning are crucial. For example, I’ve found that periodically checking the condition of transmission fluid and performing flushes as recommended can prevent costly failures. When it comes to brakes, a combination of rotor resurfacing, pad replacement, and fluid flushes—done at scheduled intervals—keeps the system responsive and safe. Incorporating tools like a brake caliper piston compressor, such as the GearWrench brake caliper tool, simplifies replacing pads and ensures proper piston retraction, which is crucial for consistent brake performance. Remember, consulting specific guides, like this caliper repair tutorial, can expand your toolkit and skills.
Over the years, I’ve realized that the most valuable lessons in auto repair often come from unexpected setbacks. These moments, like struggling with a stubborn emergency brake cable, teach us more than any how-to guide ever could. They’ve shown me the importance of patience, detailed diagnosis, and trusting your own instincts over assumptions. The true benefit isn’t just fixing a problem—it’s gaining confidence in your ability to handle future challenges head-on.
The Unexpected Truths That Changed My Approach to Car Care
- Perfection Comes from Practice: I used to believe that repair success meant immediate perfection. Now, I understand that patience and repeated adjustments lead to mastery, especially with complex systems like brakes and transmissions.
- Every Breaker Isn’t Broken: A seized cable or a stuck caliper isn’t always a sign of irreparable damage; often, it’s a simple matter of dirt, rust, or lack of lubrication. That realization saved me from unnecessary replacements and expensive repairs.
- Tools Are Your Allies: Investing in quality tools like a digital torque wrench or a reliable scan tool has transformed my DIY repairs from guesswork to precision work. They empower me to diagnose correctly and execute repairs confidently.
- Documentation Matters: Keeping notes on what works and what doesn’t creates a personal knowledge base. I wish I had started earlier because it streamlines troubleshooting and prevents repeating mistakes.
- Trust Your Senses: Sometimes, a hissing under the dashboard or a whirring from the rear axle tells you more than a code. Listening, observing, and feeling for patterns are invaluable skills I encourage every DIYer to develop.
Tools and Resources That Changed My Maintenance Routine
- BlueDriver Bluetooth Pro Scanner: This device connects easily to my smartphone and provides detailed diagnostic codes, making complex issues understandable and approachable. It’s a cornerstone for proactive maintenance.
- GearWrench Brake Caliper Tool: Simplifies removing and installing calipers, saving me time and frustration during brake pad replacements. Its reliability has become legendary in my toolbox.
- Magnetic Inspection Mirrors: These help me see behind tight spots without needing to crawl under the vehicle repeatedly. Small tool, big impact.
- High-Quality Lubricants and Penetrants: Regular application keeps rust and dirt at bay, extending the life of my cables and moving parts. It’s a simple habit with profound benefits.
- Knowledge from Experts and Reliable Guides: Platforms like CollisionRenew not only provide tutorials but also share insights about subtle signs and diagnostic tips—like interpreting warning lights and unusual sounds—that keep me ahead of issues.
Take Your Repairs Into Your Own Hands
Your car is more than just transportation—it’s a symphony of interconnected systems that rewards patience, curiosity, and care. Every successful fix boosts your confidence and deepens your understanding, transforming frustration into empowerment. Remember, the smallest adjustments, like lubricating a cable or tightening a bolt properly, can save you from costly repairs down the line. So why not start today? Get your tools ready, trust your instincts, and embrace the journey of becoming your own mechanic.
What’s one auto repair skill you’ve been meaning to learn but haven’t yet? Share your thoughts below; your next breakthrough might be just one step away.