
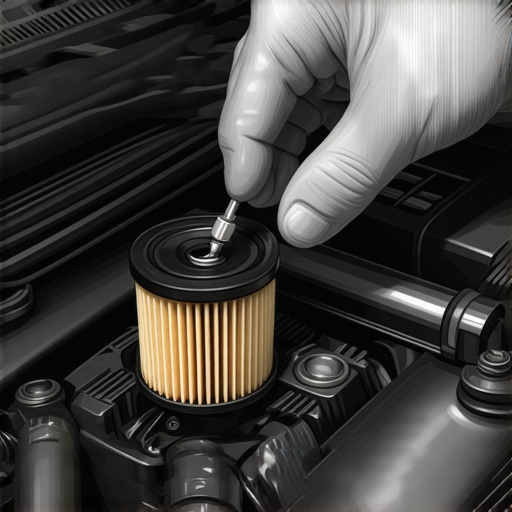
Ever felt that rush of frustration when your oil filter refuses to budge no matter how many twists and turns you try? I remember the first time I faced this demon. I was knee-deep under the hood, cursing my lack of the right tools, when suddenly, a seemingly simple job turned into a battle of wills. My hands were slipping, my patience thinning, and the oil had started to seep where it shouldn’t. It was a lightbulb moment—discovering the trusty screwdriver trick that changed everything.
The Struggle is Real: Why Some Oil Filters Just Won’t Come Loose
So, why do some oil filters stubbornly cling, even after you’ve tightened every muscle and gray hair in your head? It comes down to a mix of age, grime, and sometimes, just lousy luck. Over time, oil filters can become sealed tighter than Fort Knox, especially if they weren’t installed properly the first time or if oil residue has baked onto the threads. This makes conventional hand-tightening or even standard wrench tactics useless, leading many to despair and consider aggressive measures.
But here’s the truth—there’s a smarter way that doesn’t involve breaking your knuckles or risking damage to your engine parts. Trust me, I learned this the hard way, and I want to spare you the same frustrations. I once borrowed the wrong size wrench and ended up stripping the filter—an experience that cost me extra time and money. That early mistake taught me the importance of technique and patience.
Now, I’m going to share with you a simple yet effective trick that I swear by: the screwdriver method. It’s a game-changer that allows you to loosen even the most stubborn filters safely and efficiently. Before we dive into the step-by-step guide, let me ask—have you ever faced a deadlock with your oil filter that made you question your automotive skills? If so, you’re not alone, and this approach might be just what you need.
If you want to ensure your vehicle stays in top shape, learning how to handle these small but mighty obstacles is crucial. Plus, it saves you effort, time, and those dreaded trips to the mechanic for a job you could do yourself with a little know-how. For more expert tips on auto repair essentials, check out [this comprehensive guide](https://collisionrenew.com/the-ultimate-guide-to-auto-repair-keep-your-car-running-smoothly) to keep your car running smoothly.
Ready to tackle that stubborn filter once and for all? Let’s get into the technique that’s saved countless DIYers—and might just save your weekend, too.
Get the Right Tools and Position
Start by gathering a flat-head screwdriver, a pair of gloves, and a rag. Park your vehicle on a flat surface, engage the parking brake, and wear gloves for safety. Position yourself so that you have clear access to the oil filter, ideally from the side or top, depending on your vehicle’s design. Remember, proper alignment ensures precision and reduces the risk of slipping or damaging nearby components.
Identify and Insert the Screwdriver
Locate the slot or groove on the oil filter’s outer edge—many filters have a notch designed for this purpose. Carefully insert the flat-head screwdriver into this groove, making sure it’s securely lodged. Apply gentle pressure; avoid forcing it, which could crack the filter or slip and cause injury. Imagine youre wedging a lever under a stubborn lid—steady, controlled force is the key.
Leverage and Loosen the Filter
Once the screwdriver is in place, turn it counterclockwise to loosen the filter. Use the handle of the screwdriver as a makeshift lever, turning with smooth, consistent pressure. As I did when faced with a stubborn filter last summer, I applied slow, deliberate rotations—this method gradually broke the seal without applying excessive force. Expect some resistance, but resist the urge to force it aggressively; patience prevents damage.
Maintain Control and Remove Safely
Keep a firm grip on the screwdriver, and as the filter begins to loosen, support the filter with your other hand or a rag to prevent it from dropping suddenly. Once it’s sufficiently loosened, you can unscrew it by hand, turning clockwise to remove it completely. This process minimizes the risk of slipping and damaging engine parts.
Clean Up and Prepare for Replacement
After removal, wipe the mounting surface clean with a rag to remove old oil and grime, preventing future leaks. Inspect the gasket for damage; replace it if necessary. When installing a new filter, screw it in by hand until snug, then tighten slightly with a wrench or by following the manufacturer’s torque specifications—over-tightening can cause leaks, while under-tightening may lead to drips. Remember, the screwdriver trick is a reliable method, especially when traditional tools fail—saving you time, effort, and potential mishaps. For more tips on auto repair techniques, check out this comprehensive guide.Many car owners believe they know the basics of auto repair, but there are common myths and overlooked nuances that can lead to costly mistakes. For instance, there’s a widespread misconception that all brake pads wear evenly; in reality, uneven wear indicates problems like stuck calipers or issues with the rotor surface. Recognizing these subtleties ensures timely maintenance and avoids dangerous driving conditions.
Another often-missed point is the difference between synthetic and conventional transmission fluids. While many assume they are interchangeable, using the wrong type can cause premature wear of transmission components, a mistake that experts warn can lead to costly repairs down the line. Make sure to consult your vehicle’s manual or a trusted mechanic before switching.
Furthermore, many vehicle owners overlook the importance of regular oil changes not just for engine health, but for the entire driveline’s longevity. A neglected oil change can cause sludge buildup, which in turn accelerates wear on transmission and differential parts—as explained in detail in our comprehensive auto maintenance guide.
A key ‘oops’ trap involves neglecting the warning signs from your vehicle. For example, if your brakes emit squealing, many assume it’s just pad fade; however, it might be a sign of worn-out pads or a damaged rotor—a situation that’s best addressed promptly to prevent further damage. Ignoring such signals often results in increased repair costs and safety risks.
Are you aware that the choice of brake service can significantly impact your vehicle’s safety and reliability? Choosing the right shop—one that understands the nuances, such as proper rotor resurfacing or pad material compatibility—is crucial. Learn more about evaluating brake service quality here.
Have you ever fallen into this trap? Let me know in the comments.Maintaining your vehicle beyond basic repairs involves a combination of reliable tools, consistent routines, and staying informed about evolving auto technology. Personally, I rely on a few specialized equipment pieces that have proven invaluable over years of DIY auto repair journeys. For instance, I swear by a professional-grade torque wrench, like the **Snap-on EEDM226**, which ensures accurate tightening according to manufacturer specifications—crucial for long-term component longevity, especially in critical areas like transmission bolts and brake calipers. Using the correct torque prevents over-tightening or under-tightening, both of which can lead to costly failures. Another essential tool in my kit is a high-quality digital multimeter, like the **Fluke 115**, which helps me diagnose electrical issues swiftly, saving time and avoiding guesswork. In addition, I’ve integrated a Bluetooth OBD-II scanner, such as the **BlueDriver**, paired with my smartphone to monitor live engine data and diagnose trouble codes without visiting the shop. This combination allows me to keep an eye on my vehicle’s health and catch issues early, aligning with advice from expert sources like the **Society of Automotive Engineers (SAE)**, which emphasizes regular diagnostics for durability.
Lessons Only the Toughest Fixers Learn About Oil Filter Removal
One of the most enduring truths I’ve discovered is that patience and proper technique trump brute force every time when dealing with stubborn oil filters. I once thought a bigger wrench would do the trick, only to strip the threads and set myself back hours. The lightbulb moment for me was understanding the importance of leverage and control—tools like a flat-head screwdriver became my secret weapon. This experience reinforced that learning to adapt and respect the complexity of your vehicle’s components is what separates seasoned DIYers from amateurs. You only truly grasp this when a stubborn filter refuses to loosen and you realize that a gentle, calculated approach makes all the difference.
Tools and Resources That Changed How I Approach Auto Repairs
Over the years, I’ve curated a set of reliable tools that have saved me countless headaches. A quality torque wrench, like the Snap-on EEDM226, ensures I tighten bolts correctly, preventing leaks or damage. Pairing this with a Bluetooth OBD-II scanner such as BlueDriver lets me diagnose issues early, before they escalate into costly repairs. The comprehensive auto repair guide from Collision Renew is my go-to resource when I need detailed insights into tricky repairs, including oil filter removal and replacement strategies. Trustworthiness and precision are what make these tools and resources indispensable for both DIY enthusiasts and professionals alike.
Your Determination Counts More Than You Think
Remember, each challenge with auto repair is an opportunity to deepen your understanding and build confidence. Handling stubborn oil filters with patience and proper technique not only saves money but also fosters a sense of mastery over your vehicle. Every time you fix something yourself, you’re taking a step toward independence and empowering yourself against future car troubles. Keep learning, stay curious, and don’t shy away from those tricky jobs—they’re the best teachers. After all, car maintenance doesn’t have to be daunting; it can be rewarding with the right mindset and tools. If you’re ready to elevate your auto repair skills, explore our ultimate guide to auto repair and start transforming your approach today.