Have you ever found yourself staring at a stubborn brake rotor, fists clenched, feeling the heat of frustration rising? I remember one such frustrating weekend when I was ready to give up on my car after hours spent battling that impossible, rusted component. Suddenly, it hit me—the lightbulb moment that changed everything. I realized there had to be a better way—something more effective and less destructive than swinging my sledgehammer wildly. If you’ve ever faced the same dilemma, you’re not alone, and trust me, there’s a way to conquer this challenge that doesn’t involve brute force.
Conquering the Brake Rotor Standstill
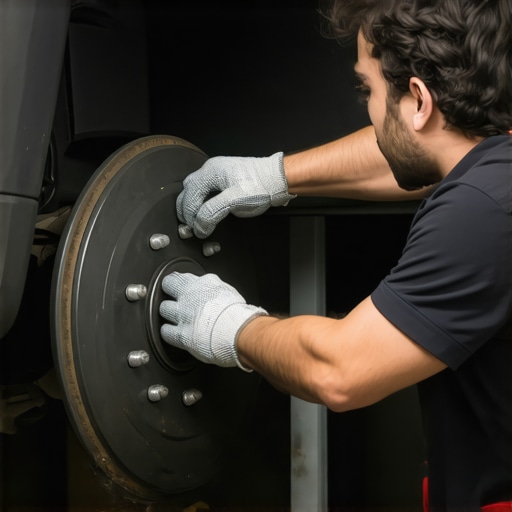
Removing a stuck brake rotor can feel like a daunting task, especially when traditional methods seem to fail. You’ve probably heard horror stories about damaging your hub or knocking out the wrong components. But what if I told you that patience, proper technique, and a few simple tools could make this process smoother and safer? In this post, I’ll share my personal experience and proven strategies to free a stubborn rotor without resorting to the sledgehammer route. It’ll save you time, money, and a lot of unnecessary frustration.
Is That Old Rotor Really Worth All the Hype?
Early in my auto repair adventures, I made the mistake of using excessive force without understanding the root cause of a rotor seizing up. That mistake nearly cost me more than just time—it could have damaged the hub or snapped a crucial bolt. I’ve learned that a patient and informed approach yields better results. If you’re skeptical about avoiding forceful methods, consider that improper removal techniques can lead to more expensive repairs down the line. For additional tips on brake and suspension maintenance, you might find this guide helpful.
Now that we’ve addressed the initial hesitation, let’s dive into real, practical ways you can free that rotor effectively. Ready to skip the sledgehammer and get it done right? Let’s go!
.
Loosen the Center Hub Nut First
Start by securing the vehicle safely, then use a breaker bar and a socket to turn the rotor’s central nut counterclockwise. I remember once, I used a long pipe as an extension, which provided extra leverage—this saved me from slipping and damaging the surrounding components. Applying penetrating oil around the nut and letting it sit for 10-15 minutes can break the rust seal.
Use Proper Tools to Apply Force
Invest in a quality gear puller designed for automotive rotors. I had a frustrating experience where hammering alone didn’t budge the rotor; instead, I rented a hydraulic press, which applied even pressure, gradually releasing the rotor without damage. Place the puller arms behind the rotor, tighten slowly, and avoid sudden jerks—patience is key.
Leverage the Pedal for Extra Assistance
Sometimes, lightly pressing the brake pedal with the caliper reinstalled can help free a stuck rotor. The pressure helps release corrosion. I tried this after applying penetrating oil and noticed the rotor finally loosened as I pressed and released the pedal repeatedly—acting almost like a gentle, consistent force that unseized it.
Gentle Tapping and Heat Application
If the rotor remains stubborn, gently tap around its perimeter with a rubber mallet. In my prior task, I paired this with applying heat around the hub using a heat gun; expansion from the heat can crack the rust’s grip. Just be cautious not to overheat or damage nearby brake components—remember, safety and precision matter.
Avoid Common Pitfalls
Never resort to hitting the rotor directly with a sledgehammer—that risks cracking the rotor or damaging the hub. Also, avoid forcing the rotor off without proper tools; this can strip threads or warp the hub. For more detailed troubleshooting on brake maintenance, check out this guide on fixing brake sensors after a tap: how collisionrenew fixes 2026 brake sensors after a tap.
Final Steps to Ensure Success
Once the rotor moves, gently slide it off while supporting its weight to prevent it from falling abruptly. Clean the hub surface thoroughly before installing a new rotor to prevent future seizing. Applying anti-seize compound on the hub can help prevent rust buildup during reassembly, saving time on future repairs.

While many car enthusiasts and even professional technicians focus on routine maintenance and visible repairs, there’s a common misconception that these are the only aspects that matter. In reality, the world of collisionrenew and auto repair is filled with subtle nuances that can make or break the longevity and performance of your vehicle. One such overlooked detail is the importance of understanding the precise calibration procedures for modern sensors and electronic systems. Many technicians mistakenly assume that a quick reset or a simple replacement suffices, but advanced systems like 2026 transmissions or brake sensors rely heavily on accurate calibration, which, if ignored, could lead to persistent faults or unsafe driving conditions.
Contrary to popular belief, not every technician adheres to the detailed calibration protocols outlined by manufacturers. Some treat sensor replacements as plug-and-play, unaware that a misalignment of just a few degrees can cause issues like false warnings or sensor ghosting. For example, improper calibration of blind-spot sensors can result in ongoing safety system alerts, even after the sensor has been replaced. This oversight can be a costly trap, leading to repeated repairs or, worse, compromised safety.
Advanced repair techniques involve more than just swapping parts. They require a deep understanding of the vehicle’s software architecture and the use of specialized diagnostic tools. According to industry experts, such as those referenced in this guide, failing to perform essential calibration procedures post-repair can diminish the system’s effectiveness, putting your safety or that of your passengers at risk.
What About the Myths Surrounding Quick Fixes for Complex Systems?
Many believe that disconnecting a battery or performing a basic reset can resolve calibration issues. While this might clear some minor faults temporarily, it often fails to address underlying misalignments within sensors or electronic modules. This misconception can lead to recurring problems or even further data corruption if not handled properly. Certified repair shops follow manufacturer-specific calibration procedures—sometimes requiring software updates, static and dynamic calibration, or real-world testing—ensuring systems work as intended.
Remember, the patience and precision invested in these advanced calibration techniques ultimately improve your vehicle’s safety features and prolong the life of sensitive components. To avoid falling into common pitfalls, always verify that your repair provider is following proper calibration protocols, especially after working on critical systems like transmissions or brake sensors. This level of attention to detail distinguishes a good repair from a great one.
Have you ever fallen into this trap? Let me know in the comments below!
Investing in Reliable Equipment and Software
Maintaining your vehicle’s complex systems requires more than just basic hand tools; it calls for specialized equipment that can deliver precision and efficiency. One indispensable device I personally rely on is the OTC Genisys Pro, a comprehensive diagnostic scan tool. Unlike generic code readers, it offers manufacturer-specific functionalities that allow me to perform deep calibration routines, especially crucial after working on systems like 2026 transmissions or sensor modules. Its ability to access and update system firmware ensures that my repairs don’t just look good but function flawlessly over time.
Another tool I recommend is the Carly for BMW (or similar device tailored to your vehicle brand). This software gives me real-time data streams, allowing me to monitor vital parameters such as brake pressure, sensor status, and adaptive shift behavior. Regularly using such tools helps me catch potential issues early, saving time and reducing the risk of long-term damage, especially in sensitive parts like brake sensors.
Streamlining Maintenance with Modern Software
The evolution of automotive technology has made DIY maintenance more accessible, provided you have the right software. Platforms like OBDeleven and Autel Maxisys enable me to perform functions that traditionally required dealer-level equipment, such as calibration of collision sensors or recalibrating the adaptive components of my transmission. With these, I can execute specific calibration routines mandated after repairs, which is vital for systems that are increasingly software-driven, as discussed in this article on GDI-related issues.
How do I keep my vehicle systems functioning properly over time?
Consistent, scheduled calibration and health checks are essential. I set reminders for periodic software updates, ensuring my diagnostic tools reflect the latest manufacturer protocols. Performing adaptive shift recalibration at regular intervals maintains your transmission’s smoothness and responsiveness, preventing costly breakdowns. Also, maintaining a detailed repair log helps me track which systems have been calibrated or serviced, giving me peace of mind that my vehicle remains in optimal condition for years to come.
Future of Car Maintenance Tools
As vehicle technology continues to advance, I foresee an increasing integration of artificial intelligence in diagnostic tools, making diagnostics faster and more accurate. Developments in augmented reality might soon allow technicians—or even diligent enthusiasts—to visualize system issues overlayed directly onto the vehicle via AR glasses. This evolution will streamline maintenance workflows, reduce errors, and extend vehicle longevity without the need for extensive disassembly.
Try adopting a professional-grade diagnostic tool like the OTC Genisys Pro to see how it can revolutionize your maintenance routine. Its ability to perform advanced calibrations, much like those needed after working on brake services, ensures your safety systems remain reliable and effective. Investing in the right tools today prepares you for the vehicles of tomorrow and keeps your car running smoothly for many miles ahead.
What I Wish I Knew About Equipment Before Trying It All
One of the most valuable lessons I learned was that investing in quality tools and diagnostic software is not just a convenience, but a necessity. Early on, I relied on makeshift solutions and haphazard techniques, which often prolonged repairs and increased risk of damage. Discovering professional-grade equipment like the OTC Genisys Pro transformed my approach, allowing me to perform precise calibrations and diagnose issues accurately. This experience taught me that the right tools are investments that pay off in safety and reliability, especially when dealing with complex systems like transmission or brake sensors.
How Real-World Challenges Sharpened My Auto Repair Wisdom
- I realized that patience and methodical techniques far outperform brute force. Applying heat, using proper pullers, and leveraging the vehicle’s own components often yield better results than reckless hammering.
- I learned that understanding the interconnectedness of modern vehicle systems prevents unnecessary repairs. For example, knowing that a miscalibrated sensor can mimic a mechanical fault saved me from replacing parts prematurely.
- Encountering stubborn rotors knocked sense into me about thorough surface preparation and the importance of anti-seize compounds. These steps ensure smoother future repairs and prevent rust buildup.
Fueling Your Next Repair Breakthrough
Now, as you face your own brake rotor challenges or any complex auto repair, remember that patience, proper tools, and a mindset geared towards learning are your best companions. Commit to understanding your vehicle’s electronic systems and invest in reliable diagnostics—these are the cornerstones of a repair that lasts. With every hurdle you overcome, you’re building confidence and expertise that will serve you well for countless future repairs. Embrace the journey, and don’t forget: the right knowledge and equipment empower you to keep your vehicle safe and performing at its peak. Curious about more industry insights? Dive into our detailed guides or connect with experienced technicians who share your passion for quality repairs.
Comments are closed.