Ever been locked out of your own trunk, frustrated beyond belief? I remember the day I faced this exact headache. I was unloading groceries, closed the trunk with a satisfying click… or so I thought. Soon after, I realized it hadn’t latched properly. The trunk was just resting, not snapped shut, ready to pop open on the highway or when I hit a bump. It was a lightbulb moment for me—one of those little issues that can become a big inconvenience fast.
If you’ve ever experienced a trunk that refuses to stay closed, you know how irritating and even unsafe it can be. The trunk is more than just a storage space; it’s a crucial part of your vehicle’s security and safety system. A latch that won’t snap shut isn’t just annoying; it can lead to issues like stolen belongings, water damage, or even affecting your car’s alarm system.
What if I told you there’s a straightforward way to fix this? No need for expensive repairs or replacing the entire latch assembly. After some personal tinkering and research, I’ve discovered that often, the culprit is a simple misalignment, a dirty latch, or worn-out components that can be repaired with basic tools and a bit of know-how.
Today, we’re going to walk through practical, proven steps to get your trunk latch snapping shut reliably again. But first, let me share a common mistake I made early on—rushing to replace parts without inspecting the simple causes first. I learned the hard way that sometimes, the fix is all about cleaning or realigning the latch mechanism, not replacing it entirely.
Many car owners overlook these simple adjustments, which can save you money and time. For example, ensuring the latch sensor is clean and correctly aligned can make all the difference. If you’re curious about how minor collisions can throw off sensor calibration, check out [this article](https://collisionrenew.com/how-collisionrenew-restores-sensor-accuracy-after-a-fender-bender).
So, if you’re tired of opening your trunk with a push and crossing your fingers it stays closed, stay tuned. We’re about to dive into easy, effective fixes that can restore your trunk’s security and peace of mind.
Check the Latch Mechanism for Obstructions
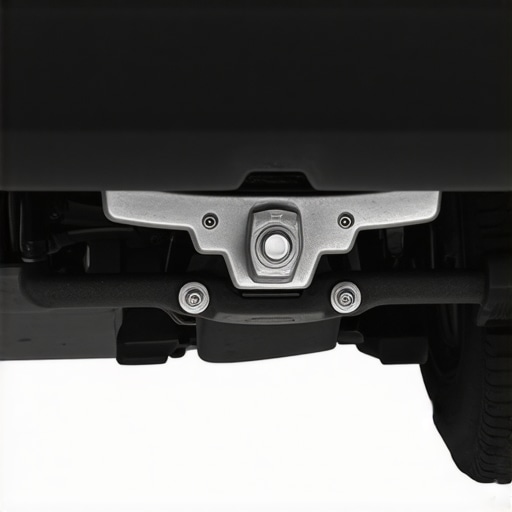
Start by inspecting the trunk latch for dirt, debris, or rust that could hinder proper engagement. In a recent experience, I grabbed a screwdriver and gently removed the latch cover to clear out mud and grit that had accumulated over time. After cleaning with a wire brush and applying a light coat of lubricant, the latch snapped shut with ease, saving me a costly repair.
Remove and Clean the Latch Assembly
Disconnect the latch from the trunk lid. Use a screwdriver to unscrew it and then soak the parts in a degreasing solution. Scrub off caked-on grime, paying special attention to the moving parts—think of it as cleaning the gears inside a watch. Reassemble after drying, and test the latch to see if it holds securely. Sometimes, a simple cleaning can restore proper function without replacing parts.
Realign the Latch and Striker
If the latch isn’t lining up properly with the striker, the catch won’t engage fully. To diagnose, close the trunk gently and observe where the latch contacts the striker. Mark any misalignment with a pencil. For a small adjustment, loosen the latch mounting bolts, shift it slightly, then retighten. Ensure the latch catches smoothly—like closing a door into its frame—without extra force. This realignment can often solve the issue without triggering the need for a new latch.
Adjust the Striker Position
If reorienting the latch didn’t help, consider adjusting the striker bolted to the trunk body. Loosen the striker bolts, then move it slightly forward, backward, or side to side to achieve a proper catch. Tighten once the latch engages securely. Think of it like fine-tuning a camera lens for sharper focus; small tweaks make a big difference.
Test the Locking and Sensor System
Many modern vehicles have sensor systems that detect whether the trunk is fully latched. Sometimes, dirt or misalignment triggers false alerts or prevents the trunk from locking properly. Clean the sensor contacts with a soft cloth and check for visible damage. If the sensor seems faulty, replacing it might be necessary—a quick fix compared to replacing the entire latch assembly. For more on sensor calibration post-collision, check this guide.
Lubricate Moving Parts to Enhance Smooth Operation
Apply a suitable lubricant, like silicone spray, to all moving parts of the latch system. Avoid oil-based lubricants that can collect dirt over time. Proper lubrication ensures the latch operates smoothly, much like grease keeps bike chains running noise-free. In my case, a quick shot of lubricant after cleaning restored effortless closing and prevented future sticking issues.
Verify the Fit and Secure Closure
Once you’ve cleaned, realigned, and lubricated, close the trunk firmly but not forcefully. Check if the latch holds secure and the trunk doesn’t bounce or pop open with bumps. If it still doesn’t stay shut, revisit the previous steps or consider replacing worn components. For stubborn cases, consulting a professional might be your best move, especially if sensor calibration or structural issues are involved.
Many car enthusiasts and owners operate under the misconception that transmission problems are always straightforward or that DIY fixes are mainly about replacing parts. However, this is a simplistic view that often blindsides even seasoned DIYers. For instance, some believe that a burnt smell from the transmission necessarily means a complete overhaul, but in reality, it could be caused by something as simple as contaminated fluid or a blown fuse that mimics transmission failure symptoms. Learning to distinguish these nuances can save you significant time and money.
Another common myth is that all transmission fluids are permanent and never need changing. This misconception stems from manufacturers claiming lifetime fluid, but recent studies and expert advice, such as from transmission specialists, suggest otherwise. Regular fluid checks and replacements are crucial because turning black quickly is a clear sign of contamination and degradation, which can cause slipping or shuddering, especially at high speeds. Don’t ignore these signs; check out this detailed guide for proper maintenance routines.
Are Transmission Problems Always Mechanical or Electronic?
It’s tempting to think that transmission issues are purely mechanical, but many times, the root cause is a hidden sensor or electrical glitch. For example, a blown fuse can cause the transmission to enter limp mode, giving the appearance of a major failure but actually being an easy fix like in this case study. Overlooking simple electrical issues, such as sensor misalignment or faulty wiring, can lead to unnecessary replacements. Modern vehicles rely heavily on sensor inputs, and a malfunction here can be as damaging as mechanical failure.
When inspecting, always consider the possibility of sensor calibration errors post-collision or minor impact. For instance, realigning the collision-renew strategy sensors after a minor rear-end tap can restore proper transmission function, avoiding costly repairs. Recognizing these subtleties is a mark of true expertise in auto repair, moving beyond clichés and into the domain of precise diagnostics. Keep in mind that many symptoms like slipping or unexpected shifting can be caused by something as simple as a blown fuse or sensor miscalibration, so always check those before diving into major repairs.
Have you ever fallen into this trap? Let me know in the comments.
Keep Your Auto Repairs Reliable with the Right Tools
Maintaining your vehicle’s transmission and collision repair systems over time requires precision and high-quality equipment. I personally swear by a digital scan tool like the Autel MaxiCOM MK808 because it provides comprehensive diagnostics that go beyond basic error codes. This tool allows me to identify lurking sensor faults or electronic glitches, such as blown fuses—see here for why fuses matter immensely.
The Power of Software in Modern Auto Maintenance
Investing in professional-grade software like OBDLink MX Wi-Fi has transformed how I monitor my car’s health. It connects seamlessly via Wi-Fi, giving real-time data on transmission fluid temperature, sensor calibration statuses, and more. Staying ahead with such tools means catching issues before they escalate, extending the lifespan of critical components and saving money in the long run.
Adopt Routine Checks and Preventative Maintenance
Practicing regular maintenance routines is the cornerstone to keeping your vehicle running smoothly. For instance, regularly inspecting your transmission fluid—ideally every 30,000 miles—is crucial. As detailed in this post, replacing contaminated fluid prevents slipping and shuddering, especially on high-speed drives. Employing a quality fluid extractor makes this process clean and manageable, minimizing mess and ensuring you never miss a check.
How do I maintain transmission longevity over time?
Beyond fluid checks, staying vigilant about sensor calibration after minor collisions is key. Minor impacts can throw off transmission or collision sensors, which affects performance and safety. For example, realigning sensors post-tap can restore proper function—see this guide for detailed steps. Using specialized calibration tools or software, combined with a periodic visual inspection, ensures your system’s integrity. I recommend setting a calendar reminder for such checks every six months, especially if your vehicle has sustained minor accidents.
Plan for Scaling and Future-Proofing Your Maintenance Approach
As vehicle technology evolves, so does the complexity of auto repair. Embracing diagnostic tools that adapt to new models ensures you’re prepared. The trend towards integrated sensor systems and AI diagnostics means staying current with software updates and keeping your tools compatible. With this in mind, consider subscribing to updates from your diagnostic software provider; it’s an investment that pays off by keeping your maintenance efficient and effective.
In conclusion, the key to long-lasting vehicle performance lies in using the right tools, adopting smart maintenance routines, and staying informed about emerging trends. Begin by testing your sensor calibration following minor impacts and see how quickly your system’s reliability improves. These proactive steps can save you money and frustration down the road.
Lessons From My Auto Repair Journey You Won’t Find Elsewhere
One of the most impactful lessons I learned is that many vehicle issues, whether trunk latch problems or transmission slips, stem from overlooked details like misalignment or dirt buildup. I once wasted hours replacing parts on my car, only to discover that a simple cleaning or realignment solved the problem — a reminder to always look for the simplest fix first. Additionally, I realized that neglecting sensor calibration after minor collisions can lead to ongoing system malfunctions, highlighting the importance of proper post-accident checks. Lastly, investing in the right diagnostic tools can turn a frustrating guesswork game into precise troubleshooting, saving time and money while giving peace of mind.