
Ever slammed on your brakes during a quick stop, only to feel that odd, stubborn drag still lingering? I remember the first time I experienced it—panic creeping in as I watched the pedal stay firm, refusing to come back up. It was a lightbulb moment for me, realizing that sometimes, our car problems aren’t as dire as they seem, and often, they don’t require a trip to the parts store or a hefty bill.
Don’t Let a Stuck Caliper Drag You Down
In this post, I’m going to share the techniques I’ve used firsthand to free up a sticky brake caliper without shelling out for brand-new parts. If you’re tired of the same old advice that suggests replacing the entire caliper, stick around. You might just find that a simple, cost-effective fix is waiting for you around the corner.
Is DIY Brake Repair Worth the Hassle?
When I first started tinkering, I made the mistake of rushing into the job without proper research, which led to more frustration—and a longer fix. My advice? Approach these repairs with patience and the right knowledge. Interestingly, according to a study by the National Institute for Automotive Service Excellence, many brake issues can be resolved with basic maintenance, extending the life of your existing components. Are you ready to tackle your brake problems confidently? Let’s get into the practical steps that can save you money and keep you safe on the road.
Removing the Tire and Accessing the Caliper
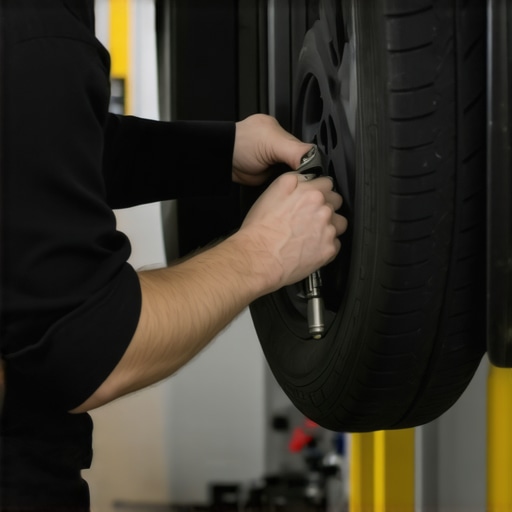
Start by safely lifting your vehicle using a jack and securing it with jack stands. Remove the wheel to expose the brake assembly. Carefully inspect the caliper for signs of sticking or corrosion. My first experience with this was messy—I didn’t retard my brake fluid and ended up with a spillage; ensure you have a container ready to catch any brake fluid.
Inspect and Prepare the Caliper
Look for obvious signs of rust or debris hindering movement. If the caliper is gummed up, cleaning it thoroughly can restore function. Before disassembly, note the position of the piston to ensure proper reassembly. Remember, the caliper piston operates like a valve; if it’s stuck, it’s often because dirt or corrosion has hardened the seal—a bit like a clogged sink trap.
Compressing the Caliper Piston
Use a C-clamp or a dedicated caliper piston tool to gently push the piston back into the caliper housing. I recall using a block of wood and a lever—less ideal but effective in a pinch. Always do this slowly to avoid damaging the piston. Doing this manually applies pressure evenly, kind of like squeezing toothpaste from a tube; too forceful can break the seal, so proceed carefully. If the piston resists, it might be time to consider cleaning or replacing the rubber seal instead of forcing it.
Cleaning and Lubricating the Components
Once the piston is retracted, clean the inside of the caliper housing with brake cleaner and a wire brush. For moving parts, apply a silicone-based brake lubricant. This prevents future sticking, similar to applying grease on door hinges to avoid squeaks. Be cautious not to get any lubricant on the brake pad contact surfaces, as that can reduce braking efficiency. If the caliper’s slide pins are corroded, remove them, clean, and lubricate. This step effectively restores smooth movement and prevents future caliper sticking issues.
Reassemble and Test the Brake System
Reinstall the caliper onto the rotor, ensuring all bolts are tightened to manufacturer specifications. Replace the wheel, lower the vehicle, and pump the brake pedal several times until it firms up. Test drive at low speeds to confirm the caliper moves freely and brakes respond correctly. An extra tip: If the pedal feels soft or spongy, bleed the brake lines to remove air bubbles. This process is like flushing a coffee pot; trapped air can ruin the drink, or in this case, your braking performance.
Many car owners believe that regular service simply means changing oil and replacing worn-out parts, but this oversimplifies what truly impacts your vehicle’s longevity and performance. One prevalent misconception is that all brake issues are solved by replacing pads or rotors; however, often, the underlying cause lies in hidden factors like warped calipers or contaminated brake fluid. For example, dark brake fluid, which can look like coffee, not only indicates neglect but also risks corrosion within the system, leading to costly repairs if ignored. Thorough flushing and upgrading to high-quality fluid can prevent these unseen dangers and extend component life.
Another common myth revolves around transmission care. Many assume that transmission fluid lasts forever or that burning smell only signals imminent failure. In reality, as highlighted in a recent [expert study](https://collisionrenew.com/the-simple-reason-your-transmission-fluid-smells-burnt), transmission fluid degrades over time and can pick up debris, causing harsh shifts and whining noises. Regular fluid analysis and timely changes minimize damage and avoid expensive replacements.
Advanced repair mistakes also trap many enthusiasts. For instance, during collision repairs, neglecting to realign sensors or improper bumper reinstallation can result in misfiring safety systems or even false collision warnings. This hidden nuance can be the difference between a fixed vehicle and one that inadvertently compromises safety.
The ‘oops’ factor is particularly relevant in DIY auto repairs. A common trap is over-tightening bolts or forcing parts into place without proper lubrication, which can strip threads or crack components—costly errors that undo your savings. Ensuring precise torque values and recognizing when parts need lubrication or gentle handling preserves integrity.
From a deeper perspective, understanding how dark brake fluid signals internal corrosion helps avoid catastrophic brake failure, while a misaligned sensor after minor collision repairs can impair automatic functions. If you’ve ever fallen into these traps or been misled by oversimplified advice, share your experience below. For more insights into unexpected repair pitfalls and nuanced maintenance tips, explore [this related article](https://collisionrenew.com/collisionrenew-tactics-fixing-gaps-between-your-hood-and-fenders) and stay ahead of costly surprises.
Prioritize Regular Maintenance with Precision Tools
Long-term vehicle health starts with using the right equipment. I swear by a high-quality digital multimeter; it’s invaluable for diagnosing electrical issues like faulty sensors or corroded wiring, especially when troubleshooting warning lights or inconsistent readings. For example, regularly testing your alternator output ensures your battery stays charged, preventing unexpected breakdowns. Testing fuel pressure with a reliable gauge can reveal hidden fuel system problems that might manifest as misfires or engine hesitation down the line.
Invest in a Proper Jack and Lifting Equipment
When working on brakes or suspension, safety and precision matter. I use a hydraulic floor jack with adjustable height settings coupled with sturdy jack stands rated for my vehicle’s weight. These tools make it safe to perform inspections and repairs underneath your car without risking mishaps. This gear allows me to replace calipers or inspect CV joints with confidence, ensuring components don’t shift unexpectedly and prevent a costly accident.
Embrace Quality Cleaning and Lubrication Products
Keeping moving parts free of grime extends their lifespan significantly. I rely on silicone-based brake lubricants for caliper slide pins, which prevent seizing and ensure smooth operation over time. Similarly, a wire brush and brake cleaner are essential for removing corrosion from rotors and calipers, especially after winter driving or salt exposure.
Use Advanced Diagnostic Software for Modern Vehicles
Modern cars rely heavily on electronic control units. I recommend investing in a Bluetooth OBD-II scanner compatible with smartphone apps like Torque orOBDeleven. These tools decode fault codes accurately and allow proactive maintenance—saving you from unexpected failures and costly repairs. For example, diagnostics can reveal looming issues with transmission sensors, so you can schedule repairs before breakdowns occur, such as those discussed in this guide on transmission hunting.
Plan for the Future of Auto Maintenance
As vehicle technology advances, so does the need for sophisticated tools. Expect AI-based diagnostics and wireless sensor monitoring to become standard, offering real-time alerts on components like brake pads wear or fluid quality. Staying ahead with these innovations ensures your vehicle remains reliable and safe over the years. I encourage you to try out an advanced diagnostic app to get a feel for the high-tech future of car care. Incorporating these tools now can save you significant time and money down the road, giving you peace of mind every time you turn the key.
What I Wish I Knew Before Taking on Brake Repairs
- Patience is your best friend; rushing can lead to costly mistakes or damaging components. My first attempt was hurried, and I ended up stripping a bolt—learning this the hard way taught me to take my time and double-check torque specs.
- Understanding the caliper’s inner workings demystifies the repair process. Now, I see the piston not just as a part to move but as a small valve that needs gentle treatment, not brute force, especially when cleaning or compressing it.
- Invest in quality tools—cheap replacements might save money upfront, but they can cause more harm than good. A sturdy C-clamp and a reliable brake caliper piston tool make a world of difference in achieving a smooth, safe repair.
- Proper inspection and cleaning extend caliper lifespan. Years ago, I overlooked corrosion on slide pins, which led to sticking calipers. Regularly inspecting and lubricating these parts prevents future issues.
My Go-To Resources for Auto Repair Success
- Haynes Repair Manuals: These comprehensive guides help me understand each step with clear diagrams and explanations. They’re like having a mechanic in my garage.
- Brake Cleaner and Silicone Lubricant: Quality products ensure my repairs last longer and perform better. I prefer brands trusted by professionals for their reliability and safety.
- Online Forums and Video Tutorials: Platforms like YouTube offer visual guidance that’s invaluable, especially when tackling tricky steps like piston compression or caliper reinstallation. Real-world tips from experienced DIYers make complex tasks manageable.
- Reliable Diagnostic Apps: When uncertain, I use OBD-II scanners connected to apps, which help me catch underlying issues early before they become costly repairs, like detecting contaminated brake fluid or sensor faults.
Seizing the Moment to Elevate Your Auto Care Game
Biased towards skill, confidence, and proactive maintenance, embrace the journey of mastering your vehicle’s health. Remember, each repair not only saves money but deepens your understanding and connection with your car. Taking the time to learn and apply proper techniques safeguards your safety on the road and nurtures a lifelong sense of pride in your DIY skills. Don’t wait for a minor issue to become a major headache—start small, stay consistent, and enjoy the satisfying craftsmanship of well-maintained brakes. What challenging repair have you tackled yourself, and what was your biggest lesson? Share below and inspire fellow auto enthusiasts to take charge of their vehicle’s care.