
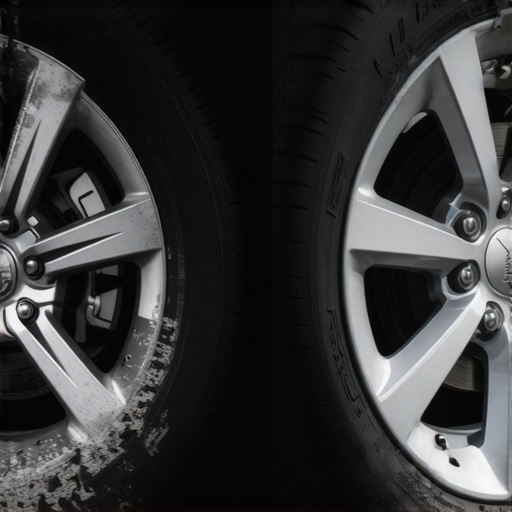
It was a moment of frustration I won’t forget—parking my car after a weekend getaway, only to notice that my once shiny alloy wheels were now scuffed, scratched, and dull. At first, I thought about costly replacements or professional repairs, but then I had an epiphany: I could handle this myself with a bit of know-how and the right approach. That realization changed everything.
Why Scuffed Alloy Wheels Don’t Have to Stay That Way
Many car owners overlook their wheels, assuming the damage is permanent or only fixable by experts. But let me tell you, those scuffs and scratches are more cosmetic than destructive, and with a little effort, you can bring back that sleek, fresh look. Aside from boosting your car’s aesthetic appeal, repairing alloy wheels can also prevent further corrosion or damage, saving you a lot of money in the long run. Plus, it’s incredibly satisfying to see your own handiwork transform your ride.
But I know what you’re thinking: “Is this really worth the effort? Will I mess it up more than I fix it?” That’s a valid concern. I made my fair share of early mistakes—like using the wrong type of polish or skipping primer—which made the process more frustrating. However, once I understood the proper techniques, I started seeing real results.
So, today I’m going to walk you through the simple steps I used to restore my alloy wheels. No gimmicks, just honest advice based on experience. By the end of this post, you’ll know how to tackle those unsightly scuffs and scratches and get your wheels looking like they just rolled off the showroom floor.
If you’ve ever stared at your wheels and felt annoyed every time you park, stay with me. Let’s turn that frustration into pride. Now, before we dive into the step-by-step process, think about your own wheels—do you have those stubborn scuffs that refuse to clean off? If so, you’re in the right place.
Is Restoring Alloy Wheels Actually Worth the Hype?
Many skeptics wonder if DIY repairs really can rival professional jobs. I’ll admit, I was cautious at first—worrying about uneven patches or messing up the finish. But starting small, with a test run on an inconspicuous wheel, proved that a careful, patient approach yields fantastic results. Plus, knowing the common mistake of rushing the process or skipping surface prep can save you from costly redo’s. For a deeper understanding of how proper technique prevents costly mistakes, check out CollisionRenew’s comprehensive guide on how to fix paint swirls left by cheap car washes.
Prime Your Surface Like a Pro
Start by thoroughly washing your wheels with a non-abrasive wheel cleaner and a stiff brush to remove brake dust, dirt, and grease. Once clean, dry the surface completely with a microfiber towel. I once skipped drying and ended up trapping water beneath my paint, causing bubbles later. After drying, apply painter’s tape around the tire’s edge to protect your rubber from accidental paint or polish overspill.
Sand Away the Imperfections
Choose the Right Grit Sandpaper
Select a fine grit sandpaper, around 400-600 grit, to gently smooth out scratches and scuffs. Think of this step as sanding a wooden table to remove imperfections before refinishing—careful and even pressure is key. I used a block sander to keep the motion uniform, which helped prevent uneven surfaces.
Sand the Damaged Areas
Sand over the scuffed areas with light, circular motions, gradually blending the scratches into the surrounding metal. Avoid pressing too hard to prevent removing more material than necessary. During my own attempt, I accidentally sanded too much, but resanding with finer grit and adding a touch of primer fixed the uneven patches.
Prime, Paint, and Seal for a Flawless Finish
Apply Primer Carefully
Spray a thin, even coat of fine automotive primer to the sanded spots, holding the can about 6-8 inches away. Wait for about 10-15 minutes for it to dry. In my experience, skipping primer led to uneven gloss; adding a primer layer made the final paint much more durable and smooth.
Paint Like a Master
Select a matching alloy wheel paint—preferably a high-temperature, durable type. Apply in light, even coats, allowing each layer to dry for 10-15 minutes. Use short, overlapping sprays to prevent drips. I learned that multiple thin coats yield better results than one thick coat, which can run or drip.
Seal and Protect
Finish with a clear coat to lock in the paint and add gloss. Spray in light layers, letting each dry thoroughly. Once complete, let the wheel cure for at least 24 hours before driving. During my project, I avoided rushing the drying time, which kept the finish shiny and resistant to chips.
Final Touches and Maintenance
Remove the painter’s tape carefully and clean off any overspray. Regular washing with gentle products and avoiding harsh brushes will maintain your restored alloy wheels longer. Remember, like ensuring your brake pads wear evenly or fixing a slipping transmission, patience and proper technique here make all the difference in achieving professional-looking results.
Many car owners believe that routine maintenance is straightforward and that sticking to basic guidelines guarantees vehicle longevity. However, this common perception often overlooks critical nuances, leading to costly mistakes. For instance, a frequent myth is that all transmission issues result from fluid leaks or worn-out parts, but recent studies highlight the importance of driving habits, such as towing behaviors, which can accelerate transmission wear without obvious leaks. In fact, understanding that slipping transmissions during towing episodes can stem from heat buildup, as explained in CollisionRenew’s guide on towing effects, can help owners prevent premature failures.
Are You Falling for the Oversimplification of Brake System Repairs?
Many assume that squeaky brakes always mean worn pads needing replacement. While it’s often correct, it’s not universally true. Sometimes, the true culprit is moisture accumulation or pad gluing to the rotor surface, which requires different remedies. An oops moment many experience is neglecting this nuance, leading to unnecessary pad replacements while the real issue persists. Always explore root causes before jumping to conclusions. Moreover, neglecting to check brake fluid condition—especially if it appears dark and contaminated—can drastically impact brake effectiveness and safety. Regularly inspecting brake fluid can prevent pedal issues and uneven pad wear, as detailed in CollisionRenew’s article on brake fluid maintenance.
Keep It Running with the Right Tools
Maintaining your vehicle over time requires more than just basic knowledge—it demands the right equipment. One indispensable tool I personally swear by is a high-quality digital torque wrench. Unlike traditional models, my digital torque wrench provides precise measurements, ensuring I don’t overtighten or strip bolts, especially when working on sensitive components like suspension or brake calipers. This control helps prevent damage and prolongs parts’ life.
Another favorite in my toolkit is an advanced scan tool like the Autel MaxiCOM MK808. This device isn’t just for reading engine codes; it allows me to perform comprehensive system testing on transmissions, ABS, and airbags, saving trips to the mechanic for simple diagnostics. Its ability to reset adaptations and perform live data monitoring makes it invaluable for long-term maintenance.
When it comes to fluid health, I rely on a handheld refractometer for quick in-situ checks of coolant and transmission fluid, helping me decide if a flush or top-up is needed before issues escalate. These tools form the backbone of my routine, catching problems early and preventing costly repairs down the line.
Implementing Smarter Maintenance Practices
Practicing proactive maintenance is key to keeping your vehicle reliable. For instance, regularly inspecting and replacing transmission fluid before it degrades can prevent slipping issues, especially when towing—an example detailed in this guide. Using tools like a funnel with a filter ensures clean fluid changes, reducing contamination risks.
Similarly, maintaining your brake system involves more than just replacing pads. Periodic bleeding of brake fluid with a hand pump kit ensures optimal hydraulic pressure, avoiding spongy pedals and uneven wear. Investing in a brake caliper piston reset tool also simplifies making repairs or replacements, making the process cleaner and safer.
Remember, the trend in automotive maintenance is shifting towards digital diagnostics and data-driven care. Embracing these tools will prepare you for future vehicle technology advances, such as electric components and smart systems, which require precise and detailed troubleshooting techniques.
How do I maintain my car’s systems over time?
Consistent check-ups, tracking fluid conditions, and using the right diagnostic tools are essential. Scheduling regular inspections, akin to how you would maintain a biological system, helps identify potential issues early. For example, routinely checking your coolant using a refractometer or monitoring transmission shifts with a diagnostic scanner can save you from sudden breakdowns and extend your vehicle’s lifespan. Staying ahead with proactive upkeep is especially crucial as vehicles become more complex, integrating advanced electronics and sensors that demand precise handling.
Ensuring your tools are updated and calibrated is another part of effective maintenance. Modern scan tools receive software updates that add functionality, enabling you to diagnose newer models and systems effectively. As the automotive industry evolves rapidly, keeping your toolkit current ensures you can handle upcoming challenges and maintain your vehicle’s performance for years to come. Be proactive; start incorporating these targeted tools into your routine today, and watch your car’s longevity and reliability improve exponentially.
Secrets I Wish I Knew About Fixing Scuffed Alloy Wheels
One of the biggest lightbulb moments during my journey to restore my alloy wheels was realizing that patience truly pays off. Rushing through the sanding or skipping surface prep only led to more imperfections, making the finish look uneven or messy. I learned that taking small, deliberate steps and allowing each layer of paint and sealant to dry thoroughly results in a professional-looking finish. Another insight was understanding the importance of choosing the right materials—like fine grit sandpaper and high-quality paint—which can make or break your project. Lastly, I discovered that regular maintenance after the repair, such as gentle washes and avoiding harsh chemicals, extends the life of your DIY work and keeps your wheels looking sharp for longer.