
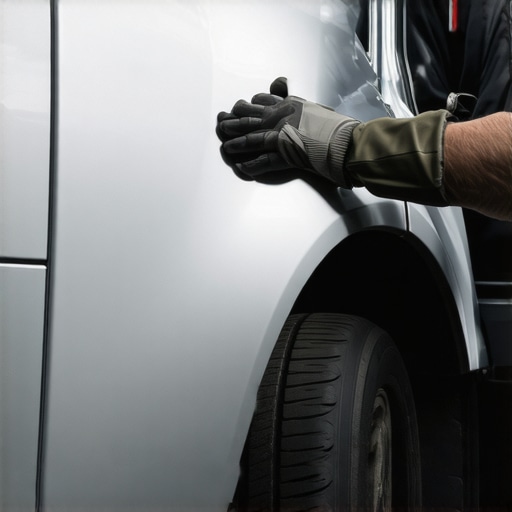
Have you ever looked at your car after a minor bump and wondered if that tiny dent or crease would ever disappear? I faced this exact frustration with my own vehicle. One day, after a low-speed side swipe in a parking lot, I noticed an ugly, almost invisible crease in my aluminum fender—a crease that stubbornly stayed despite multiple attempts to buff it out. It was a moment of realization that not all damage is obvious; some issues hide beneath the surface, quietly affecting your car’s appearance and value.
Why Invisible Creases Can Be a Driver’s Nightmare
Even the smallest, seemingly insignificant dents or creases can wreak havoc on your car’s aesthetics—and if left untreated, potentially impact resale value or structural integrity over time. aluminum fenders are particularly tricky. They bend and develop tiny, barely perceptible creases from minor impacts, and these can be tough to see but obvious to the trained eye. These damages don’t just ruin your car’s looks; they could also lead to rust or further structural issues if not properly addressed.
Many vehicle owners ignore these subtle deformations, thinking they’re too minor or too costly to fix. But here’s the thing—**you don’t have to live with these blemishes**. And I’ll tell you why: with the right technique, understanding, and a bit of patience, you can bring your aluminum fenders back to near-perfect condition. Trust me, I’ve been there, and I’ve found a process that works without the need for expensive replacements or complicated procedures.
Are you tired of trying to hide these tiny imperfections with paint or hoping they’ll just disappear over time? Well, you’re not alone. My goal is to share my personal journey and provide you with proven methods to restore those invisible creases effectively. So, let’s get into what really works—starting with the biggest mistakes I made early on that almost ruined the job for me. Knowing what not to do is just as important as knowing how to do it right.
Common Mistakes That Sabotage Aluminum Fenders Restoration
Early in my repair attempts, I tried overly aggressive sanding, thinking it would level out the crease faster. Turns out, that just made things worse—removing too much material and causing uneven surfaces. I also neglected to properly clean and prep the area beforehand, which led to poor adhesion of the repair materials. These are mistakes that can easily happen if you’re unaware of the nuances involved in aluminum work.
Luckily, I learned from these errors and refined my technique. If you want to avoid these pitfalls and truly understand how to reverse those invisible creases, stay with me. I’ll walk you through the proven methods and tools that have helped countless enthusiasts restore their aluminum panels without resorting to costly replacements. Curious if this process is worth the effort? Let’s explore how you can transform your vehicle’s look and feel, starting right now.
Assess the Damage and Prepare Your Workspace
Start by inspecting the crease closely in good lighting. Take a photo to remember the original shape and plan your repair. Clear the surrounding area of debris and cover nearby components with protective cloths. Use gloves and eye protection to ensure safety during the process. Remember, a clean, controlled environment prevents dirt from getting embedded in your repair.
Heat the Area to Make the Metal More Malleable
Using a heat gun set to a low to medium temperature (around 200°F or 93°C), evenly apply heat to the affected area for about 2-3 minutes. This reduces the metal’s hardness, making it easier to manipulate. Think of it like warming butter before spreading; it softens just enough for easier shaping. Be cautious not to overheat or discolor the paint.
Use Gentle Pressure with a Plastic Tool or Hammer
After heating, gently press the crease from the inside or the exterior with a rubber mallet or a plastic tap-down tool. Work gradually, moving along the edges of the crease to coax the metal back into shape. It’s akin to kneading dough—apply steady, light pressure rather than force, which can cause cracks or further deformation. Micro-stories: I once used a soft mallet and a wooden block to tap along the crease, watching it slowly flatten; however, I avoided hitting with metal tools to prevent damage.
Cool Down and Check Your Progress
Once you’ve gently worked on the crease, allow the metal to cool naturally, or use compressed air directed at the area for a quick cool-down. The gradual cooling helps set the metal into the new shape. Reinspect the area—if the crease persists, repeat heating and pressing. Patience is key; rushing can cause cracks or uneven surfaces.
Refine the Surface with Fine Sandpaper
After the shape is restored, lightly sand the area with 800-1000 grit sandpaper to smooth out any irregularities or minor scratches. Keep the surface clean and dry. Remember, aggressive sanding can thin the metal or remove clear coat, so gentle strokes are preferable. For inconspicuous repairs, this step prepares the surface for finishing or repainting without noticeable imperfection.
Apply Finish and Protect
If the paint was affected, consider applying a compatible touch-up paint or sealant. For cosmetic repairs, a clear coat can help blend the repaired area. This step not only improves appearance but also prevents rust, especially important given that aluminum fenders are prone to corrosion if scratched. For more restoration techniques, check out how to restore a faded bumper without spray paint.
Prevent Future Creases with Proper Handling
Learn how improper parking or minor impacts lead to invisible dents. Practice caution when maneuvering around tight spots. Regularly inspect your vehicle, and address small deformations early to prevent escalation. Knowing how to spot a failing wheel bearing or power steering issues can help avoid accidental impacts that cause creases, as explained in related guides.
 While many car owners believe that transmission issues are always obvious or that routine maintenance solves all problems, the truth is far more complex. A common myth is that low transmission fluid levels are the sole culprit for shifting problems—however, recent studies show that solenoid wear or internal mechanical faults often go unnoticed but critically impact performance. As an expert in auto repair, I’ve seen situations where replacing fluid temporarily masks deeper issues, leading to recurring failures.
One trap many fall into is ignoring subtle signs like delayed gear engagement or unexplained slipping, thinking they are minor. These symptoms often indicate underlying problems such as worn clutch packs or sensor malfunctions, which require nuanced diagnosis beyond simple fluid checks.
When it comes to collision repair, there’s a misconception that minor dents are purely cosmetic. But hidden structural damages can compromise safety and long-term vehicle integrity. For example, ignoring small misalignments in the chassis can cause uneven tire wear and steering issues down the line. To ensure thorough restoration, understanding the importance of factory specifications during realignment is vital. You can learn how collision repair experts restore factory gaps after minor accidents by visiting this detailed guide: https://collisionrenew.com/how-collisionrenew-restores-factory-gaps-after-a-small-side-swipe.
In car servicing, many assume that changing oil and filters is enough for engine longevity, but advanced engine diagnostics reveal that neglecting components like the PCV valve or vacuum hoses can lead to reduced efficiency and increased emissions. Regular inspections of these parts, especially those prone to clogging or cracking, can save you costly repairs later.
Brake service might seem straightforward—change pads and call it a day. Yet, uneven pad wear or caliper sticking can be culprits behind brake pulsation or reduced stopping power. Not inspecting rotors or considering the condition of brake fluid can result in premature failure. Seasonal moisture or contamination in brake fluid, for example, significantly impact braking performance and safety.
Understanding the nuances in auto repair saves you money and enhances safety. Avoid the trap of accepting superficial fixes or ignoring early warning signs that seem insignificant. Instead, focus on detailed diagnostics, component condition, and factory standards to ensure your vehicle remains reliable. If you’re curious about diagnosing specific issues, explore related topics like how to identify-mystery fluid leaks or why your steering wheel squeaks when turning quickly. Remember, a well-maintained vehicle reflects an informed owner.
Have you ever fallen into this trap of misconceptions or overlooked subtle signs in your vehicle? Let me know in the comments.Maintaining your vehicle’s optimal performance requires more than just basic knowledge—it demands the right tools and a consistent approach. One of the most effective investments is a high-quality digital multimeter, like the Fluke 115, which allows for precise diagnostics of electrical components such as batteries, starters, and alternators. I personally prefer the Fluke because of its accuracy, durability, and ease of use, especially when troubleshooting complex electrical issues like a failing alternator, which can be subtle but damaging over time. Additionally, a good quality code scanner, such as the Autel MaxiCOM series, has become indispensable. It enables me to quickly access OBD-II codes, identify potential faults early, and save time during repairs.
Beyond electronic diagnostics, I rely heavily on specialty hand tools like plastic pry tools, micro-adjustable wrenches, and a reliable trolly jack with a safe weight rating to perform under-car inspections or fluid changes. For instance, when I need to replace a worn serpentine belt, I use a serrated belt tool combined with a torque wrench set to manufacturer’s specs to ensure proper tension—critical for long-lasting performance.
In terms of software, my preferred method for managing repairs and maintenance schedules is an automotive-specific app like RepairPal, which helps track service intervals, recalls, and parts replacements. This proactive approach helps extend vehicle life and prevents costly breakdowns, especially with components like brake systems and transmission units that require regular attention. As technology evolves, I predict an increasing shift toward integrated diagnostic platforms that combine hardware and AI for real-time monitoring, enabling us to catch issues before they become serious.
How do I keep my car functioning smoothly over time? Regular calibration checks with my diagnostic tools—especially testing sensors and control modules—are vital. For example, verifying the proper operation of ABS sensors ensures safe braking and prevents uneven wear. Checking the health of your battery terminals with a dedicated cleaner can also stave off no-start conditions. For an effective routine, I recommend starting with cleaning your battery terminals using a wire brush and a mixture of baking soda and water, which I detail further in my guide on preventing no-start issues.
Make sure to incorporate these tools into your maintenance routine to save money and increase safety. For instance, if you haven’t inspected your shocks recently, using a shock leak detection kit can reveal issues before dangerous driving conditions occur—learn more about this in my article on shock failures. Remember, consistency and proper equipment are your best allies in keeping your vehicle reliable and safe for the long haul. Test out your multimeter today by checking the voltage of your battery—it’s a simple yet revealing exercise that can prevent future breakdowns.
The Hardest Lesson I Learned About Aluminum Fenders Restoration
One of my biggest mistakes was rushing the heating process, which caused uneven metal softening and led to additional dents. Patience and consistent heat application are critical—quick fixes rarely work in delicate repairs.
Why Overconfidence Can Ruin Small Repairs
I often underestimated the importance of surface prep, neglecting to clean the area thoroughly before reshaping. Proper cleaning ensures better material adhesion and a smoother finish—never skip this step.
What Experts Won’t Tell You About Aluminum Repair Techniques
There’s a common misconception that heavy tools are necessary to fix creases. In reality, gentle pressure with the right tools and patience yield the best results, preserving your fender’s integrity.
My Essential Toolkit for Aluminum Fenders Fixes
Over time, I’ve found that a quality heat gun, plastic tap-down tools, micro sanders, and a fine-grit sandpaper set are indispensable. Trustworthy brands like DeWalt and 3M offer durability and precision—investing in good tools saves time and prevents further damage.
Where to Go from Here
If you want to dive deeper into restoring your vehicle’s appearance after small damages, check out expert guides on factory-aligned collision repair or professional bumper finishing. These resources build on the skills and tools discussed here, ensuring your repair looks seamless and lasts long-term.
Your Turn to Try
Now that you know some personal lessons and proven techniques, it’s time to give it a shot. Restoring small dents and creases isn’t just about aesthetics—it’s about taking pride in your vehicle’s condition. Have you ever tried fixing a stubborn crease? Share your experiences below and let’s learn together.