
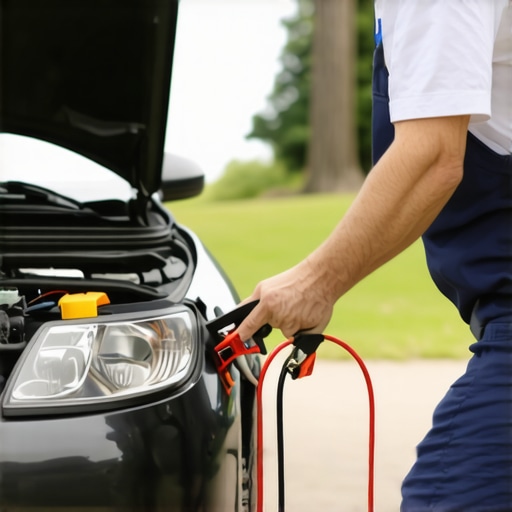
Ever been stranded with a dead battery, only to fumble nervously with jumper cables, worried about frying the car’s delicate computer? I can’t count how many times I’ve been in that exact spot—heart pounding, hands sweaty, and the looming fear of causing irreversible damage. That lightbulb moment came unexpectedly when I nearly blew my bank account because of a careless jump. Since then, I’ve dedicated myself to mastering how to jumpstart a car without frying the computer, turning a stressful experience into a simple, safe routine. If you’ve ever faced the dread of trying to revive your vehicle without damaging its electronics, you’re in the right place. Today, I’ll guide you through the essential tips I’ve gathered over years of tinkering and troubleshooting, so your next jumpstart is safe, effective, and frustration-free.
Why Protecting Your Car’s Computer Matters More Than Ever
Modern vehicles are basically computers on wheels, packed with sensitive electronics that control everything from your engine to your security system. A sudden voltage spike, like a mishandled jumpstart, can fry these crucial components, leading to hefty repairs. It’s no exaggeration—according to automotive electrical experts, incorrect jumpstarting procedures can cause damage that costs hundreds to thousands of dollars (source: CollisionRenew). That’s why it’s vital to understand the process thoroughly. Early on, I made a costly mistake—connecting the cables backward—thinking I was just being cautious. It’s a rookie error, but it taught me a valuable lesson about respecting the procedures designed to keep your car’s brain safe. In this article, we’ll cover exactly how to do a jumpstart safely, avoiding common pitfalls that even seasoned drivers sometimes overlook.
Still skeptical about the risks? You’re not alone.
Many people underestimate how delicate their vehicle’s electronics can be. I used to think that as long as I connected the terminals properly, everything would be fine. But what I didn’t realize was that even small mistakes—like connecting the jumper cables in the wrong order—can create voltage surges capable of frying your car’s computer. Trust me, the last thing you want is a dead $1,200 ECU because of a simple oversight. That’s why I emphasize the importance of following a proven, step-by-step method. For more insights on common jumpstart mistakes, check out this resource. Next, let’s dive into the specific steps to ensure your jumpstart won’t turn into a costly mistake.
Prepare Your Equipment and Environment
Begin by ensuring your jumper cables are in good condition—seals intact, no frayed wires—and park both vehicles close but not touching. Turn off both ignitions and engage parking brakes to prevent any movement. I once struggled in a tight parking lot, having to get creative to position the cars safely, but taking these steps first saved me from chaos later.
Identify Correct Terminals Before Connecting
Locate the positive (+) and negative (−) terminals on both batteries. The positive terminal is usually red with a plus sign, while the negative is black with a minus sign. Double-check each to avoid reverse polarity, which can cause voltage spikes—imagine the difference as the wrong gear in your transmission; it can lead to damage. I once rushed and almost connected backwards, which sparked a small arc—lesson learned: always verify before connecting.
Connect the Jumper Cables Properly
Connect the red clamp to the positive terminal of the dead battery, then to the positive terminal of the live battery. Next, attach the black clamp to the negative terminal of the live battery, and finally, connect the remaining black clamp to an unpainted metal surface away from the battery on the dead car—this acts as a grounding point to discharge any sparks safely. Think of it as grounding yourself before fixing an appliance; it prevents unintended shocks or damage. Ensuring a solid, snug connection is vital—loose clamps can cause intermittent power and potential sparks.
Start the Donor Vehicle and Wait
Turn on the engine of the vehicle providing the jump. Let it run for 2-3 minutes to transfer sufficient charge. During this time, I often monitor for unusual sounds, such as clicking or whining—these can hint at underlying issues, like a failing alternator. For instance, a late friend once ignored odd sounds during his jump, which led to an unexpected alternator replacement a week later.
Attempt to Start the Dead Car
Now, try starting the vehicle with the dead battery. If it hesitates or doesn’t turn over, wait a few more minutes with the donor running before trying again. If it still refuses, recheck all connections, and ensure the dead battery isn’t completely drained or damaged beyond recovery. I recall a time when I attempted to jump a severely discharged battery, and after multiple tries, it finally turned over—proof that patience and correct procedures pay off.
Safely Disconnect the Cables
Once the dead vehicle starts, remove the black grounding clamp from the grounded metal surface first, then the black clamp from the donor vehicle. Next, disconnect the red clamps from both batteries. Keep the engine running on the revived vehicle for at least 15-30 minutes to allow the alternator to recharge the battery thoroughly. I once forgot this step and immediately turned off; the car died again, teaching me that continuing to run the engine helps stabilize the system.
Check for Underlying Problems
If your car repeatedly fails to start after a jump, it might suggest deeper issues like a faulty alternator or a dying battery. Regularly inspecting your battery’s health can prevent surprises—consider visiting an auto repair expert for a load test. Staying proactive keeps your vehicle reliable, much like maintaining good brakes or transmission fluid to avoid breakdowns.
Master the Art of Safe Jumpstarting
Remember, patience and precision are your best tools here. Think of it like performing a delicate repair—every step counts. Properly following these instructions not only protects your vehicle’s electronics but also ensures your safety. With practice, you’ll avoid costly mistakes, and the jumpstart process will become second nature—like changing a tire or checking oil levels.
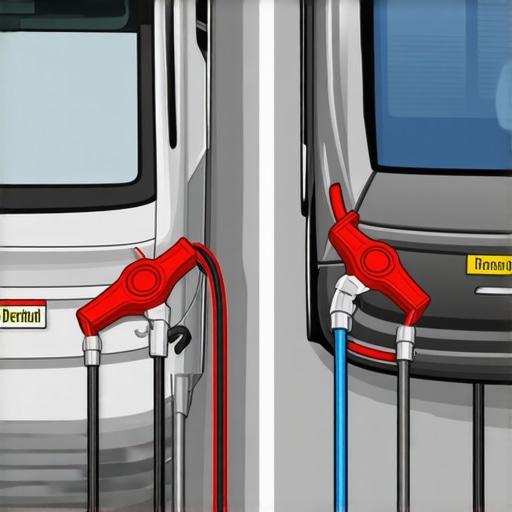
Illustration showing correct jumper cable connections between two vehicles with labeled terminals and grounding points.
When it comes to vehicle maintenance, many car owners harbor misconceptions that can lead to costly mistakes. A common myth is that transmission fluid change intervals are universally fixed, but in reality, the optimal timing depends on driving habits and vehicle make. Rigidly sticking to a schedule without considering your specific usage can result in unnecessary drains on your wallet or overlooked issues. For instance, overflushing transmission fluid can disturb the vital lubrication layer, potentially causing gear slipping or harsh shifts. Make sure to consult your vehicle’s manual or a trusted auto repair expert to determine what’s best for your car. Let’s explore more nuances that often trip up even experienced drivers.
What about the myth that all collision repairs are straightforward?
This misconception can be dangerous, as many believe that minor dents or paint scratches are quick fixes, leading to skipping professional assessments. However, underlying structural damage or rust might lurk beneath the surface, compromising safety and vehicle longevity. Rushing repairs without thorough inspection can cause future failures, such as compromised frame integrity during accidents. Trusting certified collision repair centers like CollisionRenew ensures your vehicle’s safety and preserves its value. Remember, what appears simple on the surface often conceals complex issues demanding expert attention.
Complex braking systems: A hidden trap for the unwary
Many think that brake pads are interchangeable and only require replacement when squeaking, but in fact, neglecting to consider master cylinder health and brake fluid condition can lead to catastrophic failures. For instance, air bubbles in the brake lines can cause spongy pedals or total brake failure under stress. Regularly assessing brake fluid quality and inspecting rotors prevent dangerous situations. Interestingly, some signs like a persistent burning smell under the hood might point to disc binding or caliper sticking, issues that require specialist intervention. Staying vigilant with brake maintenance is vital for safety—don’t rely solely on surface symptoms. To understand more about ensuring your brake system’s health, explore this comprehensive guide.
Advanced question: How does misdiagnosing transmission issues impact long-term vehicle health?
Misdiagnosis often prompts unnecessary repairs or delays proper treatment, exacerbating damage. For example, misinterpreting a whine sound as a worn belt when it’s actually a failing transmission pump can lead to overlooking critical failures. This can cause overheating and eventual complete transmission breakdown, costing thousands more than timely intervention. Studies show that early detection of subtle signs, like bubbling transmission fluid on the dipstick, can improve repair outcomes and extend vehicle lifespan (source). Recognizing these nuances requires a seasoned eye—don’t settle for hearsay or superficial fixes. Seek expert advice to avoid these costly mistakes.
Understanding these hidden nuances about transmission, collision repairs, and brake service can save you money and keep your vehicle reliable for years to come. Have you ever fallen into this trap? Let me know in the comments.

Diagram illustrating the difference between proper and improper transmission fluid levels and their effects on gear operation.
,
Maintaining your vehicle’s optimal performance relies heavily on the quality of your tools and your knowledge of proper techniques. Over the years, I’ve discovered that investing in the right equipment and software not only makes repairs more efficient but also guarantees long-term reliability. One of my go-to tools is the digital multimeter. I prefer the Fluke 117 because of its accuracy and durability—it’s essential for diagnosing electrical issues such as faulty sensors or wiring problems. For instance, regularly testing your battery voltage with a multimeter can prevent unexpected breakdowns, and I recommend doing this monthly if your car is used frequently.
Another invaluable tool is a OBD-II scanner. I personally use the BlueDriver Bluetooth scan tool connected to my smartphone. Its real-time data and comprehensive code definitions have saved me countless trips to the mechanic. For example, when my engine began to run roughly, I quickly identified a misfiring cylinder without leaving my driveway, thanks to this scanner. As vehicles become increasingly complex, integrating software tools into regular maintenance is becoming indispensable.
How do I maintain my diagnostic tools over time?
Keeping your diagnostic equipment in top shape involves a few simple steps. For the multimeter, ensure the probes and leads are clean and free from corrosion—use a soft brush and some contact cleaner periodically. For your OBD-II scanner, keep the device updated with the latest firmware, which manufacturers release to improve compatibility and add features. Also, store these tools in a protective case to prevent physical damage. Regularly calibrating your multimeter against a known voltage source ensures ongoing accuracy, providing peace of mind during critical diagnostics.
Beyond handheld tools, I rely heavily on automotive diagnostic software integrated with professional scan tools to analyze complex systems like transmission or ABS modules. These programs can read trouble codes directly from the vehicle’s ECU, offering insights that simple code readers can’t provide. As technology advances, the trend toward cloud-based diagnostics and remote monitoring is likely to grow, making vehicle health management more proactive than reactive.
Investing in quality diagnostic tools and mastering their use is a game-changer. For example, I recently used a laser torque wrench to correctly tighten my wheel lug nuts, ensuring proper clamping force and preventing future wheel issues. Incorporate these tools into your routine, and you’ll catch problems early, saving money and time down the line. For a quick win, try calibrating your multimeter this week—it’s an easy step that can significantly boost your troubleshooting accuracy and keep your car humming along smoothly.
The Hardest Lesson I Learned About transmission,auto repair,collisionrenew,brake service,car service
One of the most impactful lessons I had was understanding that even seasoned drivers can underestimate the delicate nature of modern vehicle electronics. A split-second mistake during a jumpstart, like connecting cables in the wrong order, can lead to costly repairs and a lot of frustration. This experience taught me humility and the importance of patience, attention to detail, and respecting the intricate systems within our cars. It reminded me that continuous learning is essential, and sharing this wisdom could help others avoid similar pitfalls.
My Essential Toolkit for Reliable Vehicle Maintenance
Over time, I’ve come to rely on specific tools that elevate my maintenance routine. A high-quality digital multimeter, like the Fluke 117, ensures accurate electrical diagnostics, preventing guesswork. An OBD-II scanner, such as the BlueDriver, provides instant insights into complex systems, saving trips and guesswork. Investing in a good set of jumper cables, with thick clamps and insulated handles, can make all the difference when emergency arises. These tools have become my trusted companions, empowering me to take control and prevent costly breakdowns.
Your Turn to Try Smarter, Safer Vehicle Care
Remember, mastering safe jumpstarting and regular vehicle maintenance isn’t just about fixing problems—it’s about building confidence in handling your car’s complex systems. With the right approach, you can turn a stressful experience into a straightforward task that saves money and keeps you safe. Whether it’s checking your battery regularly or knowing how to jumpstart properly, every small effort adds up. So, gear up, stay curious, and Keep improving your knowledge about your vehicle. What’s one vehicle maintenance skill you’re eager to learn or improve? Let me know below and share your journey towards smarter auto care.