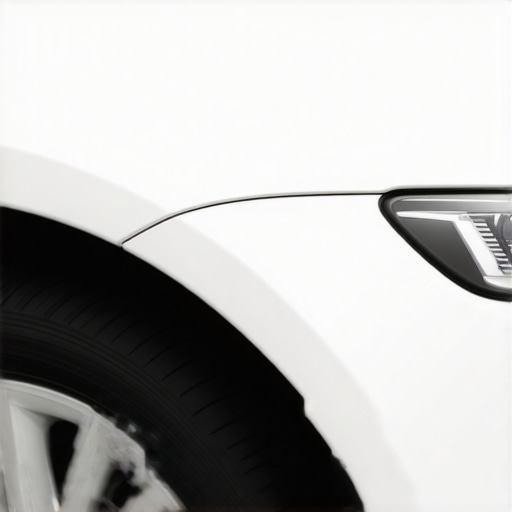
I remember the exact moment I realized how frustrating it can be to match a tiny paint chip on a pearl white car—it’s like trying to color within the lines in a paint-by-numbers kit, but the colors don’t quite match. The sunlight caught that tiny scratch, and suddenly, my pristine pearl white looked dull and mismatched. That lightbulb moment made me dive deep into the world of paint matching, especially when it comes to delicate pearl finishes.
Why Matching Pearl White Paint Matters More Than You Think
If you’ve ever tried to fix a small paint chip or scratch and ended up with a mismatch that screams “DIY gone wrong,” you’re not alone. Pearl white is notorious for its subtle shimmer and depth; even a slight discrepancy in the shade or texture can ruin the entire look. But here’s the good news: you don’t always need to repaint the whole panel or car to restore that flawless finish. With modern techniques, collision repair shops can now seamlessly match pearl white paint without a full repaint—saving you time and money.
Have you faced this problem before? A tiny scratch that ruins your car’s appearance, making you wish for a magic wand? Well, I’m here to tell you there’s no magic, but there is a smart, less invasive way to handle it. Plus, understanding how these paint matching techniques work can help you avoid costly mistakes or unnecessary repaints.
Is Pearl White’s Luster Actually Hard to Match? Think Again
Early in my DIY attempts, I made a classic mistake: ignoring the importance of surface prep and relying solely on color matching kits. This led to more mismatched patches than I care to admit. Did you know that pearl paints contain tiny mica particles that reflect light differently depending on their placement and thickness? That’s why a perfect match requires more than just matching color codes—it demands a detailed understanding of the paint’s texture and reflection properties.
For a more in-depth understanding of the true causes of paint mismatches, check out this comprehensive explanation on texture issues in car paint. Recognizing these nuances helps ensure that the repair not only looks good but also maintains the integrity of the original finish.
Now, don’t worry—there’s a practical path forward. In the next sections, I’ll walk you through how collision repair specialists achieve a near-invisible match for pearl white paint, even in the tiniest areas. It’s all about using the right techniques, tools, and understanding the surface you’re working with. Ready to see how you can do this without repainting your entire car? Let’s dive into the process.
Preparing the Surface Correctly to Achieve Seamless Results
Before diving into paint application, ensure the area is meticulously cleaned and sanded with fine-grit paper. Think of it as prepping a canvas before painting; a rough surface leads to uneven color and reflection issues. Remove any old buffer marks or scratches, and clean with a degreaser to eliminate oils that can interfere with adhesion. I once skipped this step and ended up with a patch that looked different under sunlight—lesson learned. Use a microfiber cloth to wipe away dust thoroughly and double-check that the surface is uniformly smooth and dry.
Applying a Base Coat with Precision
Match the base color shade using your manufacturer’s color code or a high-quality paint matching system. When painting tricky pearl finishes, it’s vital to apply thin, even coats to prevent uneven buildup. Use a dual-action spray gun for controlled atomization, holding it about 6-8 inches from the surface. I recall once trying a quick spray, which resulted in splotches. The key is to let each coat flash off before applying the next—wait about 10-15 minutes—so the layers meld seamlessly and create a uniform base.
Enhancing the Pearl Effect for a Flawless Finish
The pearl effect relies heavily on the correct application of the mica-based topcoat. Mix your pearl pigment into the clear coat, following manufacturer instructions precisely. For a subtle shimmer akin to a pearl’s natural luster, use fewer mica flakes; for a more vibrant effect, add slightly more. When I first experimented, I over-poured mica, leading to a grainy look. Practice on a test panel first, adjusting the mica concentration until the shimmer appears even and depth-rich.
Executing the Topcoat with Care
Spray the clear coat with consistent strokes, overlapping each pass by about 50%. Keep your spray gun at a steady distance and maintain a uniform speed—think of quilting, where even stitches create the best pattern. Allow each layer to dry thoroughly in a dust-free environment; dust or particles settling during drying can ruin the fineness of a pearl finish. I once rushed the drying time, and the result was a matte, uneven sheen—patience makes the difference. Finish with a gentle polish to bring out the depth and luster of the color.
Matching Texture and Reflection for a Perfect Blend
Color matching isn’t only about shade; it’s about how light interacts with the surface. Factors like surface smoothness and paint thickness impact the shimmer and depth. Use a proper sanding and polishing process to match the texture of surrounding areas—imagine tuning a guitar to ensure the sound blends perfectly. If the existing paint has a glossy, orange-peel texture, replicate that by lightly sanding or using a finishing glaze. Often, a minor adjustment here can hide the transition line and make repairs virtually invisible. For example, I once matched a pearl white door ding, and by carefully sanding and polishing, the repair vanished under sunlight texture nuances.
Final Checks and Environment Control
Ensure your workspace is dust-free and climate-controlled—high humidity or dust particles can settle on wet paint, spoiling the finish. Use a quality fan or air filtration system to circulate clean air. Before final polishing, inspect the area under different light conditions, especially sunlight, to confirm color and luster match perfectly. This step is crucial because a mismatch often reveals itself only under specific lighting. Think of it as previewing a movie in different theaters: sometimes, a small detail is only noticeable in certain conditions.
Challenging the Common Belief That All Auto Repairs Are Straightforward
Many car owners assume that choosing a repair shop like CollisionRenew guarantees a simple, predictable service. However, that’s a dangerous oversimplification. The truth is, several nuances—often overlooked—can dramatically impact the quality, cost, and longevity of your repairs. For instance, technicians might focus solely on fixing the visible damage, neglecting underlying issues like misaligned components or subtle frame distortions that can cause long-term problems. This oversight can lead to recurring damages or even safety hazards down the line. I’ve seen countless cases where a quick fix masked deeper problems, only to resurface later, costing owners more than if they’d addressed the root causes upfront.
What Advanced Car Owners Should Know About Mismatched Theories in CollisionRenew Methods
One widespread myth is that a perfect color match is solely about paint code accuracy. In reality, experts understand that factors like paint texture, gloss level, and reflection properties are equally crucial. Subtle surface textures—like orange peel—can betray a repair even if the color looks correct under normal lighting. For example, if a body shop neglects to match the original paint’s texture, the repaired area becomes glaringly obvious under sunlight or bright conditions, diminishing the overall value of the repair. To dig deeper into texture nuances, check out this detailed explanation on texture matching.
Another critical misconception involves the repair process itself. Many think that new synthetic sealants or fillers are universal solutions. However, applying the wrong type or insufficient curing time can create long-term issues like premature peeling, especially in high-humidity environments. For example, using sealer additives improperly might inadvertently trap moisture, causing corrosion or paint failure over time. This aspect is often underestimated but can have serious consequences, as highlighted by industry experts emphasizing proper curing protocols.
Are you aware of how even minor overlooked details, like surface preparation or environmental conditions, can influence the outcome? Failing to consider these factors might lead to repairs that look perfect initially but deteriorate rapidly. Always inquire whether your repair shop adheres to meticulous preparation and curing standards, or you risk replicating common pitfalls that more experienced technicians avoid.
In summary, knowing these subtle yet vital nuances empowers you to make smarter decisions. Don’t fall for the misconception that all repairs are equal or that a quick patch is enough. Advanced owners recognize that success lies in details—like matching texture, understanding curing processes, and addressing underlying issues—ensuring safety, durability, and aesthetic appeal. Have you ever fallen into this trap? Let me know in the comments and share your experiences with complex car repairs or surprises that caught you off guard.
Maintaining your vehicle’s optimal performance over time demands precision tools, reliable methods, and an understanding of how these investments contribute to both short-term fixes and long-term durability. One essential kit I personally swear by is a high-quality digital paint thickness gauge. It allows me to assess whether a repaired area matches the original surface consistency, especially important when dealing with delicate pearl finishes where texture and reflection play key roles. For example, using the paint texture gauge helps prevent inconsistencies that could betray a repair, ensuring seamless blending for years to come.
Additionally, investing in a professional-grade spray gun like the Devilbiss FinishLine SU950 allows me to control atomization and paint flow meticulously. This control is vital when applying pearl white or metallic paints, as uneven application can result in dull spots or color mismatches. I prefer a touch-up gun with adjustable spray patterns and pressure settings because it minimizes overspray and ensures even coats, reducing rework and waste.
For those tackling DIY repairs or small-scale touch-ups, a dual-action (DA) sander with variable speed is invaluable. I use a 3-inch DA sander for spot sanding because it offers precision and reduces the risk of over-sanding surrounding areas. Proper surface prep is the foundation of lasting repairs; neglecting it leads to peeling, clouding, or mismatched textures over time. Remember, following manufacturer protocols for sanding and cleaning can significantly extend the life of your paint and clear coat layers.
Looking ahead, the trend is shifting toward autonomous, environmentally friendly paints that cure faster and provide better adhesion. Technologies like UV-curable coatings are gaining traction and promise faster repairs and greater durability. Keeping an eye on innovations like laser-assisted curing systems can position you ahead of the curve, ensuring your tools and methods remain effective for years.
So, how do you keep your car’s cosmetic repairs working by the time you hit the next service interval? The answer lies in not just choosing the right tools but mastering their use through routine calibration and maintenance. Regularly checking your spray guns for clogs, cleaning sensors of your paint thickness gauge, and re- calibrating your measurement devices after a set number of uses keeps your repairs on point.
For a tangible improvement, I recommend trying out a professional-grade spray gun combined with a paint thickness gauge during your next project. This combo dramatically increases your chances of achieving a near-perfect match and extending the lifespan of your repairs. Remember, the magic is in the details—consistent maintenance and intelligent tool choices make all the difference in the long run.
What I Wish I Knew When I Started Fixing Pearl White Cars
One of the most eye-opening lessons I’ve learned is that achieving a seamless match with pearl white paint requires more than just matching color codes—it demands a keen understanding of reflective properties and surface textures. Early on, I underestimated how tiny differences in mica distribution could betray a repair under sunlight, making me realize that the devil is in the details. This insight has transformed my approach, emphasizing meticulous surface prep and environmental control.
Another revelation was that the true challenge isn’t just blending the color but restoring the correct texture and depth. I once ignored the importance of replicating the original orange peel finish, only to see the mismatch glaring in daylight. Now, I always match the existing surface’s gloss and texture, knowing it’s crucial for a flawless repair that will stand the test of time and light.
The third breakthrough came from understanding that proper curing and environmental conditions are often overlooked. Rushing the drying process or working in a dusty garage can ruin an otherwise perfect paint job. Investing in good workspace controls and patience ensures the pearl shimmer remains vibrant and consistent, leading to professional results even on the smallest touch-ups.
Tools and Resources That Changed My Game
After countless trials, I found that using a high-quality digital paint thickness gauge, like the paint texture gauge, helps me detect subtle inconsistencies that would otherwise go unnoticed. Paired with an adjustable spray gun such as the Devilbiss FinishLine SU950, I can control application precisely, ensuring even coats and perfect mica dispersal for pearl finishes. These tools have saved me time, money, and countless headaches.
Additionally, I rely on expert-recommended resources and community forums that share real-world tips. Websites like CollisionRenew provide invaluable insights into surface preparation and matching techniques, emphasizing that even minor surface nuances make a significant difference. Reading about others’ experiences has helped me refine my process, avoiding common pitfalls and embracing best practices.
Your Turn to Shine Bright
Maintaining your car’s flawless look is always within reach when you understand the nuances of pearl white paint and apply the right techniques. Remember, excellence isn’t just about big tools or costly upgrades; it’s about attention to detail, patience, and continuous learning. Whether you’re tackling a small scratch or a complete panel repaint, these insider secrets will help you restore that stunning pearl luster with confidence.
What’s the trickiest part of your auto repair journey so far? Let me know below—sharing experiences helps us all drive smarter and repair better.