
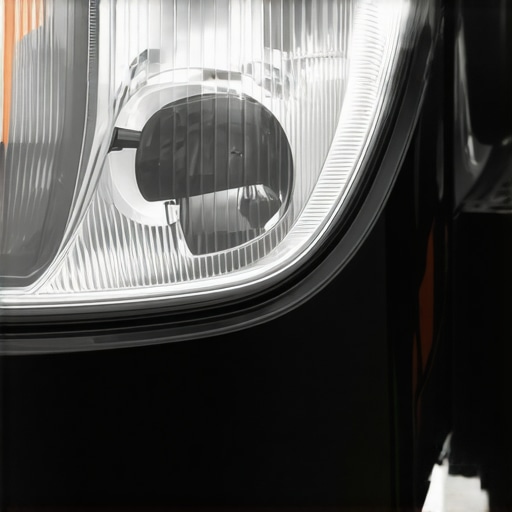
Ever been caught in the middle of a late-night drive, only to realize your headlight housing is hanging slightly loose or, worse, rattling like a tin can? I know the feeling all too well—it’s that sinking moment when you see a crack or broken tab and think, “There goes my headlight. Now what?” Over time, those small plastic tabs that hold your headlight together can become brittle and break, often after a minor collision or just through age and exposure to the elements. That realization hit me last winter, right after I scraped by a snowbank, and suddenly, my headlights looked more like a jigsaw puzzle than a sleek, integrated part of my car.
But here’s the truth: you don’t have to fork out big bucks for a whole new headlight assembly or replace the entire housing. Small, broken plastic tabs might seem minor, but they can cause big headaches—water leaks, moisture buildup, misaligned beams, and even electrical issues if they lead to gaps or cracks. The good news? There’s an effective way to repair and reinforce those broken tabs, saving you money and time.
Today, I’ll walk you through the practical steps I used to fix my damaged headlight housing, restoring both its function and appearance. Trust me, this is a job you can tackle yourself, even if you’re not a seasoned mechanic. Before we dive into the how-to, let’s talk about why this repair matters. Properly secured headlight housings are essential for visibility, safety, and keeping your car looking sharp. Plus, well-maintained headlights can improve your night driving and are often a legal requirement.
Have you ever faced a similar headache with headlight damage? If so, keep reading—we’re about to turn that frustrating problem into a manageable DIY fix.
The Hidden Dangers of Broken Headlight Tabs
Prepare Your Tools and Workspace
Gather a flat-head screwdriver, plastic pry tools, Pliers, epoxy glue or plastic welder, sandpaper, and clean cloths. Choose a well-lit area with enough space to access your headlight. Remember, safety is key—wear gloves and protective glasses if needed. I once started this repair on my driveway after a rainy day, and a tidy workspace made the process smoother and less messy.
Remove the Headlight Assembly Carefully
Locate the screws or clips securing the headlight. Use the screwdriver to unscrew or unclip gently—think of it as unlocking a treasure chest without breaking the lock. On my first attempt, I slightly forced a clip, which caused a minor crack; patience is crucial. Once loose, carefully pull the assembly out, supporting it from the sides. This exposes the backside where the tabs are located.
Identify and Clean the Broken Tabs
Examine the broken plastic tabs—these are often small and fragile, like chicken bones. Use your sandpaper to lightly roughen the edges around the broken area; this promotes better adhesion. Clean with a cloth to remove dust and grease, ensuring the epoxy bonds firmly. I learned that skipping this cleaning step resulted in a weak repair, making the fix short-lived.
Reinforce and Rebuild the Tabs
Mix epoxy glue according to the instructions, or use a plastic welder if available. Apply the adhesive to the broken tab, pressing it into shape to match the original contour. Use clamps or tape to hold it in position until cured—think of it as setting a broken bone with a splint. During my repair, I used a small clamp to keep the tab aligned; it took about an hour to set properly. For larger cracks or missing material, consider adding a small piece of plastic or fiberglass mesh for added reinforcement.
Allow Proper Curing Time and Reinstall
Let the repaired tabs cure fully, typically 24 hours for epoxy. Avoid any stress or movement during this time. Once hardened, reattach the headlight assembly by aligning it carefully and securing the screws or clips back in place. Tighten gradually to prevent stress on the new tabs, much like threading a bolt—overtightening can cause further damage. After reassembly, test the headlight to confirm stability and proper operation.
Additional Tips for Long-Term Durability
To prevent future breakage, apply a thin layer of silicone or rubber sealant over the repaired areas to add flexibility and water resistance. Regularly check the headlight housing for cracks or looseness, especially after rough roads or minor collisions. I also recommend reviewing auto repair tips to maintain your car’s overall health and avoid related issues.
While many car owners believe they understand basic maintenance, there are nuanced misconceptions that can lead to costly mistakes. One common myth is that sticking to manufacturer-recommended intervals is always sufficient; in reality, driving habits and environmental factors often require more personalized schedules. For instance, aggressive driving or frequent short trips can accelerate wear, meaning your vehicle may need attention sooner than the standard timeline. Relying solely on dashboard warning lights without understanding their triggers might cause you to overlook underlying issues—some faults, such as faulty sensors, can send false alerts, misleading you into unnecessary repairs.
How can you differentiate between genuine warning signs and false positives in vehicle diagnostics?
Experts suggest combining visual inspections with diagnostic scans from reputable sources to avoid unnecessary or missed repairs. Overlooking specific component relationships can also cause problems. For example, a faulty gas cap may trigger transmission warning lights, but many skip checking simple fixes before diving into expensive repairs. Educational resources like auto repair guides emphasize understanding these hidden links to save time and money. Moreover, trusting in quick fixes like stop-leak additives without deep understanding often results in incomplete or temporary solutions, especially with critical systems like transmissions. Recognizing the importance of thorough diagnostics and proper maintenance routines is key to long-term vehicle health. The assumption that all repairs are equal or that DIY shortcuts can replace professional evaluations leads to ongoing issues and potential safety hazards. For example, a misdiagnosed brake issue might seem minor but can turn dangerous if not addressed correctly—see this article for detailed insights. Trusting your mechanic’s expertise, combined with understanding your vehicle’s unique needs, enhances reliability and safety. Are you aware of how interconnected your vehicle systems truly are? Digging beneath surface-level fixes often reveals overlooked causes, which can be documented in comprehensive guides like restoration strategies. Never underestimate the value of regular, targeted inspections to prevent cascading failures later. Have you ever fallen into this trap? Let me know in the comments.Maintaining your vehicle’s longevity and performance hinges on having the right tools at your fingertips. Personally, I rely on high-quality equipment that offers precision, durability, and ease of use. For instance, a digital torque wrench has become indispensable in my toolkit; it ensures I tighten bolts and nuts to manufacturer specifications, preventing over-tightening or under-tightening, which can lead to future issues. Investing in a reputable brand like Snap-On or Tekton provides not only accuracy but also peace of mind during critical repairs.
Alongside a torque wrench, a versatile multimeter is vital for diagnosing electrical problems. I favor the Fluke 115 Dual-Mode Multimeter because of its reliability and clear display, which simplifies testing sensors, fuses, and wiring harnesses. Accurate diagnostics save time and prevent unnecessary part replacements—saving you money in the long run.
For moments when a component needs a quick boost, a cordless impact wrench comes in handy. I prefer the Milwaukee M18 Fuel, as it combines power with portability, making tasks like removing stubborn lug nuts or suspension bolts much easier. Having a well-stocked toolkit also means I can perform routine maintenance, such as changing oil, replacing filters, or inspecting brakes, without waiting for professional help.
What about software? For modern vehicles, diagnostic scanners are game-changers. I recommend the Autel MaxiScan MS309; it supports a wide range of OBD-II codes and provides real-time data. This tool helps identify issues early, especially with complex systems like transmission or ABS, preventing minor problems from escalating.
Looking ahead, the trend in auto repair points toward integrated diagnostic systems and smart tools that connect via Bluetooth to smartphones or tablets. These advancements will make troubleshooting faster and more precise, even for the everyday DIY enthusiast.
**How can I keep my tools in top shape over time?** Regularly cleaning and oiling mechanical parts, calibrating electronic devices, and storing tools in a dry, organized space extend their lifespan and ensure accuracy when needed most. Using high-quality tools and software not only improves repair quality but also boosts safety, reducing the risk of tool failure during critical jobs.
Remember, a well-maintained toolkit is the backbone of dependable vehicle repairs. Try upgrading your impact wrench or investing in a reliable diagnostic scanner today—taking these steps can make long-term maintenance more manageable and effective. For more insights on sustainable vehicle upkeep, explore our comprehensive auto repair guide.
What I Wish I Knew About Headlight Repairs Early On
One of the toughest lessons I learned was the importance of patience and precise diagnostics when fixing headlight housings. Rushing through without thoroughly cleaning or aligning parts often led to repeat failures, costing me more time and money. Now, I realize that understanding the intricacies of plastic bonding and reinforcement is crucial—something I discovered through trial, error, and lots of research.
Another insight was seeing how seemingly minor repairs, like reattaching a broken tab, can have a ripple effect on safety and vehicle longevity. Neglecting small issues allows moisture, dirt, and corrosion to compromise other components, which eventually leads to bigger, costlier repairs. Recognizing this interconnectedness has changed my maintenance mindset entirely.
Additionally, I underestimated the value of quality tools. Using inexpensive epoxy or makeshift solutions only delayed the repair process and sometimes worsened the damage. Investing in reliable adhesives and diagnostic tools like the Fluke multimeter or a torque wrench has been a game-changer—not just for repairs but for peace of mind.
Why I Recommend Tools and Resources That Changed My Repairs
- AutoTech Master Repair Kit: This comprehensive set includes precision screwdrivers, plastic pry tools, and even a portable LED work light. It’s helped me access tight spaces and work more accurately, reducing the risk of additional damage.
- The Ultimate Auto Repair Guide: A well-crafted resource that breaks down complex procedures into manageable steps. It’s a go-to for troubleshooting and understanding vehicle systems beyond basic knowledge.
- Digital Torque Wrench from Hart Tool: Ensures I tighten bolts to manufacturer specifications, preventing future looser connections that could cause headlight misalignments or leaks.
- OBD-II Diagnostic Scanner: The Autel MaxiScan MS309 helps identify hidden issues early—saving my time and preventing unnecessary repairs. It’s become part of my essential toolkit.
Your Next Challenge Awaits: Embrace the Repair Journey
Remember, every repair, big or small, is an opportunity to learn and improve your skills. Turning a headlight housing fix into a chance to master DIY auto repair builds confidence and saves money—plus, it makes you more attuned to your vehicle’s needs. Every successful repair is a victory that adds up, leading to a more reliable and safe driving experience. Don’t shy away from trying repairs yourself; the satisfaction of restoring your car can be truly empowering.
Are you ready to tackle your next repair with newfound confidence? Share your experiences or questions below—I’d love to hear how you approach vehicle maintenance and DIY fixes!