
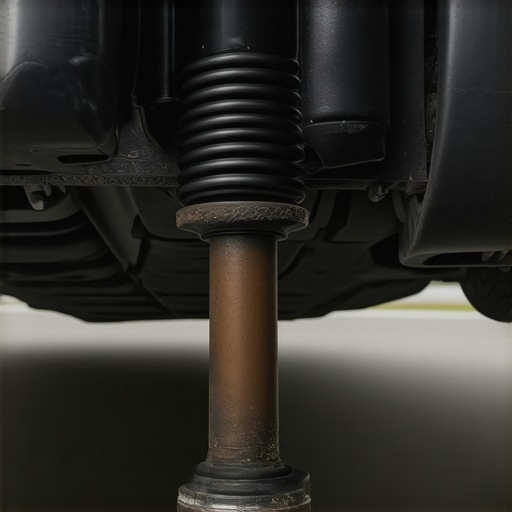
Ever been cruising down the highway, only to hear a sudden thump or feel an unsettling clunk? That stomach-drop moment when you realize your car might be in serious trouble. I remember one particular Saturday, thinking I was just going for a quick coffee run, only to end up stranded because my axle gave out unexpectedly. Turns out, a tiny, often overlooked part—the CV boot—had been leaking slowly for months. That lightbulb moment made me realize how critical it is to spot signs of a failing CV boot before disaster strikes.
Why catching a leaking CV boot early can save you a fortune—and your day
Many car owners don’t realize that a leaking CV (constant velocity) boot doesn’t just cause an annoying mess under your vehicle—it hides a serious threat to your drivetrain. If left unchecked, a torn or leaking CV boot can lead to complete axle failure. That’s costly to fix and can leave you stranded miles from home. Early detection isn’t just about saving money; it’s about avoiding inconvenient breakdowns and dangerous situations on the road.
Is your suspicion just in your head or is that leaking CV boot really worth fearing?
Honestly, I once ignored a small greasy stain near my wheel and brushed it off as routine. Big mistake. Along the way, I learned that many car owners fall into the trap of diagnosing themselves incorrectly or waiting too long. I made that early mistake, and it cost me time, money, and a lot of stress. That’s why I recommend paying attention to the clues your car gives you—like a musty smell inside the vehicle or unusual noises during turns. Spotting these early signs can prevent your axle from breaking and save you a huge headache.
If you’re unsure whether your CV boot might be leaking, don’t wait for the big failure. Regular maintenance and inspections are your best friends. For a comprehensive guide on how to keep your vehicle in top shape, check out Essential Car Service Checks. And if you’re ready to get a professional opinion or need assistance, don’t hesitate to reach out.
In the next section, I’ll walk you through the specific signs that indicate your CV boot is teetering on the edge of failure—so you can catch it before the axle snaps and leaves you stranded.
Start with a Visual Inspection of Your CV Boot
Park your car on a level surface, engage the parking brake, and turn off the engine. Before diving under the vehicle, wear gloves and safety glasses. Jack up the car using a reliable jack, and secure it with jack stands. Locate the CV axle, which connects your wheel hub to the transmission, and examine the rubber boot covering the joint. Look for tears, cracks, or grease splatters indicating a leak. I once noticed a small tear on my CV boot while inspecting my vehicle’s undercarriage, which prompted me to act before more severe damage occurred.
Identify Signs of Damage Beyond Visual Clues
If the boot looks okay but you suspect a leak, check for excess grease around the wheel area or a clicking noise during turns—common signs of CV joint issues. A greasy stain near the wheel well can hint at a torn boot allowing grease to escape. During a routine check, I detected a faint grease trail that pointed me toward the boot needing replacement.
Remove and Prepare the Damaged CV Boot
Start by removing the wheel lug nuts and taking off the wheel. Then, locate the CV joint and unscrew the clamp or clip holding the boot in place. Carefully slide the boot back from the joint, being cautious not to damage the joint itself. Clean the joint with a rag to remove old grease and debris. Remember, applying too much force can dislodge the joint or damage the axle—gentle handling is key. I learned this lesson the hard way when I slightly bent the axle due to excessive pressure during disassembly.
Clean and Inspect the Joint for Damage
After removing the boot, thoroughly inspect the CV joint’s bearing and spline for wear, corrosion, or damage. Rot or excessive play indicates the need for replacement of the joint itself, not just the boot. A clean, smooth joint means you’re ready for the next step.
Replacing the Boot and Reassembling
Apply fresh grease compatible with CV joints into the new boot. Make sure to fill the boot adequately but avoid overpacking. Slide the new boot onto the joint, ensuring it fits snugly over the spline. Secure the boot with new clamps or clips, tightening them properly to prevent leaks. Double-check the fastening and that the boot is seated well. During my first attempt, I mistakenly used the wrong clamps, which caused a grease leak, emphasizing the importance of proper securing.
Final Checks Before Driving
Reinstall the wheel, tighten the lug nuts to the manufacturer’s torque specifications, and lower the vehicle to the ground. Spin the wheel gently and listen for unusual sounds. Check for leaks around the boot and ensure everything is tightly secured. If you’re unsure or uncomfortable performing this repair, consider contacting professionals through Collision Renew. Regular inspections can prevent future costly repairs. For a comprehensive overview of maintaining your vehicle, visit Essential Car Service Checks.
Auto repair is often shrouded in misconceptions that can lead owners astray, causing costly damages or premature component failures. One common myth is the belief that all mechanics are interchangeable, but in reality, many shops lack specialization in critical areas like transmissions or brake systems. Relying on generic or inexperienced technicians can result in overlooked nuances that compromise your vehicle’s safety and longevity.
Another misunderstanding is that waiting until warning lights illuminate is sufficient. While dashboard indicators are vital, many issues—such as slowly leaking fluid or subtle vibrations—develop gradually and aren’t immediately detectable through alerts. Expert professionals advise routine inspections that spot early signs of wear, which might be covered in our essential car service checks. Skipping these can turn manageable issues into major repairs.
Are all auto repairs created equal, or does experience really matter? Let’s dig into the nuances.
Many car owners believe that a low price point guarantees a good deal, but the truth is, experienced specialists often charge more because they understand the complexities involved—especially with advanced systems like modern transmissions or ABS modules. Expecting cheap fixes often results in recurring problems or insufficient repairs, leading to higher costs in the long run. A common trap is misdiagnosing transmission slipping as a simple fluid change, when in fact, internal components may need detailed inspection or rebuilding. For insight into maintaining your drivetrain, check out top transmission repair tips.
Moreover, overestimating the durability of repairs without understanding OEM specifications can cause ongoing issues. For instance, using generic brake pads might save money upfront but can lead to uneven wear or reduced stopping power. This underscores the importance of trusting professionals who follow manufacturer guidelines and employ genuine parts for brake service.
What hidden pitfalls lurk behind seemingly simple maintenance tasks?
A critical mistake many make is neglecting the importance of proper fluid levels and quality. For example, checking transmission fluid levels without understanding the right procedure can give false reassurance or cause unnecessary concern. According to experts, the level and condition of transmission fluid are vital indicators of internal health, and incorrect checks may overlook early signs of failure. Read more about this in why your transmission fluid level varies.
Similarly, routine brake inspections that only focus on pad wear ignore other critical components like rotors, calipers, or brake lines. Overlooking these nuances can result in reduced braking effectiveness or system failure. Regular, comprehensive diagnostics ensure safety and save money—don’t rely solely on visual cues.
In summary, understanding the intricacies and pitfalls of auto repair requires a nuanced approach—one that recognizes the value of experience, thorough inspections, and OEM standards. Only then can vehicle owners truly protect their investments and ensure safety on the road. Have you ever fallen into this trap? Let me know in the comments.
Equip Yourself for Reliable Auto Care
Maintaining your vehicle over the long term requires more than just basic knowledge; it demands the right tools and a systematic approach. I personally rely on a few specialized items that make inspections and minor repairs manageable at home, saving time and money in the process.
First, a high-quality digital multimeter is essential. I use the Fluke 87V, renowned for its precision and durability, especially when diagnosing electrical issues like alternator faults or battery draining problems. This tool allows me to quickly verify voltage levels and check the integrity of sensors, which is critical in identifying problems early—before they escalate into costly repairs.
For inspecting fluid levels and quality, I favor a temperature-sensitive fluorescence dye tester. It enables me to detect leaks in transmission or coolant systems with remarkable accuracy, often revealing slow leaks that would otherwise go unnoticed. Regularly using such tools aligns with the advice found in Essential Car Service Checks and ensures a proactive maintenance approach.
When it comes to physical inspections, a sturdy creeper with a comfortable padded surface makes working under the vehicle less strenuous. I opt for a model with a built-in tool tray—keeps my wrenches and screwdrivers within reach, reducing the risk of dropping parts or losing small components during repairs.
In addition, a torque wrench is indispensable. I recommend a digital torque wrench with preset settings, like the Tekton 1/2-Inch Drive Digital Torque Wrench, which ensures that bolts—whether for brakes, wheels, or suspension components—are tightened to manufacturer specifications, preventing over-tightening or under-tightening that could compromise safety.
For software diagnostics, I utilize an OBD-II scanner such as the BlueDriver Bluetooth Professional Scan Tool. It connects seamlessly to my smartphone, providing real-time data on engine performance and fault codes. This approach aligns with industry trends pushing towards more digital, data-driven maintenance routines. In the future, I predict that vehicle diagnostics will increasingly incorporate AI-driven analysis for even more precise diagnostics.
How do I maintain tools and diagnostics over time? The key is regular calibration and cleaning. For example, calibration of my torque wrench every six months ensures accuracy, which is vital for safety-critical repairs. Proper storage of tools in a dedicated toolbox prevents corrosion and damage. I also keep a maintenance log to track calibration dates, repairs, and upgrades—this habit keeps my toolkit reliable and ready for any job.
I strongly recommend trying out a digital multimeter and an OBD-II scanner if you haven’t yet. These tools provide immediate insight into your vehicle’s health, empowering you to catch issues early, much like the experts at top transmission repair tips. Investing in quality equipment pays off in longevity and safety. Don’t forget to regularly check your tools’ calibration and perform maintenance—trust me, it’s worth the extra effort.
Over the years, I’ve learned that the real value in auto repair doesn’t lie just in quick fixes but in understanding the small details that prevent big problems. My biggest eye-opener was discovering that a minor, overlooked tear in my CV boot could have led to costly axle failure. That lesson taught me to trust my instincts and prioritize early detection—saving me money and unnecessary stress down the line.
What I Wish I Knew When Tackling CV Boot Issues
- Don’t Ignore the Little Signs: Grease splatters or a faint smell can be your car’s way of telling you something’s wrong before it becomes a disaster. Paying close attention to these details can make all the difference and is a habit I highly recommend.
- Routine Checks Are Lifelines: Regular inspections of your CV boots and joints aren’t just maintenance—they’re insurance against unexpected breakdowns. I now schedule simple visual checks every few months, which have collectively saved me from major repairs.
- Tools Give You Power: Having a few quality tools like a digital multimeter and a reliable creeper has transformed the way I care for my vehicle. They allow me to perform basic diagnostics and spot issues before professional intervention is needed—empowering me to stay ahead of problems.
Tools and Resources That Make a Difference
- Essential Car Service Checks provides a comprehensive guide on maintaining all critical aspects of your vehicle, including CV boots. It’s my go-to reference for proactive care ideas.
- Reaching out to professionals when in doubt has saved me from making costly mistakes. An expert opinion ensures your repairs are done correctly and safely.
- Top transmission repair tips and other specialized guides help me understand the nuanced aspects of vehicle health that owners often overlook, reinforcing my confidence during DIY inspections.
Seize the Moment and Keep Moving Forward
Understanding the intricacies of CV boot maintenance has been my key to safer, more reliable driving. I encourage you to trust your observations, equip yourself with the right tools, and never hesitate to seek expert help when needed. Your car is more than just a vehicle; it’s a trusted companion on your journeys. Start paying closer attention today, and you’ll enjoy smoother rides and fewer surprises on the road.