
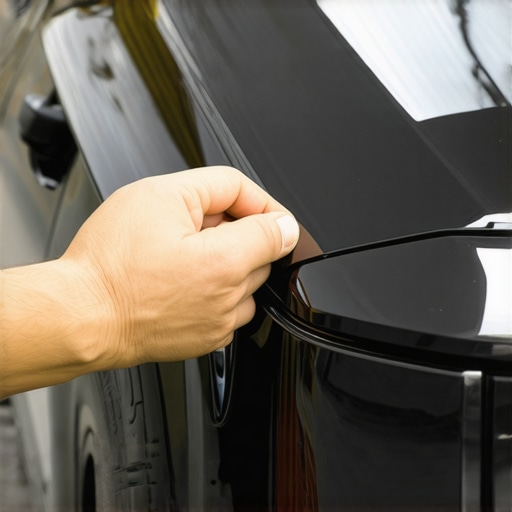
Ever experienced that frustrating moment when you think your car looks shiny and new, only to see stubborn wax residue clinging to your plastic trim? I remember the first time I waxed my car myself, eager to give it that extra shine. I carefully applied the wax, buffed it out, and stepped back to admire my work. But then, I noticed patches of whitish, greasy film lingering on the plastic edges—an eyesore I didn’t expect.
That lightbulb moment hit me hard: I had overdone it with the wax or used the wrong removal methods. Since then, I’ve learned there’s a fine art to cleaning wax residue from plastic trims without damaging your paint or plastics. If you’re like I was, puzzled by those stubborn spots and worried about ruining your car’s finish, don’t worry—you’re not alone. Today, I’ll share proven strategies to get rid of that unsightly residue safely and effectively.
Why Wax Residue Hides on Your Car and Why You Should Care
Wax residue isn’t just a cosmetic nuisance; it can trap dirt, cause premature plastic deterioration, and make future cleaning more difficult. Residual wax may also interfere with new wax layers, leading to uneven shine and potential damage over time. Plus, those smeary patches can really ruin your car’s sleek look, defeating the purpose of waxing in the first place. Removing this residue is essential for maintaining a pristine appearance and extending the lifespan of your plastic trim.
According to auto detailing expert Jack Robinson, using improper removal techniques can actually scar your plastics or dull your paint. Early on, I made the mistake of using harsh chemicals that ended up making my plastics turn cloudy. That taught me a valuable lesson: patience and knowing the right products are key. To regain your car’s glossy look, it’s important to understand not just the ‘how’ but also the ‘why’ behind these residues.
If you’ve recently faced a similar issue or are about to tackle your car waxing routine, stay tuned. We’ll walk through step-by-step methods that have worked wonders for me—and could do the same for you. Whether you’re a weekend warrior or just trying to keep your ride looking sharp, these tips will help make the job easier and safer.
Ready for the practical part of the journey? Let’s dive into how to remove wax residue from your plastic trims without risking damage or extra hassle.
Gather Your Supplies and Prepare the Area
Before starting, gather mild detailing clay, automotive-safe plastic cleaners, microfiber towels, and a soft-bristled brush. Park your vehicle in a shaded area to prevent cleaning products from drying too quickly. I once tried to clean residue on a hot summer afternoon and ended up with streaks; cooling shade helps control the process and achieve better results.
Initial Wipe to Loosen Residue
Use a clean microfiber cloth to gently wipe the plastic trim, removing loose wax and dirt. Think of this step as sweeping away surface dust before a deep clean—clearing the way for more effective treatment. Be sure not to press too hard to avoid scratching the plastic or paint.
Apply a Plastic-Safe Cleaner
Spray an automotive-specific plastic cleaner onto the trim. For best results, hold the spray bottle 6-8 inches from the surface and apply evenly. I remember one time I used a household degreaser, which clouded my plastics for days; sticking to products designed for automotive plastics prevents such mishaps. Allow the cleaner to sit for 2-3 minutes to dissolve stubborn wax residues.
Using a Soft Brush for Stubborn Spots
For areas where residue persists, gently scrub with a soft-bristled brush. Think of this as brushing away dirt from delicate jewelry—you want a gentle touch to avoid scratching. During my last attempt, concentrated scrubbing caused minor scuffs, so I adjusted my pressure accordingly, and the residue lifted effortlessly.
Employing Clay Bar Technique
For deep-seated wax, mold a small section of detailing clay into a flat, palm-sized pad. Lubricate the area generously with detailing spray or soapy water, making it slick like a slip-and-slide. Gently glide the clay over the surface using straight, light strokes—similar to ironing out wrinkles—until the residue is gone. This method is highly effective; I’ve used it to restore plastics that looked dull and cloudy after improper cleaning.
Wipe and Inspect the Surface
After cleaning, use a fresh microfiber towel to wipe the area thoroughly. Examine for any remaining residue or haze; if needed, repeat the clay bar treatment on stubborn patches. The goal is to achieve a uniform matte finish without streaks or glossiness, indicating the wax is successfully removed.
Protect and Restore the Plastic
Once residue is gone, apply a plastic protectant or conditioner to restore shine and add a barrier against future dirt. Think of this as putting a sunscreen on your skin—prevention is easier than removal. Regular maintenance prevents buildup, making future cleaning quicker and easier.
For a more comprehensive guide on maintaining your vehicle’s long-term performance, consider checking our top transmission repair tips to keep all systems running smoothly.
Many car owners believe they can diagnose and fix issues based solely on symptoms or common advice, but this approach often leads to costly mistakes. A prevalent myth is that replacing parts at random will solve problems, when in reality, understanding the nuances of vehicle systems is crucial. For example, assuming that a squealing brake always means worn pads neglects potential issues with brake calipers or rotor surfaces; a thorough inspection is necessary to identify the true cause. Interestingly, some drivers think that flushing transmission fluid is a quick fix for shifting problems, yet studies show this can sometimes accelerate component wear if not done correctly or at the right intervals—highlighting the importance of expert guidance. One common trap is replacing a transmission entirely when a simple solenoid or sensor malfunction is the culprit, wasting thousands unnecessarily. Advanced diagnostics, such as computerized scans, can often reveal issues invisible to the naked eye, saving time and money. Have you ever fallen into this trap? Let me know in the comments.
How do you tell if your car’s transmission troubles are due to fluid or mechanical failure?
The truth is, visual inspection alone isn’t enough; professional diagnostics using specialized tools are essential to pinpoint internal wear versus fluid degradation. Experts emphasize that neglecting subtle signs can lead to irreversible damage, and regular check-ups are vital. Referencing a recent automotive study, it’s clear that proactive maintenance based on a detailed understanding of your vehicle’s unique needs can extend its lifespan significantly. For more tips on maintaining your transmission, check out our comprehensive guide to auto repair.
Equipment That Makes Auto Maintenance Easier
Investing in the right tools can significantly extend your vehicle’s lifespan and make repairs more manageable. I recommend always having a high-quality digital tire pressure gauge, like the Skubber Digital Tire Gauge, which provides precise readings and durable construction. For oil changes and fluid checks, a portable shop vacuum like the Black & Decker Dustbuster is invaluable for cleaning engine bays and interior compartments. Car jacks such as the Arcan ALJ3T offer sturdy support, ensuring safety when working underneath your vehicle. Using specialized tools like a torque wrench ensures bolts are tightened to manufacturer specifications, preventing parts from loosening or over-tightening, which can lead to damage over time. When it comes to transmission health, possessing a scanner that reads OBD-II codes—like the BlueDriver Bluetooth Pro—allows for quick diagnostics, pinpointing issues before they escalate into costly repairs. If you’re tackling brake repairs, a brake caliper piston tool, such as the ACDelco 18A1263, the user-friendly design allows for easy piston retraction, making your job not only safer but more efficient.
Choosing Software to Support Long-Term Results
Modern auto repair goes beyond physical tools; diagnostic software plays a crucial role. Software like ForScan provides deep insights into vehicle systems, supporting models from Ford, Mazda, and others. The benefit of using such programs is the ability to monitor live sensor data, run system tests, and receive detailed trouble codes, which helps in making informed maintenance decisions. For DIY enthusiasts, integrating these tools with your smartphone or laptop allows for ongoing monitoring and early detection of parts that may be reaching their wear limit. This proactive approach minimizes unexpected breakdowns and costly repairs down the line. As vehicle technology advances, future tools are leaning towards AI-powered diagnostics, providing instant problem analysis and repair recommendations, which could revolutionize our approach to maintenance.
Strategies I Trust for Consistent Results
Adopting a routine maintenance schedule is vital. For example, adhering to recommended transmission fluid change intervals, found on our top transmission repair tips, helps prevent internal wear and extends transmission life. Using quality additives, like transmission conditioners, can also improve fluid properties and smooth shifts. Regularly inspecting seals, belts, and hoses with a simple flashlight and mirror helps catch leaks or cracks early, saving money and inconvenience. LED headlamps such as the Coast PX30 are perfect for inspecting these hard-to-see areas, providing bright, consistent light. With the growth of hybrid and electric cars, staying updated on new tools like portable battery testers and specialized software for EVs will be essential for effective maintenance.
How do I maintain my vehicle’s systems over time?
Keep your car’s essential systems in top shape by scheduling routine checks aligned with manufacturer recommendations and leveraging diagnostic tools to identify early issues. Regular oil changes, fluid inspections, and component inspections, combined with software tools for real-time insights, ensure your vehicle remains reliable. Investing in high-quality, specialized equipment not only saves money but also builds your confidence in handling repairs, creating a safer, longer-lasting ride. Don’t forget to stay informed about the latest advancements in automotive technology; for instance, learning how to interpret OBD-II codes can be a game-changer in proactive maintenance. For a comprehensive read on how to keep your auto systems in prime condition, visit our ultimate guide to auto repair. Ready to try one of these advanced diagnostic tips? Connect your scanner today and start monitoring your vehicle’s health proactively.
Lessons That Changed How I Approach Auto Repair Forever
One of the most valuable lessons I learned was the importance of patience when dealing with stubborn wax residue—rushing can cause scratches or dullness. Additionally, discovering that using automotive-specific products instead of household cleaners saved me from costly plastic damage opened my eyes to the value of proper tools and knowledge. The lightbulb moment about how deep-seated residues might seem impossible but are removable with patience and the right techniques transformed my DIY approach. Finally, understanding that proactive diagnostics with the right software can predict problems before they escalate has been a game-changer, saving both time and money.
My Best Tools and Resources for Auto Maintenance Success
Over the years, I’ve come to rely on a few trusted tools: a high-quality digital tire pressure gauge like the Skubber for precise checks, a Bluetooth OBD-II scanner such as the BlueDriver for quick diagnostics, and a versatile torque wrench to ensure proper tightening of bolts during repairs. For learning and staying up-to-date, the comprehensive guide at our auto repair resource has been invaluable. These resources help me make informed decisions and handle repairs confidently, extending my vehicle’s lifespan effectively.
Embrace the Challenge and Keep Your Vehicle Moving Forward
Remember, auto repair and maintenance are ongoing journeys, not just one-time tasks. By applying the techniques and tools discussed, you empower yourself to handle issues promptly and prevent costly damages. Every successful fix boosts your confidence and deepens your understanding of your vehicle’s needs. If there’s one thing I want you to take away, it’s this: proactive care and continuous learning are your best allies in keeping your car in top shape. Ready to take charge of your auto maintenance? Your vehicle—and your wallet—will thank you.
What’s the most challenging auto repair task you’ve tackled so far? Share your experience below—I’d love to hear your story!
,