
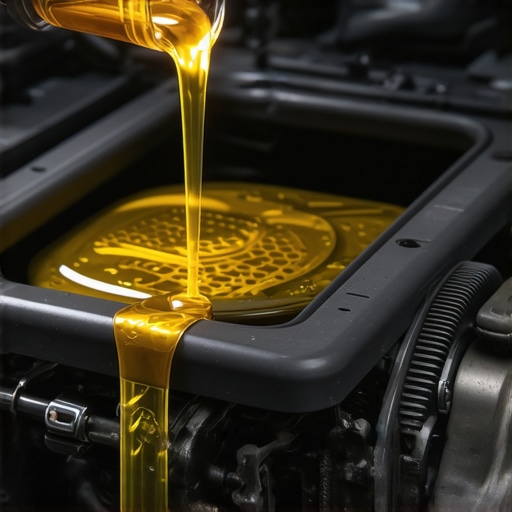
I’ll never forget the day I noticed a small puddle forming beneath my car after a short drive. At first, I thought it was just condensation or some spilled fluid. But as days went by, that tiny leak seemed to grow, and suddenly, I was faced with the harsh reality of a leak I couldn’t ignore. It was a sinking feeling — questioning whether my trusted vehicle was falling apart and if I was just throwing money at quick fixes that wouldn’t last.
Why Oil Additives Might Not Be the Magic Solution You Expect
Like many car owners, I was tempted by those flashy claims on oil additive bottles promising to seal leaks instantly. But my experience taught me that these products are not always the miracle cures they appear to be. In fact, I learned that relying solely on oil additives to stop leaks can sometimes do more harm than good, especially if you don’t understand the underlying cause of your leak.
Today, I’ll share honest insights from my journey — peeling back the curtain on whether oil additives really deliver on their promises, and how you can approach fixing leaks with confidence and knowledge.
Is the Hype About Oil Additives Actually Worth It?
Early on, I made the mistake of applying a popular oil additive I found at the auto store without doing proper research. Turns out, many of these products are designed to temporarily swell or plug small leaks. But if the leak is caused by a cracked seal or worn gasket, these additives won’t fix the root problem. In some cases, they might just clog your engine or reduce oil flow, leading to bigger issues down the line.
I’ve since learned that a permanent fix involves identifying the actual cause of the leak and addressing it properly. For example, a consultation with a trusted mechanic or a detailed inspection can save you from unnecessary expenses and future breakdowns. Want to know more about how to find a reliable repair shop? Check out this guide.
Identify the Leak Source First
Start by cleaning the engine area around the leak with a degreaser. Then, observe when and where the leak occurs—whether during operation or after parking. Use UV dye or a flashlight to trace oil or coolant leaks accurately. I once used a UV leak detector kit to spot a stubborn transmission fluid leak, which guided me directly to a failing seal.
Prepare Your Workspace and Tools
Park your vehicle on a flat surface and disconnect the battery for safety. Gather tools such as socket wrenches, screwdrivers, pliers, and a gasket scraper. Having everything within reach prevents unnecessary trips to the garage, saving time. I recommend wearing gloves and eye protection to avoid injury from engine debris.
Drain Fluids and Remove Components
Drain the necessary fluids—oil, coolant, or transmission fluid—based on what seal or gasket you’re replacing. For instance, replacing a valve cover gasket requires draining the engine oil. Loosen and remove components blocking access, like the alternator or intake manifold, carefully following your vehicle’s service manual. I once had to remove the intake to access a rear main seal; patience was key to avoid damaging delicate parts.
Extract the Damaged Seal or Gasket
Use a gasket scraper or plastic pry tools to gently lift the old gasket or seal. Avoid gouging the mating surfaces, as this can cause future leaks. For stubborn seals, applying heat with a heat gun can soften the rubber for easier removal. I once heated a rear crankshaft seal to facilitate removal, which prevented damage to the crankshaft.
Clean the Surface Thoroughly
Scrape off residue, old gasket material, and clean the surface with brake cleaner or solvent. A clean surface ensures a good seal for the new gasket or seal. Inspect for scratches or warping; if surfaces are compromised, consider resurfacing or replacing the part. Neglecting this step led me to leak issues even after new seals—precision is essential.
Install the New Seal or Gasket
Apply a thin layer of gasket sealant if recommended by the manufacturer. Carefully place the new gasket or seal, aligning it precisely with bolt holes and surface contours. Tighten bolts in a criss-cross pattern to evenly distribute pressure, preventing leaks. I learned to torque bolts gradually to specifications—over-tightening can crack parts, under-tightening causes leaks.
Reassemble and Refill Fluids
Reinstall any removed components, ensuring all bolts are torqued correctly. Refill fluids to manufacturer-recommended levels and check for leaks during a test run. Keep a close eye on the area where the repair was made for a few miles. A leak I once overlooked persisted because I didn’t double-check gasket seating; thoroughness pays off.
Final Checks and Maintenance
After test driving, recheck fluid levels and look for signs of leakage. Consult your vehicle’s service manual for any specific procedures related to your model. Regular inspections can catch small leaks early, saving you from costly repairs later. For more detailed maintenance practices, explore essential car service checks.
Many car owners believe that all auto repair shops, including CollisionRenew, operate under the same standards and practices. However, this is a dangerous misconception that can lead to costly mistakes. One of the most prevalent myths is the idea that quick fixes like sealants or temporary repairs are sufficient for long-term vehicle health. In reality, relying on these shortcuts often masks underlying issues, causing more damage over time. As I’ve learned through extensive experience, genuine repairs require diagnosing the root cause—whether it’s transmission trouble or brake system wear—and applying comprehensive solutions. This attention to detail distinguishes reputable shops from those that prioritize speed over quality, ultimately saving you money and enhancing safety. Beware of shops that push unnecessary services or avoid transparency; always ask for detailed diagnostics and written estimates.
What Advanced Signs Indicate Your Vehicle Needs Specialized Attention?
Recognizing subtle symptoms such as delayed shifting, unusual noises, or inconsistent brake responses can prevent extensive damage. These signs often reveal underlying problems that general inspections might overlook. Experts advise that regular, thorough maintenance checks—guided by reliable sources like this guide—are essential in catching such issues early. Additionally, understanding factory-recommended service intervals and specific vehicle quirks helps avoid the trap of neglecting minor problems until they escalate. Many vehicle owners underestimate how nuanced effective repairs can be, leading to premature part replacements or complete system failures. In practice, an informed approach coupled with a trusted technician significantly extends your vehicle’s lifespan. For comprehensive transmission maintenance tips, see these expert strategies. Never assume that a repair is simple or that all shops adhere to the same standards. Doing your homework and asking the right questions ensures that your car receives the quality service it deserves. Have you ever fallen into this trap? Let me know in the comments.
Keeping It Running: Tools I Recommend for Auto Care
Maintaining your vehicle over time requires not just knowledge but also having the right equipment on hand. Quality tools make all the difference, especially when you’re tackling tasks like transmission fluid changes or brake system inspections. I personally swear by a reliable digital torque wrench for bolt tightening—precise torque prevents leaks or damage and ensures safety. For example, when replacing a gasket, tightening bolts to manufacturer specifications is crucial—a misstep here can lead to costly leaks and further repairs.
Another indispensable tool is a UV leak detection kit. This device allows you to quickly identify elusive leaks, whether oil, coolant, or transmission fluid, saving you hours of guesswork. I used one recently to track down a transmission fluid seepage, avoiding unnecessary parts replacement. Coupled with a stethoscope designed for automotive diagnostics, you can listen for abnormal sounds in your engine or transmission. Listening carefully can reveal issues like bearing wear or worn CV joints before they escalate.
Having a high-quality creeper eases access to undercarriage components, reducing discomfort and improving inspection accuracy. I prefer models with adjustable height and padded headrests, which make long sessions less taxing. For fluid exchanges, a syringe-style pump helps precisely add or extract fluids without spills—especially useful for small reservoirs or tight spaces.
What Tools Are Critical for Your Car’s Longevity?
In the future, I predict that automakers will increasingly integrate smart diagnostic tools directly into vehicles, allowing owners to monitor wear and tear via smartphone apps. This shift will empower drivers to perform more proactive maintenance, reducing reliance on costly repairs. For now, equipping yourself with the right tools—like a vehicle inspection kit—is vital to keep your car in top shape.
To truly master long-term maintenance, I recommend mastering a few DIY repair strategies and keeping your tools organized in a dedicated kit. Regularly incorporating routine checks, guided by reputable sources, ensures you catch issues before they develop into expensive problems. Don’t hesitate to try out a UV leak detector or a digital torque wrench today—these investments will save you money and extend your vehicle’s lifespan significantly.
Over the years, I’ve come to realize that trustworthy auto repair is about more than just quick fixes—it’s about building a relationship with your vehicle through knowledge and patience. One lightbulb moment was discovering how vital it is to develop a genuine understanding of your car’s unique needs, rather than blindly following generic advice. Instead of relying solely on one-size-fits-all solutions, tailored approaches tailored to your vehicle’s history can save you considerable time and money. Additionally, I learned that communication with your repair shop matters immensely; asking questions and understanding the process can prevent misdiagnoses and unnecessary expenses. Lastly, consistently maintaining a detailed repair journal has helped me notice patterns and catch small issues before they become costly disasters, ensuring my vehicle’s longevity and performance.” ,