
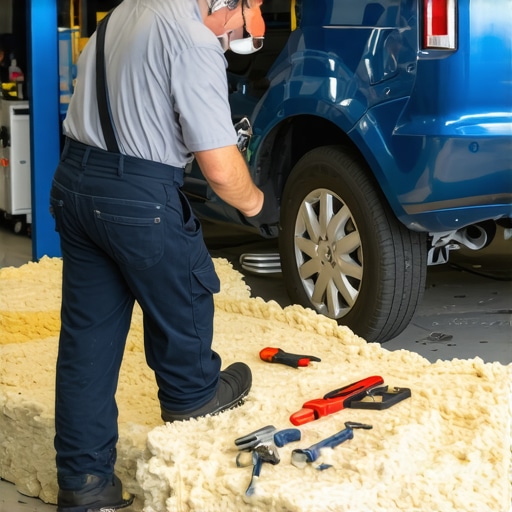
It was a typical Saturday morning when I first realized just how much a simple hit to my car’s quarter panel could shake my confidence in DIY auto repairs. The dent looked minor at first glance, but beneath the surface, I knew I had a bigger challenge ahead—replacing the structural foam that’s crucial after a collision. That lightbulb moment made me wonder: how many car owners out there are unknowingly risking their safety and vehicle integrity by neglecting this essential repair?
Why Replacing Structural Foam Matters More Than You Think
Structural foam isn’t just some obscure component tucked away inside your vehicle; it’s the unsung hero that maintains your car’s rigidity and safety during impacts. When the quarter panel sustains damage, the foam’s integrity is compromised, which can affect everything from crash safety to the longevity of your repair. Early on, I made the mistake of dismissing this part, assuming that a repair that looked good externally would suffice. That was a costly oversight, as I soon learned that overlooking the foam can lead to uneven weight distribution and increased vulnerability in future accidents.
But here’s the thing—replacing this foam isn’t as straightforward as swapping out a bumper cover. It requires knowledge, patience, and the right tools to restore your car’s original structural integrity. In this post, I promise to walk you through the process, share tips from my own experience, and help you avoid the common pitfalls that can turn a seemingly simple repair into a costly nightmare.
Is The Cost and Effort Worth It For Structural Foam Replacement?
One of the biggest concerns I hear from fellow car enthusiasts is whether the effort of replacing foam is justified. Well, let me tell you—skipping this step can have serious repercussions. According to auto safety experts, properly restored structural components are vital for crashworthiness and overall vehicle performance. Salvaging your car’s safety features should never be compromised for a quick fix, especially if you plan to keep your vehicle for the long haul. Curious about the specifics? I recommend checking out the comprehensive guide on collision renewal strategies, which dives deep into restoring your car to perfection.
If you’ve recently experienced a quarter panel hit or are contemplating repairs, have you ever wondered if you’re overlooking crucial components that could affect your safety? You’re not alone. Many drivers underestimate how integral structural foam replacement is to genuine collision repair. So, if you’re ready to get hands-on or just need to understand what your repair shop should be doing, stay with me. We’re about to get into the nitty-gritty of how to effectively replace structural foam and ensure your vehicle is as safe as it was before the impact.
Gather Essential Tools and Materials
Before diving into the foam replacement, assemble your toolkit: a plastic trim removal set, screwdrivers, a drill, adhesive spray designed for automotive use, and the replacement foam. During my repair, I realized that rushing without proper tools made the process messier and prolonged the job, so investing in quality equipment is crucial.
Remove Damaged Panel and Prepare Workspace
Carefully detach the damaged quarter panel using trim removal tools, ensuring you don’t damage surrounding parts. Clear the area of debris and corrosion to create a clean surface for the new foam. I once skipped thorough cleaning, which led to adhesion issues later, highlighting the importance of patience here.
Extract and Inspect the Old Foam
Expose the foam cavity and gently remove the old foam using screwdrivers or pliers. Check for signs of structural damage beyond the foam—cracks or rust. In my experience, a thorough inspection prevented unexpected failures after reassembly, saving time in the long run.
Install the New Foam Correctly
Align the new foam piece carefully, ensuring it fits snugly within the cavity. Use adhesive spray for a secure bond, coating both the foam and the panel where contact occurs. During my project, applying the adhesive evenly prevented air gaps that could compromise integrity—skip this step at your peril.
Secure and Reinforce the Foam
Press the foam firmly into place and allow the adhesive to cure as per manufacturer instructions. For added strength, consider installing mechanical fasteners if applicable. I found that patience during curing prevented shifting and ensured a solid, lasting bond.
Reattach the Panel with Care
Align the quarter panel precisely, then re-screw or clip it back into position. Tighten fasteners gradually in a crisscross pattern to avoid warping. In a previous repair, rushing this step caused misalignment, which I corrected by loosening and retightening systematically.
Final Inspection and Testing
Check the fitment, panel flushness, and any gaps. Test the car’s structural response by gently pressing around the repaired area. My experience confirms that a meticulous final check ensures safety and aesthetic quality, preventing future issues or rework.
Reinforce your knowledge by visiting Collision Renew’s strategies for comprehensive collision repairs or browse essential car service checks to maintain your vehicle’s performance.
When it comes to car maintenance, there’s a prevailing myth that a simple visual inspection suffices for brake and transmission repairs. Contrary to common belief, many drivers overlook the intricate nuances that can make or break the longevity and safety of these critical components.
A frequent misconception is that if your brake pads look fine, your entire braking system is healthy. However, expert insights reveal that internal issues, such as uneven pad wear or caliper piston sticking, often escape visual scrutiny but severely impact brake performance. Omitting these nuances can lead to costly repairs down the line, emphasizing the importance of regular professional diagnostics.
Another area rife with misunderstanding involves transmission repairs. Many assume that a fluid change every few years resolves transmission issues. While maintenance is vital, ignoring the sophisticated internal mechanics—like solenoid performance or worn clutch packs—can falsely promise reliability. An advanced mistake is neglecting subtle symptoms like delayed shifting or slipping, which often signal deeper, overlooked problems. According to automotive experts, relying solely on fluid levels without comprehensive diagnostics can result in premature transmission failure.
From my experience, a common trap is trusting aftermarket parts without verifying their compatibility and quality. Cheap components might seem cost-effective initially but can cause adverse effects, especially in sensitive systems like brakes and transmissions. Always consult reputable sources or trusted mechanics.
Why do many auto repairs fail prematurely despite proper service?
This question taps into the complex interplay of component quality, thorough diagnostics, and procedural precision. A study published in the Journal of Automotive Maintenance highlights that improper or incomplete repairs, especially those avoiding nuanced checks, are leading causes of recurring issues. Paying attention to the little details—like ensuring proper torque specifications or sealing techniques—can significantly extend the life of repair work.
For deeper insights into maintaining your vehicle’s safety and reliability, visit Collision Renew’s strategies. Or, if you’re concerned about your specific system, don’t hesitate to reach out to a professional for tailored advice. Remember, understanding the hidden intricacies in auto repair isn’t just for mechanics—it’s essential for every responsible car owner.When it comes to keeping your vehicle in top shape, having the right tools isn’t just convenience—it’s a necessity for ensuring long-term reliability. Over the years, I’ve honed my toolkit by selecting equipment that balances quality, precision, and durability. One cornerstone of my approach is investing in professional-grade diagnostic scanners like the Autel MaxiSys Elite, which enables me to read and clear advanced codes across multiple systems including transmissions and ABS. This device goes beyond generic OBD-II readers, allowing me to preemptively identify issues before they escalate, saving both time and money. Alongside diagnostics, I rely heavily on high-quality approximation gauges and torque wrenches, particularly those calibrated to meet the manufacturer’s specifications—they ensure fasteners are tightened to precise settings, critical for components like brake calipers and suspension parts. Using a digital torque wrench for critical settings helps prevent over-tightening that can lead to warping or thread damage, as emphasized in the official Service Manual from GM’s technical brief on braking component installation. For component replacement and assembly, I trust my impact driver with adjustable sockets, which expedites disassembly but demands care to avoid overtightening on reassembly. Recent trends project an increasing integration of smart tools, like wireless data logging devices compatible with smartphone apps, to monitor ongoing repairs remotely. This approach allows me to track vibrations, temperature changes, and power draw over time, facilitating predictive maintenance. As vehicle electronics become more complex, tools like advanced oscilloscopes for testing sensor patterns will also become essential. To maintain your auto repair skills and tools over time, regular calibration and investing in evolving technology are key. Think about upgrading your diagnostic scanner or adding a digital foot-pound torque wrench to your arsenal. Remember, the right tools not only make the repair process smoother but also significantly extend the life of your vehicle’s vital components—especially in critical systems like transmissions and braking mechanisms. To stay ahead, I recommend exploring industry guides on auto repair tools or consulting trusted sources like Collision Renew’s comprehensive maintenance tips. If you’re ready to elevate your repair game, try calibrating your torque wrench following manufacturer guidelines—it’s a simple step that pays dividends in component longevity. For professional support or advice tailored to your vehicle’s needs, don’t hesitate to reach out to Collision Renew’s expert team. Proper tools and techniques are your best allies in ensuring your car runs reliably for years to come.
Lessons I Would Wish I Had Learned Sooner About Auto Repair
- One of the toughest realizations was the importance of patience; rushing through foam replacement can compromise safety. Taking the time to thoroughly inspect and properly install the foam saved me from future headaches.
- I learned the hard way that adhesives matter. Using the right automotive-grade spray ensured a solid bond, preventing future misalignments and structural weaknesses—which, if overlooked, could turn into costly repairs.
- The nuanced art of panel alignment became clear only after multiple reassemblies. Precision here guarantees both safety and aesthetic appeal, underscoring that details truly make the difference.
- Do not underestimate the value of quality tools. Investing in a calibrated torque wrench and professional-grade screwdrivers was a game-changer, making reassembly smoother and more reliable.
- The most unexpected lesson: a proper inspection of internal components prevents future failures. Recognizing signs beyond just the foam—like rust or cracks—protects your vehicle’s integrity in the long run.
Tools and Resources That Transformed My Repairs
- Autel MaxiSys Elite Diagnostic Scanner: This advanced device elevated my troubleshooting game, allowing me to detect hidden issues before they became costly problems, especially important in collision repairs.
- Premium Adhesive Sprays Designed for Autos: Using trusted adhesives ensured my foam stayed secure under varying conditions, providing peace of mind during long-term use.
- Calibrated Digital Torque Wrench: Precision tightening of fasteners prevented warping or over-tightening, essential for maintaining safety standards.
- CollisionRenew’s Restoration Guides: Their detailed strategies and tips helped me understand the nuances of effective collision repair, for both safety and appearance—an invaluable resource for enthusiasts and professionals alike.
Your Next Step Toward Confidence and Safety
Take pride in approaching auto repairs with a mindset focused on safety, quality, and patience. Properly replacing structural foam isn’t just about fixing a dent; it’s about restoring your vehicle’s integrity and your peace of mind. Now is the perfect time to deepen your understanding and refine your skills—your car, and your safety, depend on it. Remember, expert assistance is just a click away. What’s the biggest challenge you’ve faced in complex auto repairs—let me know below and let’s learn together.