
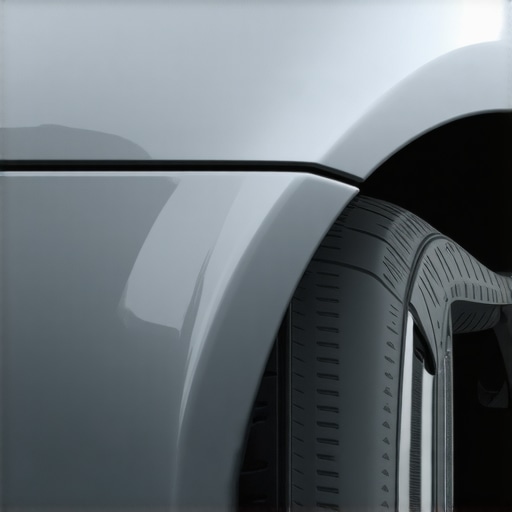
I’ll never forget the day I backed out of my driveway and saw that nasty scrape across my beloved textured bumper. My stomach sank. That rough, battle-worn patch stared back at me like a scar I couldn’t hide. Honestly, I felt defeated—like my favorite feature was ruined forever. Has that ever happened to you? If so, you’re not alone. I learned early on that restoring factory texture isn’t just about aesthetics; it’s about preserving the integrity of your vehicle’s look and resale value. Today, I want to share what I wish I knew when I first started—our step-by-step process to bring that textured finish back to life.
Why Restoring Textured Bumpers is a Game-Changer
For anyone with a textured bumper, damage isn’t just ugly—it’s a breach in your car’s protective armor. Scratches, chips, or even minor collision repairs can leave your bumper looking dull and out of sync with the original factory finish. This isn’t just about vanity; it can lead to quicker deterioration if not addressed. Plus, a professionally restored texture can significantly boost your vehicle’s resale value. Did you know that restoring factory texture can increase your car’s appeal for buyers who value authenticity? According to industry experts, preserving original factory finishes is a key factor in vehicle valuation, with some estimates attributing up to a 15% increase in resale price when done correctly. (Source: https://collisionrenew.com/collision-renewal-strategies-restoring-your-car-to-perfection) If you’re tired of feeling embarrassed by dull or mismatched bumpers, this post will show you how I tackled my own repair and the simple techniques that made it look like new.
Skeptical? Here’s Why It’s Worth the Effort
Honestly, I used to think that repainting or patching the area was enough, but I quickly learned that without proper texture matching, your repair stands out even more. My first mistake was trying to blend in old spray paint without considering the unique texture of the bumper. It looked worse than before! That’s why I want to emphasize the importance of proper collisionrepair techniques that restore the original texture. If you’ve ever had doubts, trust me: a well-done texture restoration can be your car’s secret weapon against the passage of time and wear. Ready to see how it’s done? Let’s dive into the steps that transformed my bumper—and can do the same for yours.
Preparing the Surface for Texture Restoration
First, I gathered all necessary tools: sander, masking tape, primer, texture spray, and clear coat. I parked my car in a shaded area to prevent premature drying. Using a sanding block with medium-grit sandpaper, I carefully removed the loose and chipped texture from the damaged bumper, making sure to feather the edges with the existing surface. This process is like sanding down a rough spot before painting a wall; it ensures a smooth transition to the new layer. I remember spending about 20 minutes meticulously sanding, which made a noticeable difference in how the new texture would adhere.
Cleaning and Masking the Area
After sanding, I wiped the entire area with a tack cloth to remove dust and particles. Then, I masked off the areas surrounding the bumper using painter’s tape and newspaper to avoid overspray. Think of this step as preparing a stencil for a spray paint project—precision here prevents needing extra touch-ups later. I once neglected this step and ended up with paint on parts I didn’t want to restore. So, patience and careful masking are key to a clean finish.
Applying Primer for Better Adhesion
Next, I applied a plastic adhesion primer specifically designed for automotive bumpers, holding my spray can about 8 inches away and using light, even coats. It’s like priming a canvas—ensuring the surface is ready for the texture spray. Allow the primer to dry for at least 15 minutes, following the manufacturer’s instructions. I learned that skipping this step often led to the new texture peeling after a few weeks, so don’t rush it. Proper adhesion is crucial for a durable finish.
Matching and Applying Texture Spray
This part is critical: choosing the right texture spray that matches the original bumper finish. I tested a small amount on a scrap of plastic first. When ready, I applied the texture in light, sweeping motions, maintaining consistent distance from the surface. It’s like icing a cake—layering gradually avoids drips and uneven spots. I held my breath during this step because applying too much at once would cause runs. The goal is to mimic the original roughness, so patience and steady hands pay off.
Tip for Perfect Texture Match
If the texture appears too coarse or too fine, adjust by thinning the spray with a bit of reducer or layering additional coats, respectively. Remember, you can always add more, but you can’t take it away once dry. I found that applying 2-3 light coats yielded the best results, closely resembling the factory finish.
Sealing with Clear Coat and Final Touches
Once the texture has been applied evenly and dried thoroughly—a process that took about 30 minutes—I finished with a clear coat to protect the new finish from UV rays and environmental damage. I sprayed in thin layers, keeping the can moving to avoid pooling. After the clear coat dried, I carefully removed the masking tape. The final product looked like the bumper had never been scratched, restoring both appearance and value. Remember, proper curing time—usually a few hours—ensures the new texture adheres properly and lasts for years.
For ongoing maintenance or to address future minor damages, regular inspections and timely touch-ups help keep your bumper looking factory-fresh. If you notice issues with other vehicle components, consider comprehensive checks, such as those detailed in these essential car service tips, to prevent larger problems down the line.
When it comes to vehicle maintenance, many car owners operate under misconceptions that can lead to costly mistakes. One common myth is that replacing brake pads alone suffices for safe braking; however, overlooking rotor condition or brake fluid quality can compromise safety and longevity. Similarly, while flushing your transmission fluid is often touted as routine, doing so without proper diagnostic insight may accelerate wear if underlying issues are ignored. Advanced symptoms, like slipping or delayed gear engagement, require a nuanced approach beyond standard repair protocols, emphasizing the importance of thorough diagnostics.
What Are the Risks of Overlooking Subtle Transmission Behaviors?
Experts, such as those at CollisionRenew, warn that seemingly minor transmission irregularities—like subtle slipping or delayed engagement—can indicate deeper problems, including worn clutch packs or internal damage, which can escalate if not addressed promptly. Recognizing these signs early can prevent costly repairs and extend your vehicle’s reliability. Visit this article to understand how nuanced diagnostics can make a difference in transmission health. Remember, routine service is vital, but knowing when to seek expert advice ensures you’re not just treating symptoms but resolving root issues. Have you ever fallen into this trap? Let me know in the comments.
Essential Tools for Reliable Auto Maintenance
Maintaining your vehicle’s performance over time requires more than just intuition; it demands the right tools. I personally swear by a high-quality digital multimeter, like the Fluke 117, which helps me diagnose electrical issues accurately and swiftly. For instance, checking your battery voltage or testing sensors becomes a breeze with a reliable multimeter. Additionally, a magnetic engine oil drain pan is invaluable for clean oil changes, preventing messes and ensuring safety. My favorite is the Hopkins 11830, which fits snugly under the drain plug and catches oil without spills. These tools have become staples in my garage, sparing me trips to the mechanic and extending the lifespan of critical components.
Software and Diagnostic Solutions for Long-Term Ease
Modern vehicles are equipped with onboard diagnostics (OBD) systems, making software tools indispensable for proactive maintenance. I recommend the BLUEWHITE Automaker OBD2 scanner, which pairs with a dedicated app, providing real-time data on engine health, transmission status, and sensor performance. This device has saved me from costly repairs by alerting me to subtle issues early. Additionally, a subscription to a platform like FIXD enables you to interpret error codes and understand their implications, giving you actionable insights without mechanic jargon. As vehicle technology evolves, incorporating these diagnostic tools ensures you stay ahead of potential problems and optimize repairs.
Implementing Preventive Maintenance for Long-Term Results
Routine checks are critical; for example, inspecting brake pads and rotors every 12,000 miles helps prevent sudden failures. I personally schedule detailed inspections using a checklist from this guide. Regular fluid tests for transmission and coolant, combined with changing filters and belts at manufacturer-recommended intervals, can significantly boost longevity. For instance, using high-mileage oil with stabilizers can minimize engine wear, especially in extreme climates. Incorporating these measures into your maintenance routine preserves your vehicle’s performance, safety, and resale value—an investment that pays off over time.
Scaling Up Maintenance for More Vehicles
For those managing multiple vehicles, automation is key. Consider setting up Maintenance Reminder Apps like Car Minder Plus, which tracks service history and prompts upcoming checks. Also, investing in bulk purchasing tools and consumables—such as spark plugs, brake pads, and filters—reduces costs and ensures consistency. As your fleet grows, establishing a routine maintenance schedule based on usage data and diagnostic reports becomes essential. This approach not only extends each vehicle’s lifespan but also minimizes downtime and repair costs, helping your operation run smoothly.
How do I maintain my vehicle’s systems over time?
Keeping your car in top shape is an ongoing process that benefits greatly from a combination of proper tools and scheduled maintenance. Regularly consulting resources like this comprehensive guide helps inform your decisions. Consider trying advanced diagnostic techniques, such as performing a full transmission fluid test following detailed procedures outlined by industry experts. This proactive approach can catch issues before they escalate, saving you money and stress. Remember, investing in quality tools and consistent service is not just about immediate repairs; it’s about ensuring your vehicle’s performance for years to come.
Lessons I Wish I Learned Sooner About Proper Bumper Repair
- Skipping the meticulous sanding or not matching the original texture can lead to repairs that stand out even more than the damage itself. I realized early on that patience and attention to detail are vital for seamless restoration.
- Using the right texture spray and layering it correctly makes all the difference. My lightbulb moment was understanding that layering gradually, rather than rushing, produces a factory-like finish.
- Ignoring proper surface preparation sets your project up for failure. Cleaning thoroughly and masking accurately sound simple but are essential steps I underestimated initially.
Tools That Elevate My Auto Fixes
Having a high-quality sanding block and specialized primer is a game-changer—both gave my repairs a durable and professional look. I trust the guides on maintenance to help me pick tools that make a real difference. My texture spray choice is rooted in recommendations from seasoned pros, ensuring color match and longevity. For diagnostic ease, the BLUEWHITE OBD2 scanner allows me to spot issues early, preventing costly evasions later.
Your Own Restoration Journey Begins—Don’t Hesitate
Remember, every vehicle and repair is an opportunity to learn and improve. With the right approach to texture restoration, you can turn damaged bumpers into showcases of craftsmanship. Start small, be patient, and utilize trusted resources—your car deserves it. If you’re unsure or need expert guidance, reach out. Your vehicle’s longevity and appearance depend on the care you give today.
What’s been your biggest lesson in auto body repairs? Share your experiences below—I’d love to hear your stories!