

It happened suddenly during a rainy night when I turned on my headlights and noticed a foggy haze lurking inside the glass, obscuring my view and making me wonder if I was about to drive through a cloud. Frustration bubbled up—I’ve dealt with countless auto issues over the years, but this one caught me off guard. I thought, “Did I forget to seal them properly? Or is this just normal wear and tear?” Little did I know, the real culprit was hiding in plain sight, leading to a buildup of moisture that many car owners overlook.
Why Moisture Inside Headlights Is More Than Just a Nuisance
Having my headlights fog up was more than just an aesthetic annoyance; it signaled a deeper, often overlooked problem that could compromise safety and lead to costly repairs if ignored. Moisture inside your headlights can cause electrical issues, reduce light output, and accelerate lens deterioration. But what’s truly perplexing is that many car owners, including myself initially, brush it off as normal or inevitable as the car ages.
From personal experience, I made a crucial mistake early on—I assumed a quick plastic sealant would fix the issue temporarily. That turned into a cycle of re-sealing and replacing bulbs without ever addressing the real cause. It wasn’t until I dug a little deeper that I discovered the moisture was sneaking in through tiny gaps and cracks, often caused by degraded seals or subtle frame warping. Recognizing this helped me realize that a thorough inspection and proper sealing are essential.
According to experts, environmental factors like humidity, temperature fluctuations, and road vibrations play significant roles in accelerating this process. The Environmental Protection Agency notes that temperature differences can cause condensation inside sealed compartments, including headlights, especially when the seal integrity is compromised.
If you’re wondering whether this issue affects you, ask yourself: Have I ever noticed fogging or water droplets inside my headlights after rain or during cold weather? If so, you’re not alone—and there’s a solid fix on the horizon.
Now that I’ve shared my experience and what to look out for, let’s dive into why your headlights might be building up moisture and how to fix it before it becomes a bigger headache.
Remove the Headlight Assembly Carefully
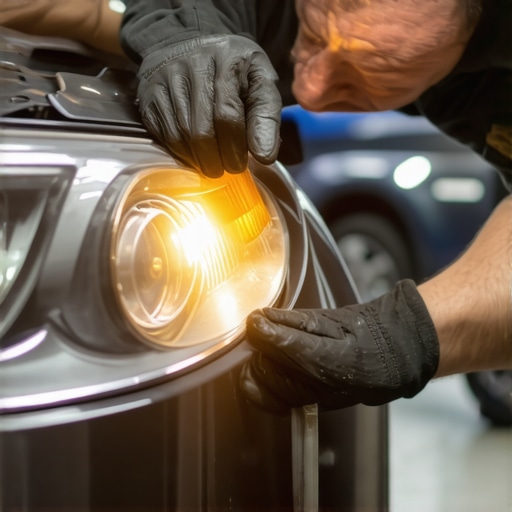
Start by disconnecting your car’s battery to prevent electrical issues. Then, remove the headlight assembly using appropriate tools—think of it as carefully detaching a delicate treasure; rushing can cause additional damage. Once free, clean the exterior surfaces with a soft cloth to remove dirt and debris, preparing for inspection.
Inspect the Seals and Identify Cracks
Check the rubber seals around the headlight for cracks or deterioration. Use a flashlight to look for tiny gaps or holes where moisture might sneak in—like looking for leaks in a boat’s hull. I once found a tiny crack on the seal that was causing water ingress, which I hadn’t noticed before. Replacing worn seals is essential; consider applying a small bead of sealant like silicone around the edges for extra protection.
Dry Out the Moisture Effectively
Place the headlight assembly in a warm, dry area or use a hairdryer on a low setting to evaporate trapped moisture. To expedite, you can also use silica gel packs placed inside the assembly—these are like tiny moisture sponges. Be cautious not to overheat plastics. After drying, reassemble and test for fogging by exposing the headlights to moisture or rain.
Seal Everything Tightly for the Future
Apply a high-quality automotive sealant around the edges of the lens and the seals. Think of this step as sealing a jar; it keeps the moisture out and preserves the clarity. Ensuring a snug fit prevents future fogging—similar to how a well-sealed window keeps out the cold. For added security, replace any degraded seals with new ones, which you can find at auto parts stores or online.
Reinstall the Headlight and Test
Carefully place the assembly back into position, tighten screws securely, and reconnect electrical wiring. Before driving, turn on your headlights and observe if the fog has cleared. It’s also wise to test in rainy conditions to confirm the effectiveness—if fogging persists, recheck the sealants or consider professional repair.
Preventive Tips to Keep Your Headlights Clear
Regularly inspect the seals and clean the lenses to prevent buildup. Park in sheltered areas when possible, especially during heavy rain or snow, to reduce exposure to moisture. Some owners use desiccant bags inside the headlight housing to absorb residual humidity—think of it as placing a sponge in a humid room to keep the air dry. If you notice persistent fogging despite these measures, it might be time to consult a professional or consider replacing the entire assembly for long-term reliability.
 When it comes to vehicle maintenance, many drivers believe they understand the essentials—regular brake pad replacements, oil changes, and tire rotations. However, beneath these common practices lie subtle nuances that can determine the longevity and safety of your car. One widespread misconception is that “brake pads wearing out evenly” is a sign of proper maintenance. In reality, uneven wear often indicates underlying issues such as warped rotors or caliper problems, which, if ignored, can lead to costly repairs or safety hazards. For example, a piston sticking in the caliper can cause uneven brake pad wear, a trap many fall into by only replacing pads without inspecting the entire braking system. Additionally, many assume that brake fluid should be replaced on a fixed schedule, but according to automotive experts, the actual need depends on driving conditions and fluid condition rather than time alone. Dark or contaminated brake fluid can reduce braking efficiency and damage components over time; thus, testing fluid quality periodically is crucial. Curious about the advanced signs of brake system failure?
What subtle indicators suggest your brakes might be failing before a warning light appears?
Often overlooked is the role of ABS sensors and how their malfunction can mimic more serious issues like warped rotors. External factors like road salt or debris can compromise sensor accuracy, leading to false ABS warnings or uneven braking. Interestingly, a study in the *Journal of Automotive Engineering* highlights that sensor calibration errors can cause unpredictable brake behavior, emphasizing the importance of not just replacing parts but also ensuring sensors and electronic systems are functioning correctly. Moreover, a common trap is neglecting the importance of proper rotor maintenance. Resurfacing rotors might seem sufficient, yet if they are deeply scored or warped, replacement becomes necessary. Rushing to resurface can mask problems temporarily while setting the stage for future failures. Want to avoid this pitfall? Regular inspections by a qualified mechanic can uncover these nuanced issues early. If you’re planning a comprehensive approach to your car’s health, consider combining brake system checks with other critical areas like suspension and transmission—since issues in one system can influence others, as discussed in our guide to fixing gaps between your hood and fenders. Remember: addressing the hidden nuances now saves you from major expenses later. If you found this insight useful, share your experiences or questions below, and let’s keep the discussion going.Maintaining your vehicle’s performance over the long haul requires more than just basic checks; investing in the right tools and adopting disciplined routines can significantly extend your car’s lifespan and ensure safety. One indispensable tool I personally rely on is a high-quality OBD-II scanner. Unlike generic code readers, I recommend the Autel MaxiScan MS300 because it’s affordable, reliable, and provides detailed diagnostic trouble codes that help identify issues before they become costly repairs. This proactive approach aligns with the trend towards predictive maintenance—using data to anticipate problems rather than react to failures.
For fluid health monitoring, a digital refractometer is invaluable, especially for checking transmission and brake fluids. Regularly testing fluid clarity and composition helps prevent long-term damage. For example, darker, contaminated brake fluid can reduce braking efficiency, a risk outlined in our article on the dangers of ignoring dark brake fluid.
When it comes to cleaning and restoring parts, I swear by a good ultrasonic cleaner. It’s perfect for cleaning delicate components like sensors or intricate metal parts, ensuring they function correctly without the need for costly replacements. Combining this with a set of precision screwdrivers and panel removal tools allows for efficient, damage-free repairs.
Scheduling routine inspections is crucial. I recommend setting quarterly maintenance to check seals, gaskets, and moving parts. Using a flashlight and mirror for hard-to-see areas ensures comprehensive inspections. Over time, these small efforts prevent major failures, especially in systems like the transmission, where unnoticed issues can lead to expensive rebuilds.
Looking ahead, the future of auto maintenance will increasingly incorporate smart diagnostics integrated with vehicle telematics. Imagine a system that alerts you to minor anomalies via your smartphone before they develop into critical failures. Companies are already developing AI-powered analytics that predict component wear, and early adopters will be at the forefront of this evolution.
How do I maintain my car’s transmission system over time The key is regular fluid testing and timely fluid changes, ideally using the comprehensive checks outlined in our detailed guide on transmission fluid health. Regularly assessing fluid condition—looking for signs like bubbling or dark coloration—prevents slippage and prolongs transmission life. For instance, changing transmission fluid every 20,000 to 30,000 miles can significantly reduce wear, as emphasized in research by automotive engineers.
If you’re ready to elevate your vehicle maintenance game, start by investing in a reputable OBD-II scanner like the Autel MaxiScan MS300 and commit to quarterly inspections. These small steps can save you thousands in repairs and keep your car running smoothly for years to come. Want to learn more about diagnosing complex transmission issues? Check out our article on [the 20-fluid fix for a jerky transmission](https://collisionrenew.com/the-20-fluid-fix-for-a-jerky-transmission). Remember, proactive maintenance combined with the right tools is the secret to keeping your vehicle in top shape—don’t wait until failure forces costly repairs.
When it comes to vehicle maintenance, few issues are as deceptively simple yet potentially hazardous as foggy headlights. During my early days as a car enthusiast, I dismissed headlight fogging as just an aesthetic nuisance. That misconception nearly led me to overlook a safety hazard that could have compromised my visibility and reactions on the road. The moment I realized that trapped moisture can weaken headlight integrity and diminish illumination was a real eye-opener—more than just a lesson in auto repair, it became a catalyst for a proactive maintenance mindset.
What I Wish I Knew About Hidden Headlight Damage
- Small cracks can disguise bigger problems: Initially, I thought a little crack was just a cosmetic issue. Turns out, it’s often the gateway for moisture to infiltrate and cause internal fogging, accelerating lens degradation and electrical issues. Recognizing the signs early can save you from costly replacements.
- Seals are your headlights’ first line of defense: Over time, rubber and plastic seals degrade, especially with temperature swings and exposure to elements. Regular inspection and timely replacement of worn seals are crucial steps that many overlook.
- Moisture buildup isn’t an inevitable fate of aging: It’s a sign that your headlight’s integrity has been compromised—whether from seal failures, cracks, or frame warping—and can be fixed with proper cleaning, sealing, and preventative measures.
- Proper drying techniques matter: Simply wiping and sealing isn’t enough—drying out internal moisture with gentle heat or silica packets preserves headlight performance and longevity.
- Prevention is better than repair: Regularly checking for early fogging and maintaining seals, combined with using UV protectants on lenses, can keep headlights clear and safe for years.
Tools and Tricks That Made a Difference
- Ultrasonic cleaner: Restores clarity to lens surfaces, removing years of grime efficiently, and is gentle enough for delicate parts.
- Automotive-grade sealant: Creating a tight barrier against moisture ingress makes a lasting difference.
- Silica gel packs: Easy and affordable method to absorb residual humidity inside the headlight assembly after drying.
- Infrared heat gun: Safely evaporates internal moisture without risking damage to plastics or wiring—think of it as a gentle sauna for your headlight.
- Seal repair kits: Perfect for replacing worn seals promptly and affordably, especially with detailed tutorials you can find online.
Take Action to Ensure Nighttime Safety
Being proactive about headlight maintenance not only preserves the aesthetic appeal of your vehicle but critically enhances your safety during night drives or poor weather conditions. Remember, addressing moisture issues early can prevent electrical failures and lens deterioration, saving you significant money and stress down the line. Regular inspections, proper sealing, and dried-out assemblies form the triad of long-term headlight clarity.
Your vehicle’s headlights are the eyes that guide you safely through your journeys—keeping them clear is an investment in your safety and peace of mind. Don’t let foggy vision become a hazard; embrace preventive care and keep those beams shining bright.