
I once smacked a grocery cart right into my car door, leaving a deep, unforgiving scratch that made me cringe every time I looked at it. For weeks, I debated whether to shell out hundreds for a repaint or just live with the ugly scar. That moment was a lightbulb—sometimes, you don’t need a full repaint to make your car look good again. I started digging, testing, and learning about simpler fixes, and let me tell you, the results blew my mind. If you’re tired of seeing that deep scratch every day but dread the thought of repainting, then you’re in the right place.
How to Tackle Deep Scratches Without Repainting the Entire Door
Today, I want to share my journey and the secrets I discovered on how to remove those stubborn scratches efficiently and affordably. Believe me, a deep scratch doesn’t have to spell disaster for your wallet or your nerves. Instead, with a little know-how, you can restore your door’s appearance and enjoy your ride again. This isn’t just about vanity; it’s about taking control of your car maintenance and saving yourself a trip to the body shop for minor blemishes.
Is It Really Worth the Effort or Just a Waste of Time?
Midway through my DIY experiment, I messed up—big time. I tried a cheap scratch remover and only made the damage worse, which made me realize that not all fixes are equal. The key is understanding what causes those deep scratches and knowing the right approach. It’s not magic; it’s science and patience, and I’m here to guide you through it. If you’ve ever felt hopeless when looking at a bad scratch, know that this method can be your game-changer. And if you’re wondering whether all this effort is worth it, I can confidently say it’s more than worth it—especially when you see the progress yourself.
Before diving into the how-to, I wanted to share a quick tip from my own experience. I used to ignore the fact that some scratches are deeper than they look, thinking they’d buff out with regular polish. Spoiler alert: they rarely do. Instead, I discovered that some scratches require targeted fixes that actually work—like the techniques I’ll show you next. And trust me, it’s not as complicated as it seems. Now, if you’re ready to save money and keep your car looking sharp, let’s get into the practical steps. And if you’re skeptical, I get it—I’ve been there. But I promise, with patience, you’ll see results that make you wonder why you ever paid for a repaint.
Start with Cleaning the Damage Area
Before anything else, wash the scratched area thoroughly using car soap and water. Use a microfiber cloth to remove dirt and debris—think of it as prepping a canvas before painting. Detailing the area ensures that no dirt or wax interferes with the repair process. Once dry, inspect the depth of the scratch; if it catches your fingernail, you’ll need a more intensive fix. I remember grabbing a flashlight and a magnifying glass to be precise—this small step saved me from wasting time on ineffective methods.
Sand the Scratched Surface Carefully
Lightly sanding the area smooths out rough edges and prepares the surface for filler or polish. Use fine-grit sandpaper, around 2000 grit, and keep the surface moist to avoid creating more deep scratches—think of it like sanding a wooden table for a smooth finish. I once tried to speed up the process with rougher paper; the result was a scuffed mess that looked worse than before. That experience taught me patience and the importance of gentle, consistent motion. Sand in a circular motion, covering only the affected area, like circling a target with a laser pointer.
Applying a Deep Scratch Filler or Primer
For scratches that penetrate beyond the clear coat, applying a primer or filler can bridge the gap. Use a small brush or applicator, and dab lightly—don’t flood it. I used a toothpick to precisely apply the filler into the deepest parts of the scratch, mimicking a miniature surgeon repairing a wound. Allow it to cure as per product instructions; rushing this step often leads to poor adhesion, which I learned the hard way. This filler will fill the void, creating a surface that’s ready for polishing.
Polish and Buff for Seamless Blending
After filler curing, use a polishing compound tailored for automotive finishes, like a micro-abrasive. Apply it with a soft cloth or buffer, working in small circles—imagine polishing a silver spoon for that mirror shine. Start with light pressure, and gradually increase as you see progress. I found that a dual-action polisher made this step easier and more even, but hand buffing works fine if gentle. The goal is to blend the repaired area with the surrounding paint seamlessly, hiding any visible marks. For stubborn spots, a bit of rubbing compound can do wonders, restoring gloss and shine.
Finish with Protective Wax Layer
Finally, seal the repair with a quality automotive wax. This not only protects against future scratches but also restores the paint’s gloss. Apply in a thin, even layer and buff with a clean microfiber cloth—think of it as giving your car a protective shield. This layer encapsulates the filler and primer, preventing dirt accumulation and UV damage. I remember feeling proud after completing this step, as the scratch was less visible, and the door looked near-perfect—like a tiny wound that healed cleanly.
Many car owners operate under misconceptions about essential services like transmission repair, collision restoration, and brake servicing. Commonly, people assume that all repairs are straightforward or that certain issues can wait without consequence. However, these beliefs can lead to costly mistakes and safety risks. Let’s explore some nuanced truths behind these widespread myths and the pitfalls to avoid, so you can make informed decisions about your vehicle’s health.
Why Do So Many Believe All Transmission Problems Are Equal?
It’s a pervasive myth that any transmission issue is a sign you need a complete overhaul. In reality, not all transmission problems are created equal. For instance, grinding sounds between second and third gear often result from minor issues like worn synchronizers or low fluid levels, which can be fixed with targeted repairs rather than costly replacements. Assuming the worst without proper diagnosis can lead to unnecessary expenses. Advanced diagnostics and understanding specific symptoms can save you significant money and inconvenience.
The Trap of Delaying Collision Repairs
Many believe that small dents or scratches are purely cosmetic and can be ignored. This misconception can be dangerous; overlooking hidden frame damage, misaligned sensors, or compromised structural integrity can jeopardize safety and lead to more complex repairs later. Collision repairs involve more than visual fixes. Proper restoration ensures safety systems and alignment are accurate, providing peace of mind and maintaining vehicle value. Failing to address these hidden issues might cause unpredictable behavior or device failures down the line.
Breaks: More Than Just Pedal Feel
Many drivers think that brake squeal or sponginess is just a nuisance, but these symptoms often hint at deeper problems like warped rotors, contaminated brake fluid, or worn-out pads. Ignoring them can lead to brake failure during critical moments. A common mistake is neglecting regular brake fluid changes, especially when the fluid appears dark and old—like dark coffee. Maintaining your brakes is not just about comfort but crucial for safety and vehicle longevity.
Advanced Insights: Are We Overlooking the Role of Sensors?
For the discerning car owner, understanding the importance of properly calibrated sensors—such as those involved in collision detection or adaptive cruise control—is vital. Sensor recalibration after an accident is often overlooked, which can impair safety features and lead to false alarms or system failures. Recognizing the nuances of sensor maintenance enhances reliability and safety, underscoring the need to move beyond superficial repairs.
In conclusion, dismissing the complexity behind various vehicle systems can be costly. A nuanced approach, backed by expert knowledge, ensures that your maintenance decisions are effective and long-lasting. Have you ever fallen into this trap? Let me know in the comments. Staying informed is your best defense against unnecessary expenses and safety hazards. Remember, understanding the hidden nuances makes all the difference in keeping your vehicle in top shape.
,
Investing in the Right Equipment Makes All the Difference
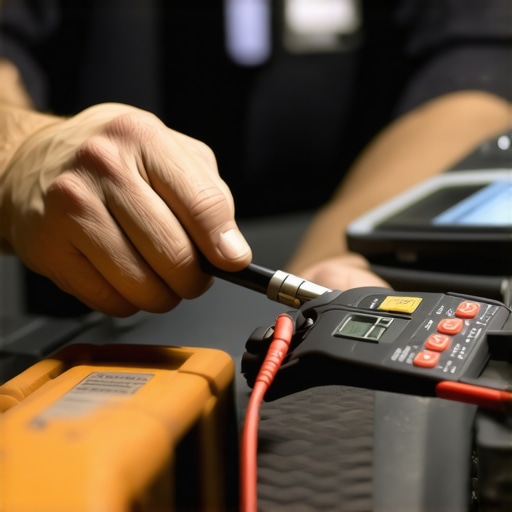
Maintaining your vehicle’s performance over the long haul requires more than just routine checks; it demands having the *right* tools at your fingertips. Personally, I swear by a high-quality digital multimeter. It’s indispensable for diagnosing electrical issues, especially when checking sensor voltages or verifying fuse integrity, like the ones that might cause your rain sensors to malfunction. My favorite is the Fluke 115 True RMS Multimeter because of its reliability, precision, and ease of use, which has saved me countless trips to the mechanic.
Another must-have is a set of genuine OEM style spark plug sockets and a torque wrench. These tools allow me to replace spark plugs with confidence, ensuring proper sealing and compression, ultimately extending the life of my engine. For assessing belt health, I rely on a serpentine belt tension gauge. As noted in technical guides, maintaining proper belt tension is critical to prevent slips or premature wear, which could lead to issues like your belt slipping or squealing.
Master Your Car’s Software With Diagnostic Scanners
On the software side, owning a robust OBD-II scanner such as the BlueDriver Bluetooth Scan Tool has transformed my approach to maintenance. It provides real-time data and can read OEM-specific codes, helping me identify problems early, whether it’s a misfiring cylinder or a failing sensor. As technology advances, I believe diagnostic tools will continue to evolve, becoming even more intuitive and accessible for everyday users.
Manual Checks and Visual Inspections Are Still Key
Beyond gadgets, regular visual inspections are crucial. I always check my tire pressures and examine the depth of my brake pads. An insidious issue like uneven tire wear can signal alignment problems or suspension worn-out parts. These straightforward checks can prevent future accidents or costly repairs. Regularly inspecting these components, as described in guides on tire maintenance, ensures my vehicle stays in top shape.
How Do I Maintain All These Tools Over Time?
Proper care extends your tools’ lifespan. For electronic devices like scanners and multimeters, I keep them clean and store them in protective cases to avoid damage. I also calibrate my torque wrench periodically, following manufacturer instructions, to maintain accuracy. For physical tools, a simple wipe after use and oiling moving parts prevent rust. Having an organized set of maintenance supplies ensures I can quickly address issues as they arise, minimizing downtime and expenses.
Looking ahead, I predict that as vehicle technology becomes more sophisticated, wearable diagnostic devices or smartphone-integrated scanners will dominate the market. Staying updated with the latest gear will be essential for both enthusiasts and professionals aiming for optimal car performance.
How can you keep your tools effective for long-term use?
Try implementing regular calibration and cleanings, and make it a habit to inspect your equipment monthly. This proactive approach ensures you’re always ready to diagnose or fix minor issues before they escalate, saving you money and maintaining your vehicle’s reliability. Don’t wait—equip yourself with a reliable digital multimeter today, and see how much easier and more precise your maintenance routine becomes.
What the Tiny Details Taught Me About Major Repairs
- Sometimes, the smallest chips and scratches reveal the biggest truths about maintaining your vehicle. Addressing a deep scratch taught me patience and the importance of proper prep work, like thorough cleaning and gentle sanding, before applying filler or polish.
- Overcoming the misconception that all damages require costly repainting empowered me to explore affordable, DIY solutions that work—saving me time and money while boosting my confidence in vehicle maintenance.
- The real game-changer was understanding that not every issue, like transmission problems or brake squeals, is as intimidating as it seems; often, targeted fixes and expert insights can resolve them efficiently.
- My biggest lesson was recognizing the value of the right tools and diagnostic knowledge, which made repairs more precise and less stressful. For example, owning a good OBD-II scanner made troubleshooting much more manageable and cost-effective.
- Finally, I learned that being proactive—whether inspecting tire wear or recalibrating sensors after a minor collision—prevents small problems from becoming major hazards, keeping my car safe and reliable longer-term.
Tools and Resources That Changed My Approach to Car Care
- Fluke 115 True RMS Multimeter: Reliable for electrical diagnostics, this multimeter helped me verify sensor voltages and prevent misdiagnoses, saving time and preventing unnecessary repairs.
- BlueDriver Bluetooth Scan Tool: This intuitive diagnostic scanner provided real-time data and OEM code readings, making early issue detection possible without expensive dealership visits.
- Technical Guides on CollisionRenew: Resources like those explaining sensor recalibration after minor accidents or fixing a rattling heat shield provided clear, actionable steps that boosted my confidence.
- Regular Visual Inspections: Simple checklists for tire wear, brake condition, and fluid levels became part of my routine—helping me catch issues early and avoid surprises.
Your Next Step Towards Car Mastery Starts Now
Remember, knowledge and the right tools turn vehicle maintenance from a daunting chore into an empowering experience. Tackling deep scratches, understanding complex repairs, or ensuring your car’s safety features operate flawlessly isn’t just for pros—it’s doable with patience and guidance. So, what small fix or investigation will you tackle today to improve your vehicle’s performance? Dive in, learn, and take control of your car care journey.