
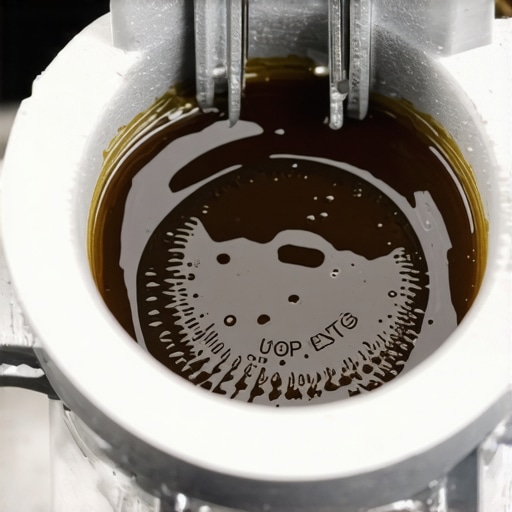
I’ll never forget the shock I felt the first time I opened my car’s hood and saw the brake fluid—dark, resembling a cup of freshly brewed coffee. At that moment, I realized I’d been neglecting a critical part of vehicle maintenance, and truthfully, I was a bit worried. That deep, murky color isn’t just an aesthetic issue; it signals that something’s not right with your braking system and could compromise your safety on the road.
Why Your Brake Fluid Turns Dark and Why It Should Concern You
Brake fluid plays a vital role in ensuring your car stops when you need it to. Over time, contaminants, moisture, and degraded rubber seals can cause the fluid to darken, forming sludge that hampers performance. If ignored, this dark brew can lead to spongy brakes, increased stopping distances, or even brake failure. It’s not just about appearance; it’s about your safety and the longevity of your braking components.
Is Your Dark Brake Fluid Actually a Big Deal?
Initially, I thought a quick flush was unnecessary and dismissed that dark color as just dirt. But I learned early on that neglecting this issue can cost you a lot more in repairs—or worse, your safety. Research shows that moisture in brake fluid can lower its boiling point, leading to vapor lock during aggressive braking, which could prevent your car from stopping in time (source: CollisionRenew).
If you’ve seen your brake fluid darken or noticed a spongy pedal, don’t ignore it. Waiting too long can escalate small issues into costly repairs. Fortunately, fixing this problem is straightforward once you know what steps to take. But before diving into solutions, I want to share one mistake I made early on that probably worsened the problem—a mistake I urge you to avoid.
That mistake was ignoring the signs and assuming that dark brake fluid is just superficial dirt. If you’re like me, you might think a quick top-off will do the trick or that the color doesn’t matter. Spoiler alert: it does. Properly assessing and replacing your brake fluid can make a significant difference in safety and performance. So, are you ready to learn how to keep your brakes in top shape and avoid the pitfalls I encountered? Let’s get started with understanding why that dark coffee brew is more than just a weird color—it’s a warning sign.
Gather Your Tools and Supplies
Start by collecting everything you’ll need: a new brake fluid specification (check your owner’s manual), a turkey baster or fluid pump, safety gloves, safety glasses, a wrench set, a clear plastic tube, and a catch container. I once worked on my car in the driveway, fumbling with tools, and accidentally spilled brake fluid on the paint; wearing gloves prevented a messy cleanup. Having everything at hand makes the process smoother and avoids multiple trips to the garage.
Locate and Access the Brake Master Cylinder
Open your hood and find the brake fluid reservoir—it’s typically a translucent plastic container near the firewall. Remove the cap by unscrewing it carefully. To prevent contamination, avoid touching the inside of the cap or reservoir with dirty tools or hands. If the reservoir is low, top it off with fresh brake fluid compatible with your vehicle. Remember, overfilling can cause spillage, so fill to the max line. My first attempt led to a slight spillage, which taught me to be precise and cautious.
Drain the Old Brake Fluid
Use the turkey baster or fluid pump to extract as much old fluid from the reservoir as possible. This reduces the amount of contaminated fluid in the system. Then, locate the brake calipers or wheel cylinders—each has a bleeder valve. Attach the clear tube to the valve and place the other end into the catch container. Carefully open the bleeder valve with a wrench. As you press the brake pedal (either manually or using an assistant), old fluid and air are pushed out. Close the valve before releasing the pedal to prevent air from entering. I made the mistake of opening the valve too early once, which caused air to get trapped, leading to a spongy brake pedal afterward. Practice patience and precision here.
Refill and Bleed the System
Keep an eye on the master cylinder reservoir, refilling with fresh brake fluid as needed to prevent it from running dry. This step is crucial; if the fluid level drops too low, you risk introducing air into the system, which diminishes braking efficiency. Repeat the bleeding process at each wheel—start with the wheel farthest from the master cylinder (usually the passenger rear) and work your way closer. During testing, I noticed that unbled air bubbles caused a soft brake pedal, so taking your time to ensure all air is purged is vital. For best results, consult your vehicle’s manual for specific bleeding sequences or consider using a pressure bleeder tool.
Finalize the Process and Test
Once all four wheels are bled and new fluid is circulating, securely close all bleeder valves, ensuring no leaks. Recheck the fluid level in the master cylinder and top off if necessary. Start the engine and gently press the brake pedal a few times to build pressure; it should feel firm. Take the vehicle for a cautious test drive, applying brakes gradually, to confirm the pedal feels solid and responsive. If you experience any softness or sponginess, repeat the bleeding process. Regularly replacing your brake fluid, especially if it was dark or contaminated, is like giving your braking system a fresh start—a simple step that greatly enhances safety.
Shattering the Myth of Easy Fixes
Most car owners believe that repairing minor issues or performing simple maintenance is straightforward and requires no expert knowledge. However, this oversimplification often leads to costly mistakes. For example, many assume that topping off fluids is sufficient, but neglecting to address underlying causes, like leaks or worn parts, can exacerbate problems over time. It’s a common misconception that DIY fixes always save money, yet without proper diagnostics, you might be masking symptoms rather than solving root issues.
The Oops We All Make When We Ignore Subtle Signs
An all-too-prevalent trap involves overlooking early warning signs, such as faint noises or slight vibrations. For instance, a subtle creak while turning can hint at steering components nearing failure, but many dismiss it until the problem becomes severe. Recognizing these nuances can prevent catastrophic failures. A critical mistake is assuming that these are just normal wear and tear, when detailed inspection might reveal deeper issues like worn CV joints or failing power steering pumps. Addressing these early on saves both money and safety.
What Advanced Techniques Are Necessary for Accurate Diagnostics?
Relying solely on visual inspection or generic scan tools isn’t enough for complex systems. Modern vehicles incorporate sophisticated electronic modules that require specialized diagnostic equipment and expertise to interpret correctly. For example, detecting intermittent transmission faults often involves live data analysis or symmetry testing, which can uncover hidden issues that basic scans miss. A study by automotive diagnostic experts shows that using advanced diagnostics can improve repair accuracy by up to 40%, reducing repeat visits and ensuring longevity of repairs. Understanding and leveraging these tools is a key advantage for professional technicians.
Have you ever fallen into this trap? Let me know in the comments—sometimes, slipping up on diagnosing can lead to unnecessary expenses or safety risks. The key takeaway is that a nuanced understanding of your vehicle’s intricate systems can make all the difference between a quick fix and a costly breakdown. So next time you’re tempted to ignore a tiny squeak or a strange smell, consider that it might be an early signal of something more serious. Paying attention now can save you a lot later on.
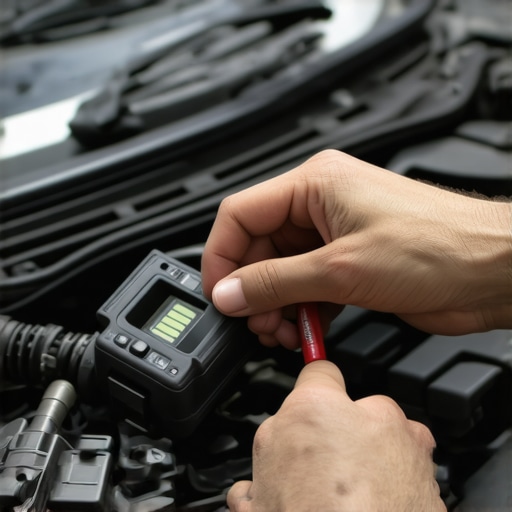
Gear Up with precision tools for lasting results
When it comes to maintaining or repairing your vehicle, using the right tools can make all the difference. I always emphasize investing in quality equipment, such as a digital multimeter for accurate electrical diagnostics—this allows me to pinpoint issues like faulty sensors or wiring harnesses swiftly without guesswork. For example, testing your alternator’s output with a reliable multimeter can prevent unexpected breakdowns, as discussed in CollisionRenew. Heavy-duty rubber gloves and safety glasses are indispensable for protecting yourself during rough tasks or when handling corrosive fluids like transmission fluid.
Leveraging software to diagnose and plan repairs
Beyond physical tools, diagnostic software has become a game-changer. Devices like the OBD2 scanner enable me to read real-time data and hidden trouble codes, saving hours of guesswork. I prefer models that support advanced parameter testing and live data streaming, which helps in assessing issues like transmission overheating or engine misfires. In the future, expect diagnostic tech to become even more integrated, with AI-powered systems predicting failures before they happen, much like predictive maintenance models used in industrial settings.
Mastering long-term maintenance with consistency
Consistent routine checks are vital. I schedule quarterly inspections focusing on fluid levels, belt conditions, and suspension integrity. For instance, regularly confirming the condition of your transmission fluid, especially if it’s bubbling, can prolong the life of your transmission—more details are available here. Additionally, reviewing your vehicle’s service history helps anticipate upcoming repairs, preventing issues like seized calipers or deteriorated brake pads from catching you off guard.
Keeping tools organized for efficiency and safety
A well-organized toolbox isn’t just about convenience; safety is at stake. I recommend using stackable containers or hanging pegboards to keep tools sorted by function. Not only does this save time, but it also reduces the risk of accidental injuries—imagine reaching blindly for a wrench and grabbing a loose screw instead. Proper storage encourages routine checks and ensures you’re always ready to handle minor repairs before they escalate.
Prepare for scaling as your skills grow
As you become more confident in DIY repairs, investing in more sophisticated equipment like a hydraulic lift or a smoke machine can open new possibilities. These tools enable you to perform comprehensive diagnostics and repairs, such as testing for exhaust leaks or replacement of deeper components. This progression aligns with the trend toward DIY enthusiasts taking on more complex tasks, driven by online tutorials and community forums. Remember, mastering these tools can significantly reduce repair costs over time.
How will you keep your vehicle running smoothly over years?
Adopting a proactive maintenance mindset—using quality tools and scheduling regular inspections—ensures your car stays reliable and safe. For example, checking your coolant system before summer trips or inspecting your wheel bearings for unusual noises can save you from roadside breakdowns. Take a tip from the experts and try setting reminders for fluid changes or belt replacements; early intervention often costs less and prevents bigger issues. Research shows that consistent upkeep can extend the lifespan of critical components like transmissions and brakes, making your vehicle more dependable in the long run.
Remember, the key to effective maintenance lies not just in having the right tools but in knowing how to use them properly. Investing in skilled diagnostics and routine checks now can prevent expensive repairs later. So, review your toolkit, upgrade where necessary, and stay vigilant—your vehicle will thank you for it.
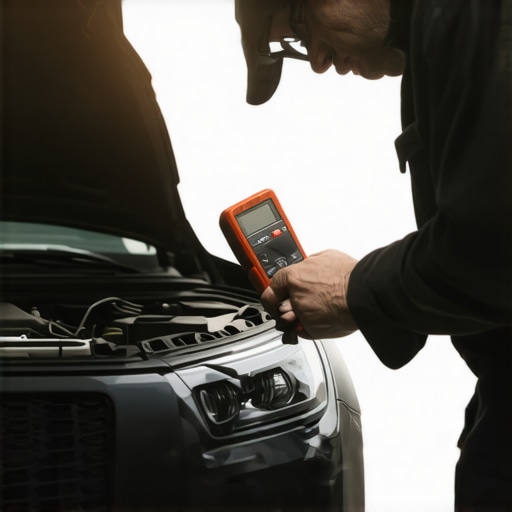
Overlooking crucial signs in vehicle maintenance can silently lead to costly repairs or safety hazards. Dark brake fluid is one such warning that often goes unnoticed, yet recognizing its significance can be a game-changer for your driving safety. By understanding what darkened brake fluid truly indicates, you empower yourself to maintain optimal braking performance and avoid preventable issues.
Lessons from the Garage: Embracing Early Detection
- Ignore the warning signs at your peril. Dark brake fluid isn’t just a dirty stain you can wipe away—it’s a symptom of moisture contamination or degraded components that can compromise braking efficiency. My own oversight almost led me to a dangerous situation; now I check my brake fluid more frequently.
- Quality over quick fixes. Instead of topping off with whatever’s at hand, investing in proper fluid replacement and system inspection has saved me from future emergencies. Trust me, a small routine investment pays off in peace of mind.
- Deep diagnostics unlock safety. Relying solely on visual cues isn’t enough; using advanced diagnostic tools can reveal underlying issues before they become apparent on the road. Familiarizing myself with these tools transformed my approach to vehicle health.
- Maintenance is a mindset. Regularly scheduling brake fluid flushes and thorough inspections can extend your brake system’s lifespan and keep you safe. It’s about cultivating a proactive attitude, not just reacting when something breaks.
- Learn from mistakes, avoid hazards. My mistake was assuming that a dark fluid was superficial dirt. Recognizing that misconception has made me more vigilant, and I urge every driver to approach maintenance with curiosity and responsibility.
My Arsenal of Tools and Resources for Smarter Repairs
- ABBYY FlexiCapture. This OCR tool helped me document and analyze my vehicle’s symptoms systematically, ensuring I didn’t overlook critical details. It’s a reliable way to keep track of maintenance history.
- Automotive Diagnostic Scan Tools. Devices like the BlueDriver or FIXD provide real-time data and trouble codes, making complex diagnostics accessible for amateurs. My confidence skyrocketed after mastering their use.
- Repair Manuals and Guides. Official manufacturer manuals and trusted online tutorials, especially those from CollisionRenew, have been invaluable for understanding specific procedures and safety precautions.
- Educational Books and Webinars. I credit books like “Auto Repair for Dummies” and online courses for building foundational knowledge, transforming my DIY approach from guesswork to precision.
Embrace Your Inner Vehicle Whisperer and Take Action
Maintaining your vehicle’s health isn’t just about avoiding breakdowns—it’s about empowering yourself to be an active participant in your safety journey. Each small check, each fluid change, adds up to years of reliable, confident driving. Remember, the road to automotive mastery begins with awareness and a willingness to learn. So, gear up, stay curious, and take that first step toward more attentive, informed vehicle care. Your car—and your safety—will thank you.
How do you plan to incorporate regular brake fluid checks into your maintenance routine? Share your thoughts below—your experience might help someone else stay safe on the road.
**