
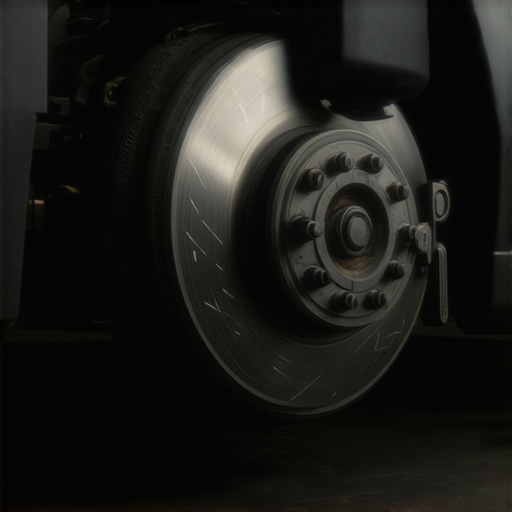
I will never forget the evening I was cruising down the interstate at seventy miles per hour, enjoying a beautiful sunset, when a sudden traffic slowdown forced me to tap my brakes. In an instant, my steering wheel turned into a jackhammer, vibrating so violently I thought my front wheels were about to fly off right there. My heart raced, and I immediately coasted to the shoulder, convinced my entire front end was ruined. It was a terrifying moment, and quite frankly, a bit embarrassing for someone who prides themselves on staying on top of basic car service checks.
The High-Speed Braking Shudder is Not Just in Your Head
If you are experiencing a violent vibration that only raises its ugly head when you apply the brakes at highway speeds, you are not alone. This is not a subtle hint; it is your vehicle screaming that something is wrong. In my early DIY days, I made the classic rookie mistake of immediately spending hundreds on a brand new set of tires and a front-end alignment, thinking my wheels were out of balance. Imagine my frustration when I got back on the highway, touched the pedal, and felt that same violent shake. It was a costly lesson in misdiagnosing auto repair basics, and today, I want to make sure you do not make that same mistake.
Are warped brake rotors really the only culprit?
While most mechanics will instantly blame warped brake rotors, the reality of high-speed vibration is often more nuanced. Yes, uneven wear on your braking surfaces is the primary driver of this issue, but suspension components and even hub assemblies can play a major role in mimicking or accelerating the problem. In fact, according to safety data from the National Highway Traffic Safety Administration, brake system components are the leading critical reason for vehicle crashes attributed to mechanical failure. Have you ever felt this sudden, terrifying steering wheel shake on the highway? If so, we are going to dive deep into exactly how to pinpoint the source so you can get back to smooth, confident driving. If your pedal itself is also pulsing, you might want to read up on why your brake pedal vibrates when stopping, as these clues are crucial to saving your wallet and your safety before you head to the shop.
Step-by-Step Diagnostic Methods for High-Speed Shakes
When your steering wheel mimics a jackhammer at seventy miles per hour, you cannot just guess at the solution. You need a systematic approach. I remember spending a sweaty Saturday morning in my garage, micrometer in hand, determined to find the source of my own vehicle’s violent shudder. By breaking down the diagnostic process into clear, manageable steps, you can save yourself hours of frustration and hundreds of dollars in unnecessary auto parts.
Measure Lateral Runout with a Dial Indicator
To truly understand why your braking system is acting up, you need to measure the lateral runout of your brake rotors. This is the amount of side-to-side wobble the rotor exhibits as it spins. I once made the mistake of eyeballing my rotors, thinking they looked perfectly straight, only to find out later they were warped just enough to cause a massive vibration. Clamp a dial indicator to your suspension knuckle, place the plunger tip against the face of the rotor, and slowly rotate the disc. If the needle jumps more than 0.002 inches, you have found your primary culprit. If you consistently face this issue, you should investigate why your brake rotors keep warping every few months to stop the cycle for good.
Inspect Your Wheel Hub and Bearing Play
Sometimes, the rotor itself is perfectly flat, but the surface it mounts to is uneven. Rust, road grime, or a failing wheel bearing can prevent the rotor from sitting completely flush. Take a wire brush and clean the hub flange thoroughly before reinstalling your rotors. To check the bearing, grab the wheel at the twelve and six o’clock positions and wiggle it back and forth. Any noticeable play indicates a worn bearing that is mimicking brake rotor wobble. For a deeper dive into distinguishing these mechanical sounds, learn how to tell if your wheel bearing is failing or if its just road noise before you start replacing expensive components.
Look Beyond the Brakes for Hidden Suspension Wear
If your rotors check out fine, the issue might lie in your suspension geometry. Worn control arm bushings or failing struts can allow the entire wheel assembly to oscillate under the heavy load of high-speed deceleration. During one of my diagnostic sessions, I discovered that a completely torn control arm bushing was allowing the front wheel to shift backward under braking, creating an terrifying vibration that felt exactly like a warped rotor. If you suspect your suspension might be the hidden culprit behind your handling issues, it is highly beneficial to look into the hidden suspension issues that a standard wheel alignment wont fix to keep your ride stable and predictable.
The Costly Myth of the Warp-Only Solution
For decades, backyard mechanics and chain shops alike have pushed a single narrative: if your steering wheel shakes when you step on the brakes, your rotors are warped. But in my years of turning wrenches, I have found that actual physical warping—where the metal disc structurally bends—is surprisingly rare. Instead, the real culprit is almost always uneven brake pad material transfer, commonly caused by keeping your hot pads pressed against the rotor after a sudden, hard stop. This creates microscopic high spots that feel identical to a warped rotor but require a completely different fix. Throwing new parts at the problem without addressing your braking habits or cleaning the hub face is a classic trap that will have you back in the garage in no time.
Why does the shake return after a few thousand miles?
Many drivers complain that they just had their brakes serviced, yet the high-speed shudder returned a few months later. According to a technical bulletin by the National Institute for Automotive Service Excellence (ASE), failing to use a torque wrench to tighten lug nuts in a proper star pattern is a primary cause of lateral runout. When shops use pneumatic impact guns without torque-limiting sticks, they apply uneven pressure across the rotor hat. Over a few thousand heat cycles, this uneven stress distorts the rotor, creating a physical wobble. If you want to avoid this cycle, it is vital to learn how to choose the best brake service in 2025 so you can ensure your mechanic uses precision tools rather than rushing the job.
The Hub Cleaning Step Everyone Skips
When you are performing your own auto repair or watching a technician work, watch closely to see if they clean the mounting hub. Rust and corrosion build up on the steel hub over time. If a brand-new rotor is installed over even a tiny speck of rust, it will sit cockeyed. A microscopic deviation at the center of the hub translates to a massive wobble at the outer edge of the brake rotor. Always insist on using a hub cleaning kit or a stiff wire brush to remove every speck of scale before the new rotor goes on. Skipping this simple step is the quickest way to ruin a premium brake job.
How Steering and Suspension Geometry Multiply the Shudder
Another nuance that gets overlooked is how slightly worn steering components amplify minor braking variations. A tiny runout of 0.001 inches—which you would never feel in a brand-new car—can feel like a full-blown earthquake if your tie rod ends or control arm bushings have even a millimeter of play. The braking force grabs the wheel, finds the weak point in your worn suspension, and begins a violent oscillation. If you suspect your steering system is contributing to this sloppy feeling, you should look into why your steering wheel feels heavy even with power steering fluid to address the broader health of your front end. Have you ever fallen into this trap and replaced your rotors only to have the shake return? Let me know in the comments below.
When you are looking to conquer high-speed braking shudder for good, you need to transition from basic diagnostic guessing to using the exact tools and techniques that professional race teams and high-end automotive technicians rely on. My personal garage setup changed forever the day I stopped relying on cheap hand tools and started treating brake maintenance with the same precision you would apply to high-performance engine building. By taking control of the process with the right gear, you ensure that your auto repair basics actually stick, saving you from repeating the same painful job every six months.
How do I maintain my brake rotors and hubs over time?
To prevent lateral runout from creeping back into your vehicle, you must implement a strict maintenance routine during every single tire rotation. First, invest in a dedicated hub-cleaning kit that features a durable abrasive pad designed to fit over your wheel studs; this makes quick work of removing built-up road salt and galvanic corrosion. Second, never let a mechanic touch your wheels with an impact wrench unless they are immediately finishing the job with a calibrated click-type torque wrench. I personally carry my own digital torque wrench in the trunk to double-check my lug nuts after any road-trip emergency. According to the engineering guidelines from the Brake Manufacturers Council, securing lug nuts in a progressive star pattern to the exact foot-pound specification is the single most effective way to prevent thermal distortion of the rotor hat under load. If you are already dealing with a soft pedal from a recent rough installation, you might need to address why your brakes feel spongy even after bleeding the lines to get your system completely sealed and pressurized.
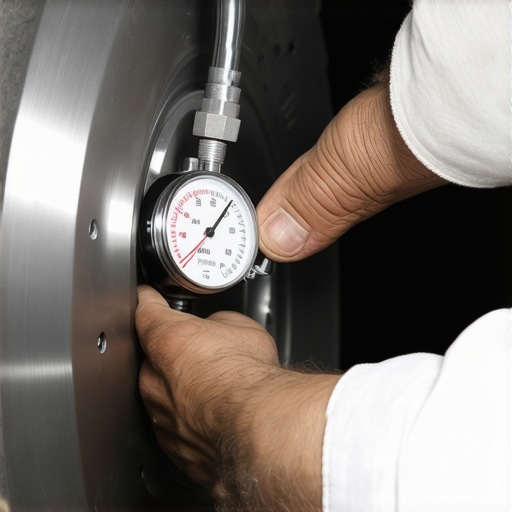
Looking ahead, the future of brake maintenance is shifting toward advanced composite materials and smart diagnostic sensors integrated directly into your car’s electronic control modules. We are already beginning to see next-generation brake pads embedded with micro-sensors that measure heat distribution and lateral force in real-time, warning drivers of uneven material transfer before a physical vibration ever develops. Until those systems become standard on every commuter car, however, the responsibility falls on us to use precision methods. I highly encourage you to try the dial-indicator test on your front hubs during your very next wheel inspection. It takes only ten minutes, and the data it provides will completely change how you approach your vehicle’s safety and performance.
When you are looking to conquer high-speed braking shudder for good, you need to transition from basic diagnostic guessing to using the exact tools and techniques that professional race teams and high-end automotive technicians rely on. My personal garage setup changed forever the day I stopped relying on cheap hand tools and started treating brake maintenance with the same precision you would apply to high-performance engine building. By taking control of the process with the right gear, you ensure that your auto repair basics actually stick, saving you from repeating the same painful job every six months.
How do I maintain my brake rotors and hubs over time?
To prevent lateral runout from creeping back into your vehicle, you must implement a strict maintenance routine during every single tire rotation. First, invest in a dedicated hub-cleaning kit that features a durable abrasive pad designed to fit over your wheel studs; this makes quick work of removing built-up road salt and galvanic corrosion. Second, never let a mechanic touch your wheels with an impact wrench unless they are immediately finishing the job with a calibrated click-type torque wrench. I personally carry my own digital torque wrench in the trunk to double-check my lug nuts after any road-trip emergency. According to the engineering guidelines from the Brake Manufacturers Council, securing lug nuts in a progressive star pattern to the exact foot-pound specification is the single most effective way to prevent thermal distortion of the rotor hat under load. If you are already dealing with a soft pedal from a recent rough installation, you might need to address why your brakes feel spongy even after bleeding the lines to get your system completely sealed and pressurized.
Looking ahead, the future of brake maintenance is shifting toward advanced composite materials and smart diagnostic sensors integrated directly into your car’s electronic control modules. We are already beginning to see next-generation brake pads embedded with micro-sensors that measure heat distribution and lateral force in real-time, warning drivers of uneven material transfer before a physical vibration ever develops. Until those systems become standard on every commuter car, however, the responsibility falls on us to use precision methods. I highly encourage you to try the dial-indicator test on your front hubs during your very next wheel inspection. It takes only ten minutes, and the data it provides will completely change how you approach your vehicle’s safety and performance.
Three Hard-Earned Brake Lessons That Saved My Wallet
Over the years, I have learned that fixing a vibration is less about buying expensive new parts and more about mastering small, precise installation habits. Here are the lightbulb moments that completely changed how I approach my own brake work:
- The Hub is King: You can buy the most expensive carbon-ceramic rotors on the market, but if you bolt them onto a rusty hub face with even a fraction of a millimeter of dirt, you will get a shudder. Clean that surface until it shines like chrome.
- Never Skip the Break-In: New pads and rotors require a proper bed-in procedure to transfer an even microscopic layer of friction material. Failing to do this causes immediate high spots and eventual shaking.
- Your Suspension Multiplies Everything: A tiny vibration you might never feel in a brand-new car becomes a violent shake when your control arm bushings start to sag or soften. Always inspect the rubber before blaming the metal.
My Essential Toolbox for Glass-Smooth Deceleration
To diagnose and fix high-speed vibration properly, you do not need a shop lift, but you absolutely do need a few specialized tools. These are the items I personally trust and keep in my drawer to keep my front-end perfectly true:
- A Mechanical Dial Indicator: Skip the guesswork. A quality dial indicator with a magnetic base allows you to measure runout down to the thousandth of an inch, pointing you directly to the offending rotor.
- A Calibrated Click-Type Torque Wrench: This is non-negotiable. Uneven lug nut torque is the number one silent killer of smooth braking, distorting the rotor face under intense heat.
- A Stainless Steel Wire Hub-Cleaning Disc: This tool fits right over your wheel studs and cleans years of scale off the mounting surface in under ten seconds without damaging the steel underneath.
Take Back Control of Your Front End
Experiencing a violent steering wheel shake at highway speeds can shake your confidence as a driver, but it is a problem you are fully capable of diagnosing and solving. By focusing on hub cleanliness, precise torque specifications, and checking the health of your suspension components, you can banish the shudder and restore that brand-new car feeling. Ignoring these warning signs can lead to more severe damage over time, such as the danger of ignoring a slight vibration in your steering wheel. Take your time, use the right tools, and enjoy the safety of a smooth stop.
Have you ever chased a stubborn wheel vibration only to find out it was a completely different part than you originally suspected? Let me know about your experience in the comments below!