
Have you ever been cruising down the road, only to notice your dashboard lights flickering every time you activate your turn signal? It’s that little annoyance that sneaks up when you’re trying to signal a lane change or a turn, and suddenly, your car’s dashboard feels like a disco party. I remember the first time it happened to me—thought I was imagining it or that my car was about to give out. But as it turned out, that flickering was a sign of something deeper, and I learned that ignoring it could lead to more serious issues down the road.
Understanding the Flickering Mystery
The flickering isn’t just a flashing light show. It’s often a sign of electrical gremlins hiding within your vehicle’s wiring or connection points. When I first faced this problem, I quickly jumped to conclusions and tried to fix it myself with a vague DIY guide. That mistake taught me the importance of understanding the root cause before jumping straight into repairs. Sometimes, it’s a simple issue like a loose or corroded connection, and other times, it points to a more complex electrical problem that requires professional attention. But the good news is, with a bit of knowledge, you can troubleshoot this annoyance yourself or at least understand what a good mechanic should check.
Electrical issues in cars are more common than you might think. According to Automotive Service Association, electrical system problems account for a significant percentage of vehicle breakdowns. Knowing what to look for can save you time, money, and stress. Once I started paying attention, I discovered that flickering often correlates with worn-out wiring, bad ground connections, or failing alternators. These are issues that can be tackled when identified early, or better yet, prevented entirely.
Have you ever experienced your dashboard flickering when using the turn signal? If yes, you’re not alone. Recognizing this problem early can make all the difference in maintaining your vehicle’s health and your safety on the road.
Start with Visual Inspection of Wiring and Connections
Begin by opening your vehicle’s hood and locating the wiring harness connected to your turn signal switch and dashboard lights. Look for signs of wear, corrosion, or loose connections. I once faced flickering lights on a rainy day; I found that a corroded connector was causing intermittent contact. Disconnect and then reconnect cleanly, ensuring all plugs are seated firmly. Using a flashlight helps reveal hidden corrosion. Properly secured connections can often resolve minor flickering issues without professional help.
Test the Grounding Points
Good grounding is vital for electrical stability. Locate the grounding points for your dashboard and turn signal circuits—typically a bolt attached to the vehicle’s metal frame. Remove the ground wire or strap, clean the contact surfaces with a wire brush or sandpaper, and reattach with a secure bolt. This process is akin to tightening a loose screw that causes a rattling noise in furniture—once snug, the problem often vanishes. A poor ground can induce flickering and other electrical anomalies, so don’t skip this step.
Inspect and Replace the Turn Signal Switch
If wire connections and grounds are intact, the next step is to examine the turn signal switch itself. Remove the steering column cover to access the switch assembly. Look for signs of wear, melting, or corrosion. Test the switch for continuity with a multimeter—if readings are inconsistent or open, replacement is necessary. I replaced a faulty switch on my car after noticing the flickering persisted even after cleaning connections; the new switch instantly stabilized the dashboard lights. Replacing the switch can be a straightforward fix if you follow manufacturer instructions or seek professional assistance.
Evaluate the Alternator Output
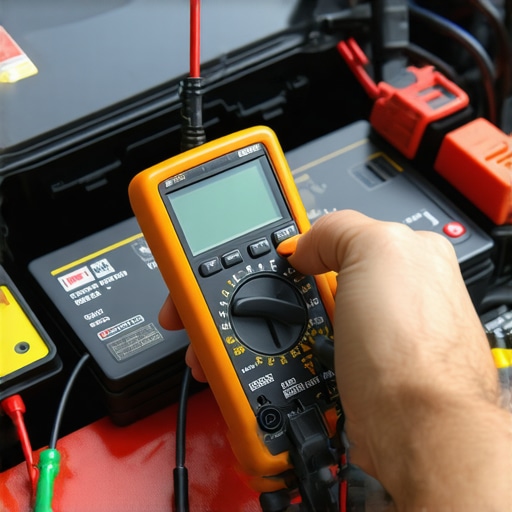
An underperforming alternator can cause voltage fluctuations, leading to flickering lights. Use a digital multimeter set to measure DC voltage—measure across the battery terminals with the engine running. A healthy alternator typically outputs between 13.8V and 14.8V. If readings fall below this range, the alternator may be failing. In my experience, a failing alternator also caused dim headlights and slow power window operation, indicating the broader electrical system was compromised. Replacing or repairing the alternator will often resolve flickering caused by voltage instability.
Use Diagnostic Tools to Pinpoint Issues
Modern vehicles often store error codes related to electrical faults. Connect an OBD-II scanner to your car’s port and check for any stored codes that could relate to electrical or lighting issues. Codes such as P0562 (System Voltage Low) point toward charging system problems. When I used a scanner before attempting repairs, I identified a voltage regulator issue that was causing the flickering. This approach saves time and directs your repairs more effectively, avoiding unnecessary replacements.
Consult a Professional Technician When Necessary
If you’ve gone through these steps and the flickering persists, it’s time to seek expert advice. Electrical issues can be subtle and interconnected, requiring specialized diagnostic equipment. Visiting a trusted mechanic ensures that complex problems—like a malfunctioning ECU or wiring harness damage—are properly addressed. For reliable repairs, consult experts through trusted providers like Collision Renew or read more about comprehensive repair strategies here.
When it comes to auto repair, many vehicle owners hold onto myths that can lead to costly mistakes. One prevalent misconception is that all mechanics are equal, providing the same quality of service. In reality, the industry is diverse, and unqualified or dishonest shops may cut corners, leading to subpar repairs or unnecessary replacements. It’s crucial to choose reputable providers like Collision Renew to ensure your vehicle receives the care it deserves. Another myth is that frequent maintenance isn’t necessary if your car feels fine. However, upcoming issues often give subtle signs that most drivers overlook, risking larger problems down the line. Regularly scheduled professional check-ups can prevent breakdowns and extend your vehicle’s lifespan.
Investing in the Right Equipment
To ensure longevity and reliable performance, I swear by a high-quality digital multimeter. I personally use the Fluke 115 because of its accuracy and durable build. It allows me to quickly diagnose electrical issues, like checking voltage drops across connections or testing components without guesswork. When dealing with sensors or wiring, having this tool at hand speeds up troubleshooting and helps avoid unnecessary replacements.
Another must-have is a OBD-II scanner; I recommend the BlueDriver for its comprehensive code reading and real-time data capabilities. This device connects effortlessly via Bluetooth to my smartphone, providing instant insights into engine health and electronic systems. Regular scans can preemptively catch problems before they escalate, saving time and repair costs.
Methods That Make Maintenance Stick
Beyond tools, establishing a routine is key. I set regular checks every 10,000 miles, focusing on fluids, brake pads, and transmission health. During these inspections, I employ techniques like listening for abnormal sounds and monitoring vehicle responses, which often reveal hidden issues. Documenting these checkups helps identify patterns—say, if brake wear is uneven or if transmission fluid appears darker than usual.
Upcoming Trends in Auto Repair
Looking ahead, I believe the integration of advanced diagnostic software and AI-driven tools will revolutionize vehicle maintenance. These innovations promise quicker diagnostics and predictive repairs, reducing breakdowns and enhancing safety. Embracing such technology now puts you ahead of the curve and extends your vehicle’s usable life.
How do I maintain my vehicle’s electrical system over time?
Consistently inspecting wiring harnesses, ensuring good ground connections, and using diagnostic tools like the BlueDriver can prolong the health of your electrical system. Also, replacing aging fuses and connectors before they fail prevents minor glitches from becoming major problems. Regular cleaning of battery terminals with a wire brush helps prevent corrosion, which is a common culprit behind electrical issues. Investing in these preventative measures means fewer surprises and more miles of smooth driving.
Don’t forget, if you’re tackling complex electrical problems, consulting experienced professionals through trusted resources like Collision Renew can save you time and money. And for a comprehensive approach, check out this guide on restoring your vehicle.
Start incorporating a diagnostic multimeter into your routine today and see how early detection keeps your vehicle running flawlessly. Remember, proactive maintenance isn’t just about fixing what’s broken—it’s about preventing issues before they occur.
Armed with a solid understanding of what causes dashboard flickering, you can now approach your vehicle’s electrical quirks with confidence. Remember, this isn’t just about fixing lights; it’s about safeguarding your vehicle’s core systems and ensuring your safety on every journey. Taking proactive steps—like routine inspections and investing in quality diagnostic tools—can turn a perplexing flicker into a minor maintenance note rather than a costly repair. The wisdom lies in paying attention before it becomes a problem, saving you both money and stress down the line.
Lessons That Changed My Approach to Car Care
- Don’t underestimate small signs: That flickering dashboard light might seem trivial, but it’s often the first warning sign of deeper issues. Ignoring it can lead to more complex and expensive repairs.
- Seek knowledge, not guesses: DIY fixes are great, but understanding the root cause makes all the difference. I learned to use a multimeter and scanner, which empowered me to troubleshoot effectively.
- Start with the basics: Simple checks like inspecting wiring and grounding can resolve most flickering issues. Professional help is essential if these steps don’t solve the problem.
- Invest in reliable tools: A good multimeter and OBD-II scanner are game-changers. They not only diagnose problems faster but also prevent unnecessary replacements.
- Build a maintenance routine: Regular inspections help catch issues early. For tips on extending your vehicle’s lifespan, explore this guide.
Discover Which Tools Elevate Your Car Maintenance Game
- Fluke 115 Digital Multimeter: Trusted for its accuracy and durability, it’s my go-to for measuring voltage and troubleshooting wiring issues efficiently.
- BlueDriver OBD-II Scanner: Its comprehensive diagnostics and real-time data help me pinpoint electrical problems quickly, making repairs less guesswork.
- Cleaning Supplies: Wire brushes and contact cleaners prevent corrosion and maintain solid connections, a simple yet vital part of routine care.
- Reference Materials: Keeping up with this comprehensive guide ensures I stay informed about evolving repair techniques and industry best practices.
Your Next Step Toward Peace of Mind
Taking charge of your vehicle’s electrical health is empowering. Incorporate these lessons, tools, and routines into your car-maintenance journey to enjoy smoother rides and fewer surprises. Remember, your proactive approach today paves the way for more reliable, longer-lasting vehicles tomorrow. Why wait for a breakdown when prevention is within your reach? Dive deeper into reliable auto care by exploring these strategies and regain control over your vehicle’s wellbeing.