
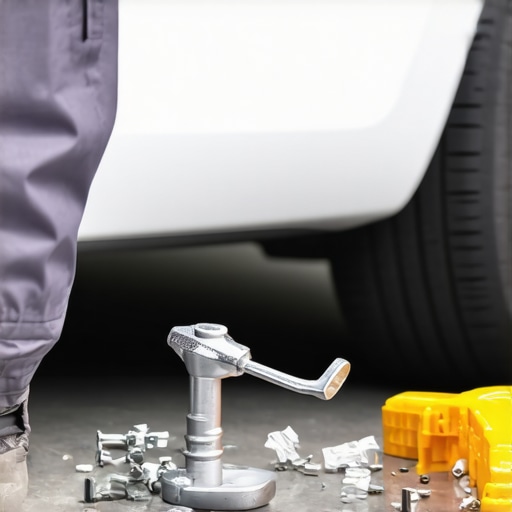
First time I watched a bumper tab snap off during a minor parking mishap, I felt that gut-wrenching mix of frustration and helplessness. It’s that moment when you realize a tiny piece of your car’s structure has decided to give way, leaving you wondering if the whole bumper is about to fall apart. I’ve been there, and let me tell you, it’s more common than you might think—especially as plastic components age and endure the daily grind of road debris, temperature swings, and jostling. But here’s the good news: fixing those snapped tabs isn’t as daunting as it seems, and with a bit of guidance, you can restore your car’s look and integrity without heading straight to the costly shop.
Why Snapped Bumper Tabs Happen More Than You Think
Over time, plastic tabs on bumpers become brittle, especially if you’ve driven through harsh weather or taken a few minor impacts. The vulnerability of these tabs is why many car owners find themselves with loose or hanging bumpers sooner than expected. I learned early on that ignoring these small issues can lead to bigger problems, like mismatched gaps or even more costly repairs down the line. Interestingly, according to CollisionRenew’s recent report, aging plastics are among the leading causes of minor but costly aesthetic issues in vehicles.
So, why bother fixing a small broken tab? Well, aside from maintaining your car’s appearance, secure bumpers help prevent further damage during everyday drives and collisions. Plus, a well-timed repair preserves residual value—something I wish I’d paid more attention to when I first noticed a crack.
If you’re tired of constantly readjusting your bumper or worried about the safety implications of a loose panel, you’re in the right place. Today, I’ll walk you through simple, proven methods to repair and replace those busted plastic tabs — so you can keep your vehicle looking sharp and functioning properly. Ready to get your hands a little dirty? Let’s dive into how you can restore those broken tabs effectively.
Is Repairing Plastic Bumper Tabs Actually Worth It?
When I first thought about tackling broken bumper tabs myself, skepticism was high. Would it hold? Would I actually save money? My early mistake was relying on cheap glue that didn’t stand the test of time. Turns out, not all fixes are created equal. If you’re wary about DIY solutions or skeptical whether such repairs can last, I get it. But trust me, with the right materials and proper technique, repairing or replacing plastic bumper tabs can be both effective and budget-friendly. Curious about what tools and supplies I recommend? You might want to check out our comprehensive guide on collision repair strategies to ensure your fix lasts long-term. Ready to make your bumper look like new? Let’s explore the materials and steps that will make this repair simple and successful.
Gather Essential Tools and Replacement Parts
Before diving into the repair, I recommend assembling all necessary tools: a screwdriver set, plastic weld kit, adhesive or epoxy suitable for plastics, and replacement bumper tabs if available. In my case, I visited a local auto parts store and found generic bumper clips that matched my vehicle’s make and model. Having everything on hand prevents interruptions and ensures a smoother process. Think of it like preparing your toolbox before starting a DIY plumbing project—missing a wrench can derail the entire job.
Remove the Bumper for Better Access
Carefully unbolt the bumper from your vehicle using a screwdriver or socket wrench, following your car’s specific removal instructions. I found that loosening the screws on the wheel wells and under the bumper allowed me to gently pry it free without cracking other clips. This step is crucial because working in the open gives you clear visibility of the broken tabs and allows precise repairs. Remember, patience is key; rushing can cause additional damage.
Identify and Prepare the Broken Tabs
Examine each broken tab carefully. Often, the plastic snaps cleanly, but sometimes jagged edges require smoothing. I used fine-grit sandpaper to clean any ragged edges, ensuring a good bond with the adhesive. If a tab is entirely missing, the replacement clip will serve as a sturdier fix. Think of this step as prepping a surface for painting—clean, dry, and free of debris for best adhesion.
Apply Plastic Adhesive or Welding Material
If you’re repairing a small crack or a snapped-off tab, apply a high-quality plastic epoxy or weld. Spread it evenly over the damaged area, clamping or holding it in place until it cures as per manufacturer instructions. I once Bonded a cracked tab, and I used a plastic welding kit, which melted the plastic back together seamlessly. For larger or missing parts, installing the new bumper clip involves pressing it firmly into the existing socket and allowing the adhesive to set fully.
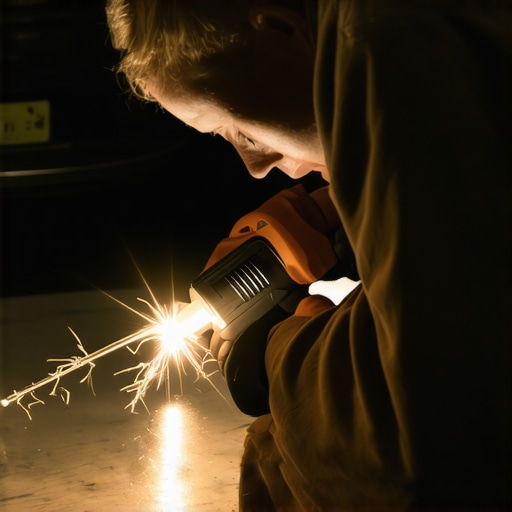
Visual guide to plastic welding and clip installation techniques.
Reattach the Bumper Carefully
Align the bumper with the mounting points on your vehicle, ensuring all clips and bolts fit snugly. Start by hand-threading the screws to avoid cross-threading, then tighten them gradually in a crisscross pattern. During my repair, I found that patience to align everything properly prevented gaps and misfits later. This precise reassembly maintains the bumper’s original shape and proper fitment.
Test and Finalize the Repair
After reattaching, gently shake the bumper to check for looseness or misalignment. If all feels secure, take the car for a short drive to observe any unusual movement or noise. I did this myself, and it ensured that my fix was durable. Remember, a well-executed repair improves safety and aesthetics, so take your time through each step, as rushing can compromise the outcome.
Many car owners believe that basic maintenance and repairs are straightforward, but beneath the surface lie nuanced truths that can make or break vehicle longevity. A common myth is that all brake pads are created equal, leading many to choose cheap alternatives over quality, which can cause premature wear and uneven braking. In reality, understanding the specifics of brake system components and their compatibility is crucial; for instance, some pads are designed for high-performance driving and aren’t suitable for daily commuting, according to automotive experts.
Why do some seemingly simple auto repairs fail quickly, even when performed correctly?
One overlooked factor is the importance of thorough cleaning and surface preparation before installing new parts. Failing to remove residues or old adhesives can compromise the repair’s durability, leading to early failures. External studies, such as those published by the Society of Automotive Engineers, emphasize that neglecting these nuanced steps can significantly reduce repair lifespan and safety. Additionally, many overlook the significance of aligning components precisely; a misaligned brake caliper not only causes uneven pad wear but also increases heat buildup, risking caliper failure. Always remember that auto repairs involve more than just replacing parts; mastering the specifics can save you time and money in the long run. Want to ensure your next brake service or transmission repair lasts? Dive into expert guides and proper procedures to avoid common pitfalls. Have you ever fallen into this trap? Let me know in the comments.
Investing in Quality Tools for Lasting Repairs
As someone deeply involved in auto repairs, I can attest that having the right equipment is vital to maintaining your vehicle’s performance over time. I personally rely on a calibrated digital torque wrench, like the GearWrench Electronic Torque Wrench, because it provides precise torque settings, ensuring components such as transmission bolts or brake calipers are tightened accurately, which prevents future issues. Additionally, a professional-grade core-compatible scan tool like the Autel MaxiCOM MK808 allows me to diagnose problems quickly, clear error codes, and monitor system health—saving me time and money in long-term repairs.
Moreover, I always keep a high-quality plastic welding kit on hand for bumper repairs or fixing cracked plastic parts. This method provides a sturdy, durable bond suitable for plastic components like bumper clips, and it’s a technique I recommend over temporary fixes like adhesives. These tools not only save money but empower you to perform repairs accurately, extending the lifespan of critical components such as brakes and transmissions.
Streamlining Car Maintenance with Smart Software
Using specialized software has revolutionized how I approach vehicle maintenance. Programs like auto repair management systems help keep detailed logs of maintenance schedules, alerting me to upcoming service needs like transmission fluid changes or transmission checks, which are crucial for long-term reliability. I’ve found that setting regular digital reminders minimizes the risk of neglecting essential services, thus avoiding costly repairs down the line.
The future of auto repair points toward integrated diagnostic platforms that communicate directly with your vehicle’s ECU, enabling proactive maintenance. As technology advances, investing in such tools will become more accessible to the average car owner, making maintenance less guesswork and more precision-driven.
How do I maintain transmission health over time?
Consistent transmission maintenance involves regular fluid changes, which is critical because transmission fluid lubricates and cools system components. Delaying fluid replacements can lead to metal-on-metal wear, increasing the risk of complete transmission failure. For best results, I follow the guidance outlined in expert transmission care tips, ensuring I use the recommended fluid type and adhere to scheduled intervals. Additionally, inspecting the transmission filter and replacing it as needed helps maintain smooth shifting and prevents overheating.
Beyond fluid management, keeping an eye on signs like slipping gears or delayed response can catch issues early. Using a high-quality scan tool allows me to monitor transmission-related error codes and sensor outputs, helping to diagnose problems before they escalate. Long-term heat management strategies, such as installing a transmission cooler, can also extend your transmission’s lifespan, especially in hot climates or heavy towing conditions.
For car owners aiming to preserve safety and performance, these maintenance habits are essential. Remember, neglecting such details can result in costly repairs or even complete transmission rebuilds. Investing time and resources into proper maintenance practices ensures your vehicle remains reliable for years to come. Want a more efficient way to keep your transmission running smoothly? Try incorporating the use of a diagnostic scan tool combined with scheduled fluid changes—it’s a proactive approach that pays off. If you need tailored advice or want to learn how to implement these practices specific to your vehicle, don’t hesitate to reach out.
Over the years of tackling bumper repairs, I’ve learned that the biggest breakthroughs come from embracing the nuances of plastic behavior and repair techniques. When I first began, I underestimated the importance of proper surface prep and the right materials, often relying on quick fixes that didn’t last. The key lesson? Invest in quality tools like a professional plastic welding kit and always dedicate time to thorough cleaning and alignment, which drastically extend the life of your repair. Additionally, understanding the unique properties of automotive plastics, as explained in our comprehensive guide, saves you from common pitfalls. Paying attention to detailed fitment and cure times has transformed my approach from patchwork to professional-grade craftsmanship, ensuring safety and aesthetics go hand in hand.