
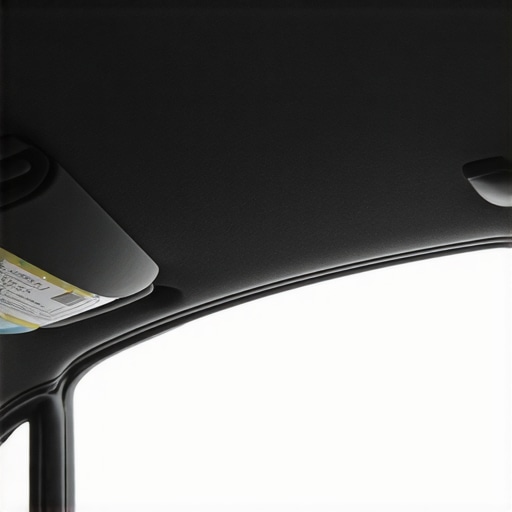
Have you ever leaned into your car and suddenly felt a weird bump or noticed a loose strip of fabric dangling from your ceiling? That sinking, sagging headliner can turn your sleek ride into something that looks neglected—all while making every drive feel just a little less pleasant. I remember the first time I noticed mine starting to peel; it was during a hot summer day, and I thought, “Great, just what I needed—another costly repair.” But let me tell you, fixing a sagging headliner doesn’t have to mean dealing with gluey messes or expensive shop visits.
Why a Sagging Headliner Is More Than Just an Aesthetic Nuisance
A loose headliner isn’t just about looks—it’s about safety, comfort, and even your vehicle’s value. Over time, heat, humidity, and age can cause the glue holding the fabric to deteriorate, leading to sagging or peeling. If left unattended, the fabric can block your interior lights or interfere with your sunroof operation. Plus, a sagging headliner can cause distracting shadows or even fall into your seat during a drive, which is not just annoying but dangerous.
In my early days of auto repair, I made a mistake I don’t want you to repeat: I tried using too much glue, which resulted in a soaked, messy ceiling—and I ended up spending hours cleaning up the sticky residue. Early on, I learned the importance of proper techniques and quality materials, which made all the difference. If you’re like me and want a clean, effective fix, then you’re in the right place.
Today, I’ll guide you through a straightforward approach to restore your headliner without turning your car into a glue factory. Whether your fabric is just starting to droop or is hanging in shreds, I’ll help you get your vehicle looking sharp again. Curious if you’ve faced the common pitfalls of DIY headliner repairs or wondering if this is worth the effort? Keep reading — I’ll share the insider tips that saved me from costly and frustrating fixes.
Is It Really Worth Fixing or Should You Replace?
Many skeptics worry about investing time and money into a repair that might not last. Honestly, I used to think replacing the entire headliner was the only way to go. But I found that, with the right approach, a good DIY fix can last for years. Plus, it’s far more budget-friendly and less invasive. I’ll show you how to do it myself, step-by-step, and even suggest some tips to ensure the fix holds up against the heat and humidity that usually cause the problem in the first place.
Fixing your headliner is not just about aesthetics; it’s about maintaining the comfort and safety of your vehicle. No more loose fabric fluttering in the wind or embarrassing saggy patches when you greet passengers. If you’ve ever felt embarrassed or frustrated by your car’s interior, then this simple, mess-free solution is exactly what you need. Ready to roll up your sleeves? Let’s get started on restoring that headliner to perfect condition.
Remove the Headliner Visually and Prepare
First, park your car in a shaded area and disconnect the negative battery terminal to prevent accidental airbag deployment. Carefully remove interior panels around the headliner using trim removal tools—think of it as gently prying open a stubborn jar lid without breaking it. Once Panels are off, gently peel back the fabric or vinyl covering the headliner board. In my case, I remember sliding a plastic spatula between the fabric and the foam, working slowly to avoid tearing the material. Lay the headliner on a large, stable surface covered with a drop cloth to catch dust and loose fibers.
Clean and Inspect the Headliner Board
With the fabric removed, you’ll see the foam backing and the cardboard or plastic core. Inspect for water damage, sagging spots, or mold. Use a vacuum with a brush nozzle to remove dust and debris—think of it as a dentist cleaning plaque from teeth. If the board is warped or swollen, consider replacing it or reinforcing it with lightweight plywood. I once used a heat gun at low settings to gently dry out damp areas, but caution is critical—too much heat can warp the board further. Check all mounting points and ensure the surface is smooth for reapplication.
Reapply the Fabric Using Quality Adhesive
Apply a high-temperature, spray adhesive designed for automotive headliners—think of it as spray glue but formulated for the interior environment. Hold the spray can about 6-8 inches from the surface and apply an even coat. My experience is that too much glue causes saturation, leading to future sagging, so I used light, multiple coats, waiting a few minutes between sprays for tackiness. Carefully lay the fabric over the board, starting from one edge and smoothing outward to prevent wrinkles—use a foam roller or a clean cloth for this. Connecting this to other car repairs, like fixing a transmission or brake service, patience in preparing surfaces ensures a long-lasting fix.Many car owners operate under misconceptions that can lead to costly repairs down the line. One prevalent myth is that sticking exclusively to the dealership for maintenance guarantees longevity and reliability. While dealerships often provide quality services, independent shops with qualified technicians can sometimes offer equally trustworthy work at a lower price. A study by the AAA Foundation highlights that with proper certifications and training, local mechanics can meet or exceed dealership standards without unnecessary upselling.
Another misconception involves the supposed necessity of using only manufacturer-specific parts and fluids. Though original parts are designed for your vehicle, aftermarket components that meet OEM specifications can perform just as well, often at a fraction of the cost. This myth often leads owners to spend more than needed, a trap that can be avoided by understanding your vehicle’s requirements.
Commonly, drivers believe that ignoring minor issues will make them go away. For instance, a slight delay in transmission shifting or a faint brake squeal might seem insignificant, but these are often early signs of more severe problems. Addressing these symptoms promptly, as discussed in our guide on top transmission repair tips, can prevent expensive replacements later.
Beware of the trap that all repairs require expensive parts or extensive labor. Many advanced auto repairs benefit from innovative troubleshooting techniques—like diagnostic scans or fluid analysis—that can pinpoint issues precisely. For example, the root cause of a persistent squealing brake can be as simple as worn pads, which is relatively inexpensive to fix, rather than a more intricate system failure.
So, how do you avoid falling for these myths? The key is to seek advice from trusted sources—such as reputable auto repair shops and official manufacturer service guidelines—before making decisions. Regularly inspecting critical systems like brakes and transmissions, as emphasized in essential car service checks, keeps issues manageable.
Don’t let misinformation cost you! Equip yourself with knowledge about your vehicle’s true needs, and always ask professionals about the best approach rather than defaulting to assumptions. Have you ever fallen into this trap? Let me know in the comments, and share your experiences or questions. Staying informed is the first step toward smarter auto care.Maintaining your vehicle’s performance over the years requires more than just regular oil changes; it demands the right tools, consistent practices, and a proactive approach to diagnostics and repair. One of my favorite investments is a reliable automotive scan tool like the Autel MaxiCOM MK808, which allows me to quickly read and clear diagnostic trouble codes, monitor real-time data, and identify potential issues early. This saves me from costly repairs later and keeps the car running smoothly between professional check-ups. Another indispensable tool is a high-quality torque wrench. Precise torque application is crucial when reassembling components like spark plugs or wheel lug nuts, ensuring safety and longevity for major systems.
When it comes to fluids and consumables, I prefer OEM-grade transmission fluid for my vehicle, tailored specifically to its make and model. Using the correct fluid and maintaining proper fill levels, as detailed in top transmission repair tips, can significantly extend the transmission’s lifespan and prevent slippage or shifting issues.
Regular inspection and cleaning of essential components like the brake system are also vital. I recommend a brake bleeder kit to remove air from hydraulic lines, which can dramatically improve braking performance. Additionally, keeping a digital multimeter handy helps in diagnosing electrical issues, from faulty sensors to failing relays.
Investing in these tools might seem daunting initially, but the long-term savings and increased confidence in your DIY skills are well worth it. Trend forecasts suggest that automotive diagnostics will become even more integrated with AI-driven systems, making tools with advanced software compatibility more valuable in the future. Staying ahead of this curve means regularly updating your diagnostic software and learning to interpret new data points.
So, how do I maintain these tools over time? Regular calibration of your torque wrench ensures accurate torque application, while periodic updates for your scan tools keep you abreast of the latest vehicle protocols. Proper storage is key—keep your equipment clean, dry, and organized to prolong its lifespan. Take a moment today to examine your current toolkit. Do you have everything needed for an emergency fix or routine maintenance? If not, consider starting with a good-quality multimeter and a reliable scan tool.
By embracing these tools and maintenance routines, you’ll develop a proactive mindset that helps prevent minor issues from becoming major repairs. For a comprehensive guide on how to keep your vehicle performing at its best, visit this resource and start implementing at least one new maintenance practice today. Remember: consistent checkups and the right tools are your best defense against unexpected breakdowns and costly repairs.
The Hardest Lesson I Learned About auto repair
One of my biggest realizations was the importance of patience and proper preparation when tackling headliner fixes. Rushing through the process often led to wasted materials and unsatisfactory results, teaching me that meticulousness pays off in the end.
Uncovering Hidden Truths About DIY Car Fixes
I discovered that many seemingly minor issues, like a loose fabric or sagging headliner, can indicate underlying problems with your vehicle’s environment, such as humidity or heat exposure. Addressing these factors early on can prevent recurring headaches and costly repairs down the line.
Why Relying Solely on DIY Can Be a Double-Edged Sword
While fixing your car’s interior can be rewarding, I learned that knowing when to seek professional help is crucial. Some repairs, especially those involving structural components or electrical systems, are best left to experts, ensuring safety and durability.
My Guide to Essential Auto Repair Tools That Save You Money
Investing in quality tools like high-temperature spray adhesives, trim removal kits, and lightweight reinforcement materials made my DIY projects more efficient and long-lasting. Building your toolkit thoughtfully can make all the difference.
Don’t Hesitate to Take Action for Your Car’s Wellbeing
Owning a vehicle is about more than just aesthetics; it’s a commitment to safety and comfort. By mastering simple repair techniques and knowing your limits, you ensure your car remains a reliable companion. If you’re ready to dive deeper, check out our comprehensive auto repair guide and keep your vehicle in top shape. While you’re at it, don’t forget to schedule regular inspections with trusted professionals—good maintenance starts with informed choices.