
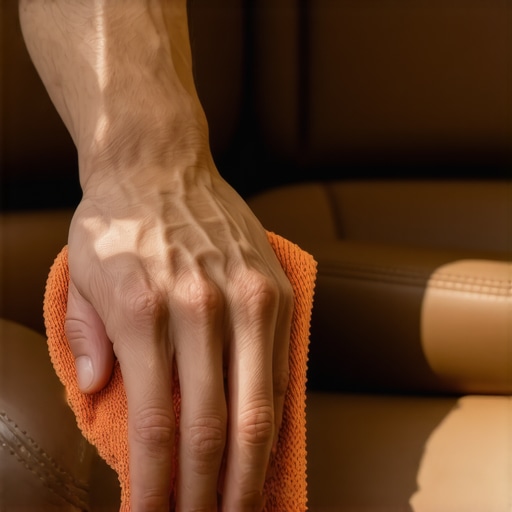
I remember the smell of my first ‘grown-up’ car—a used sedan with butter-cream leather that looked like it belonged in a high-end lounge. Three days later, I dropped a dollop of greasy fast-food sauce right on the driver’s seat. In a panic, I grabbed a bottle of generic all-purpose cleaner from under the sink. I scrubbed. I buffed. And when it dried? A giant, dark, crusty halo greeted me every time I got in to drive. I hadn’t just cleaned the stain; I’d chemically burned the hide. [IMAGE_PLACEHOLDER]
Why Most DIY Leather Cleaning Ends in Heartbreak
Leather is a living material, or at least it used to be. It is porous, delicate, and surprisingly sensitive to pH levels. Most people treat their seats like a plastic dashboard, but that is a one-way ticket to permanent discoloration and premature aging. If you have already noticed that your steering wheel is sticky and gross, you are seeing the exact same body oil buildup that is currently eating away at your seat bolsters. We focus so much on essential car service checks to extend your vehicle’s life, but we often forget that the cabin is where we actually spend our time. Have you ever tried to ‘fix’ a small spot only to make the whole seat look like it is molting? I have been there, and it is a total gut-punch.
Is This Special Cleaner Really Worth the Twenty Bucks?
I used to think specialized leather conditioner was just a scam to get me to spend more at the auto parts store. I was dead wrong. According to the Leather Research Laboratory, automotive leather typically sits at a pH of 4.5 to 5.0, and using common household soaps—which are highly alkaline—causes the collagen fibers to swell and eventually stiffen. This leads to the very stains and cracking we are trying to avoid. Especially if you are trying to stop sun damage from killing your car’s resale value, using the right chemistry is non-negotiable. Today, I am going to share the low-moisture technique that finally stopped my seats from staining and kept that factory-fresh feel. Have you ever accidentally ruined a piece of your interior trying to keep it clean? Send me a message or let me know—I would love to hear your ‘oops’ stories so we can all learn from each other.
Get the Grit Out Before You Start Scrubbing
The first step to a professional-grade clean has nothing to do with liquids. You must vacuum every square inch of the upholstery using a soft brush attachment. Think of dirt and sand as microscopic shards of glass; if you start rubbing a cleaning solution over them, you are essentially sanding down the protective topcoat of your leather. I once skipped this step on a neglected SUV, thinking the cleaner would just ‘lift’ the dirt. Instead, I ground the fine silt into the grain, leaving behind permanent micro-scratches that made the seat look gray and tired no matter how much conditioner I applied. Just as the best way to clean salt off your cars undercarriage requires removing the bulk debris first to prevent abrasion, your seats need a clean slate before any chemical interaction occurs. Pay special attention to the seams and the areas where the seat back meets the bottom cushion—this is where the ‘sandpaper’ hides.
The Low-Moisture Trick to Prevent Water Damage
The biggest mistake DIYers make is spraying liquid cleaner directly onto the seat. Leather is a skin, and its back side is incredibly absorbent. If you saturate the hide, the moisture travels into the seat foam, which can lead to mold or, worse, cause the leather to stretch and sag. To avoid this, use a foaming dispenser. By turning your cleaner into a dry foam, you allow the chemistry to sit on the surface and suspend the dirt without soaking the material. I learned this the hard way when I soaked a passenger seat in a classic sedan. The liquid seeped through the stitching, and for two weeks, every time someone sat down, a puff of soapy air shot out of the seams. Worse, the leather began to ‘bubble’ because it couldn’t dry from the underside. This is why recovering the luster of sun-damaged clear coats and leather both require a controlled, surface-level approach rather than a flood of product. 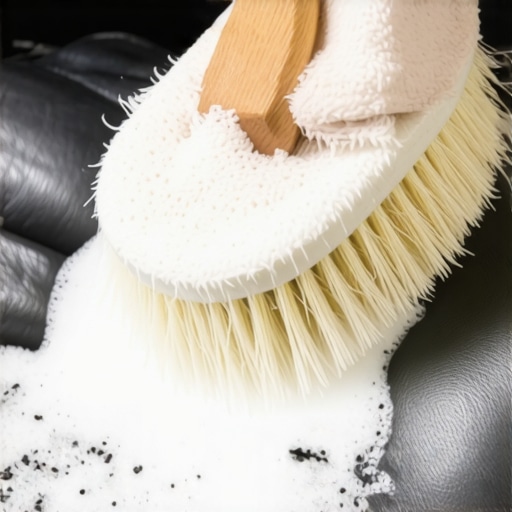
Use a Horsehair Brush Instead of a Scrubbing Pad
Once the foam is applied, do not reach for a kitchen sponge or a stiff plastic brush. You need a dedicated horsehair detailing brush. The bristles are soft enough not to scratch the finish but firm enough to get into the ‘hills and valleys’ of the leather grain. Work in small, circular motions. You aren’t trying to scrub the stain out; you are letting the bristles agitate the foam so the surfactants can grab the oil. If you have ever seen how technicians work on factory texture on textured bumpers, you know that maintaining the original feel is all about finesse, not force. If the foam starts to turn brown or gray, it is working.
Why Clean Leather Must Look Matte Rather Than Shiny
After agitating, use a clean, slightly damp microfiber towel to wipe away the dirty foam in one direction. Do not scrub back and forth, or you will just redeposit the grime. Here is the golden rule: clean leather should be matte, not shiny. That oily sheen most people associate with ‘clean’ cars is actually a layer of grease and dirt. If your seats reflect the interior lights, they are still dirty. A truly clean seat should look and feel like it did the day it left the showroom. This attention to detail is just as vital as identifying the real cause of your car smelling like hot oil; once the surface is truly stripped of contaminants, the natural, rich scent of the leather can finally return. Look at the grain under a flashlight—if you see a soft, satin finish, you have successfully saved your interior.While we are talking about that matte finish, we have to tackle the biggest myth in the detailing world: the idea that leather needs to be ‘fed’ like a living organism. Here is the contrarian truth: most modern automotive leather is actually ‘finished’ with a protective urethane coating. According to the International Detailers Association (IDA), nearly all car interiors produced in the last 30 years feature this semi-permeable plastic layer. This means those thick, buttery conditioners everyone raves about are not even reaching the hide. Instead, they sit on top of the coating, turning into a dirt-attracting magnet that eventually causes the finish to crack under the weight of the grime. It is a classic mistake, similar to how people ignore top transmission repair tips by assuming a ‘sealed’ unit never needs a fluid check. In both cases, the ‘set it and forget it’ mentality leads to expensive failures. Have you ever fallen into the ‘more conditioner is better’ trap? Let me know in the comments—I would love to know I am not the only one who once turned my driver’s seat into a greasy slip-and-slide.
The Magic Eraser Trap That Ruins Your Interior
One of the most dangerous ‘hacks’ circulating on the internet involves using white melamine foam sponges to remove scuffs from leather and plastic. Do not do it. While they look soft, these sponges are actually an ultra-fine abrasive, equivalent to 3000-grit sandpaper. I have seen countless owners ‘clean’ a steering wheel only to realize a week later that they have sanded off the entire protective topcoat, leaving the raw material exposed to sweat and UV damage. This kind of shortcut is exactly what we warn against in the ultimate guide to auto repair; what looks like a quick fix often results in structural compromise and permanent aesthetic damage. 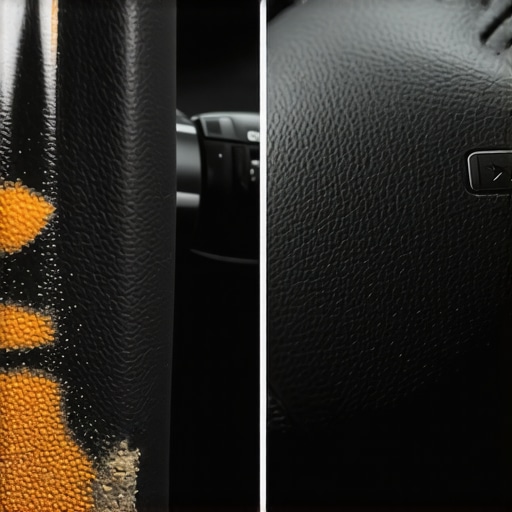
Does My Car Really Need Specialized Fluids for Every Part?
Many readers ask if they can just use a single ‘all-in-one’ cleaner or fluid for their whole car. The short answer is no. Just as you would not put high mileage oil in your brake lines, you should not use an alkaline interior cleaner on acidic leather. The chemistry is specific for a reason. For example, if you ignore the nuance of fluid types, you might eventually wonder why your transmission clunks when you move from drive to reverse because the viscosity or friction modifiers are slightly off. The same logic applies to your seats. Household cleaners like dish soap contain degreasers designed to strip oils from pans. On a leather seat, they strip the essential moisture from the urethane coating, making it brittle and prone to peeling. When you are looking for braking news or service tips, the theme is always the same: precision chemistry and specific tools save you money. By using a dedicated, pH-neutral cleaner and a light, water-based protectant, you are ensuring that the factory finish stays intact for decades rather than months. It is about being a steward of the machine, whether you are working under the hood or just refreshing the cabin.I do not just rely on brushes anymore. My secret weapon for a cabin that stays pristine is a high-pressure steam cleaner like the Dupray Neat. I use it because it reaches 275°F, which is hot enough to liquefy skin oils and kill bacteria without the need for aggressive surfactants. If you have been following collision renewal strategies for restoring your car to perfection, you know that heat management is everything. Using steam allows me to clean the tightest crevices—like those near the seat rails where fries go to die—without ever over-saturating the padding. It is the same level of precision required when you are performing essential car service checks to extend your vehicle’s life; if you are not using the right tool for the specific tolerance of the material, you are just guessing. 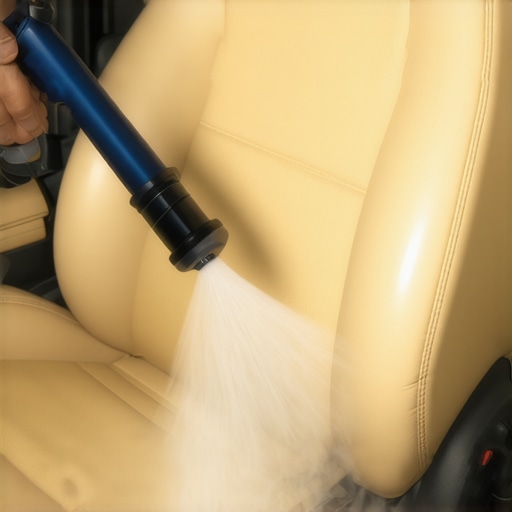
How do I maintain my car interior value for the next decade?
The secret to longevity is not a one-time deep clean; it is the “brush-and-blow” method I perform every two weeks. I use a tornador-style air tool hooked up to my compressor to blow out dust from the seams before it can settle. This prevents the sandpaper effect we discussed earlier. Long-term results in auto care mirror mechanical maintenance. Just as you follow top transmission repair tips for long-term vehicle reliability by staying ahead of fluid breakdown, you should be applying a water-based UV blocker to your leather every 90 days. I personally swear by 303 Aerospace Protectant. It does not contain the silicone that makes seats slippery or attracts dust; it simply acts as a sacrificial layer against the sun. According to the International Detailing Association (IDA) Technical Committee, the most common cause of interior aging is not actually use, but rather the cumulative effect of improper pH-balanced cleaners stripping the plasticizers from the vinyl and leather topcoats. This leads to that brittle, crackled look that no amount of conditioner can fix once it starts. It is similar to how the ultimate guide to auto repair emphasizes prevention over repair. If you wait for the crack to appear, the structural integrity of the finish is already gone. Looking toward the future, we are seeing a massive shift toward ceramic-infused interior coatings. These are not like the wax of the old days; they are liquid polymers that cross-link with the surface to provide a hydrophobic barrier. Imagine spilling a coffee and seeing it bead up on your leather like water on a freshly waxed hood. We are already using these techniques when we restore factory texture on textured bumpers to ensure the repair lasts as long as the car. My advanced tip for you this week? Grab a high-quality horsehair brush and a bottle of pH-neutral cleaner—not the stuff from the grocery store, but a dedicated auto product—and try the dry foam method on one small section of your driver’s bolster. You will be shocked at how much dirt comes out of a seat that looks clean.
Lessons Bought With Ruined Leather and Regret
After years of detailing, I have realized that the biggest mistake isn’t using the wrong soap—it is rushing the process. I’ve learned that a soft-bristle brush is far superior to any rag because it reaches into the grain where oils hide. Another lightbulb moment was realizing that ‘clean’ is a feeling, not a shine. It is very similar to how collision renewal strategies for restoring your car to perfection emphasize that surface preparation is 90% of the work. If you skip the vacuuming or the test spot, you are just inviting a disaster that no amount of conditioner can fix.
My Go-To Toolkit for a Showroom Interior
To get professional results at home, I rely on a few specific items that I have trusted for years. I swear by Gyeon LeatherCleaner Mild because its pH-neutral formula is incredibly forgiving on modern urethane coatings. I always pair it with a Colourlock Horsehair Brush to ensure I am agitating the surface without scratching it. For protection, 303 Aerospace Protectant is my secret for a factory-matte finish that blocks UV rays. Using these specific tools is the interior equivalent of following top transmission repair tips for long-term vehicle reliability; using the right chemistry ensures the material lasts as long as the engine. [IMAGE_PLACEHOLDER]
A Clean Cabin Changes How You Drive
There is a profound sense of pride that comes from sitting in a cockpit that has been properly maintained. It is not just about keeping the resale value high; it is about the experience of the drive. Whether you are deep-cleaning your bolsters or staying up to date with braking news for your next service, being a steward of your vehicle is what makes car ownership rewarding. Just as the ultimate guide to auto repair emphasizes preventative care, taking twenty minutes to wipe down your seats today prevents a multi-thousand-dollar upholstery bill tomorrow. Have you ever tried a ‘miracle’ cleaning hack that ended up being a total disaster for your seats? Let me know in the comments below!