One rainy afternoon, I rolled into my driveway only to be greeted by a flashing warning light on my dashboard. My heart sank. It wasn’t just any warning; it was about the bumper sensors, those tiny safety features I usually take for granted. Moments later, I realized that my collisionavoid system was blinking erratically, making me wonder if a simple fender-bender had turned into a dealership nightmare.
Discovering the Real Issue Behind Faulty Bumper Sensors
Like many car owners, I was tempted to head straight to the dealer, expecting a hefty bill and a long wait. But after some digging and a bit of trial and error, I uncovered that fixing these sensors doesn’t always require a trip to the shop. In fact, with a little know-how, you can often solve the problem yourself, saving time, money, and frustration.
Is It Worth Trying DIY Repairs on Critical Safety Features?
Initially, I was skeptical. I thought, “How complicated can bumper sensors be?” Turns out, not as much as I feared — but I did make a mistake early on. I trusted a generic online guide that suggested replacing the sensor entirely without checking the wiring or recalibrating the system. That mistake cost me more time and money. It wasn’t until I learned about calibration and minor adjustments that I started making real progress. For a comprehensive look at common sensor issues and fixes, check out this detailed article.
Understanding the correct troubleshooting steps has been a game-changer for me, and I bet it can be for you, too. If you’re tired of paying dealership prices for what might be simple fixes, keep reading. We’ll explore proven methods to get your bumper sensors back in shape—without leaving your driveway.
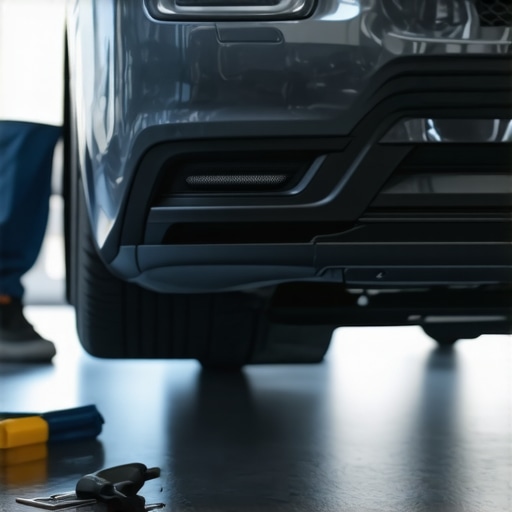
Start with a Visual Inspection
First, open your hood and check the bumper sensors for visible damage or corrosion. I once found a sensor covered in mud and debris, which was causing false readings. Use a flashlight to look for any cracks or misalignment. Clean the sensors gently with a soft cloth and a mild cleaner, being careful not to damage the wiring. This simple check often reveals issues that don’t require complex repairs.
Test the Wiring Connections
Next, inspect the wiring harness connected to each sensor. Look for loose connections, frayed wires, or corrosion at the terminals. I once experienced intermittent sensor faults because a connector had come loose after a minor bump. Gently disconnect and reconnect the wiring, ensuring it clicks securely. Applying dielectric grease can prevent future corrosion.
Use a Multimeter for Electrical Checks
To verify if the sensors are functioning correctly, use a multimeter set to ohms. Disconnect the sensor and place the probes on the terminals. A reading close to zero indicates a short, while an infinite reading suggests an open circuit. If readings are inconsistent, the sensor may be faulty. I tried replacing a sensor based solely on visual cues, but testing revealed the wiring issue was the real culprit, saving me unnecessary part swaps.
Recalibrate the System
After cleaning and checking connections, recalibration is often necessary. Some vehicles allow you to recalibrate using the vehicle’s diagnostic menu or safety system settings. For my car, I parked in a level area, turned it on, and followed a sequence in the owner’s manual to reset the sensors. This process aligned the sensors’ readings, eliminating false alarms. If recalibration fails or isn’t available, proceed to sensor replacement.
Replacing the Sensors
If testing indicates a faulty sensor, remove it carefully. Usually, sensors are mounted with clips or small bolts—use appropriate tools to avoid damage. When installing a new sensor, ensure proper alignment, as misplacement can cause further issues. I once accidentally installed a sensor upside down, which was corrected after consulting the car’s service manual, demonstrating the importance of proper orientation.
Ensure Proper System Functionality
Finally, perform a test drive to confirm the system works correctly. Observe for warning lights or error messages. Some vehicles store fault codes, so using an OBD2 scanner can verify ongoing issues. I once cleared error codes and then drove around the block; the warning light stayed off, confirming my repair was successful. For complex cases, professional calibration might be necessary, but many minor issues can be solved with these steps.
Many car owners operate under misconceptions about auto repair that can lead to costly mistakes. For instance, a widespread belief is that all transmission issues require a full rebuild, but recent studies indicate that many problems can be addressed with targeted software updates or fluid replacements, avoiding unnecessary replacements. In fact, innovative software solutions are often overlooked by mechanics, leading to premature parts replacement and inflated bills.
Are You Falling for the Oversimplification Trap?
One of the most common pitfalls is assuming that all brake squeal signals a need for new pads. Actually, dust buildup, glazed surfaces, or minor misalignments can be culprits, and a simple cleaning or caliper adjustment might suffice. This oversight can cause you to replace brakes unnecessarily, which is both uneconomical and avoidable if you know what to check. Many failures stem from neglecting these nuances, which can be discovered through careful inspection rather than jumping straight to replacement. For advanced insights, check out this comprehensive guide on brake issues.
Another hidden nuance is the importance of correct diagnostics. Relying solely on warning lights without understanding the underlying causes can lead to misdiagnosis. For example, a flashing transmission warning might seem like a hardware failure, but often, software glitches are at fault, which can be fixed with a simple recalibration rather than costly part replacements.
Is Your Service Approach Based on Myths?
Many believe that high-mileage vehicle maintenance always involves expensive parts. While certain components are wear items, many issues, especially with modern vehicles, can be addressed with preventive software updates and fluid flushes. For example, transmission lag fixes often don’t require a rebuild, but rather a precise diagnostic that most shops overlook. This advanced approach saves money and extends your vehicle’s lifespan.
So, the next time you hear an eerie noise or see a warning light, question the myths. Trust in nuanced diagnostics and targeted solutions rather than assumptions and generalizations. Have you ever fallen into this trap? Let me know in the comments.
Maintaining your vehicle’s health over the long term demands not only knowledge but also the right tools. I’ve found that investing in precise equipment can save you significant money and time, especially when addressing complex systems like transmissions and brakes. One of my go-to instruments is a high-quality OBD2 scanner, which allows me to read the vehicle’s fault codes directly—bypassing guesswork and avoiding unnecessary part replacements. Unlike generic scanners, I prefer models that support extensive diagnostics for specific makes, such as Honda or Toyota, ensuring accurate readings and actionable insights.
Complementing my scanner, I rely heavily on a set of digital multimeters with high input sensitivity. These enable me to check wiring integrity, sensor outputs, and electrical connections with confidence. For example, when diagnosing transmission issues, a multimeter helps confirm whether sensor signals are within factory specifications, aligning with the approach discussed in this comprehensive guide.
Further, I endorse the pressure and fluid temperature gauges for systems like brakes and transmissions. Regularly verifying fluid conditions ensures optimal performance and long-term reliability. For instance, a simple fluid flush can prevent overheating and early failure, especially in high-demand periods. These tools have saved me from costly repairs, as they help catch issues like contaminated brake fluid or transmission overheating before catastrophic damage occurs.
On the software front, I utilize specialized diagnostic programs compatible with my scanner, which update regularly to include the latest vehicle calibrations. This ensures calibration routines for sensors or transmission control modules are always current, aligning with the future trend of smart diagnostics. As vehicle complexity grows, relying on these tools becomes not just helpful but essential.
How do I maintain the tools themselves over time?
Proper maintenance involves regular calibration, keeping devices clean, and updating software versions. For my multimeter and scanner, I schedule quarterly checks and software updates, which maintain measurement accuracy and diagnostic relevance. Investing in good-quality cables and protective cases also extends their lifespan. Over the coming years, I predict that handheld diagnostic tools will evolve into more integrated, cloud-connected devices—streamlining data collection and diagnostics even further.
To ensure consistent vehicle performance, I always pair my tools with thorough routine checks and cleanings. For example, after a transmission fluid change, I recalibrate the system using my scanner to avoid slipping or shifting issues. These small but vital steps make a substantial difference in outcomes, echoing the importance of using precise, specialized equipment across auto maintenance.
Start implementing these tools today, especially the diagnostic scanner—I assure you, it’s a game-changer for DIY maintenance. For instance, after inspecting your brake system with a pressure gauge, you might uncover a hidden leak, prompting a simple repair before costly overhaul. Remember, as vehicles continue to improve with advanced sensors and software, staying equipped and educated ensures your car remains reliable and safe for years to come.
What I Wish I Knew When Starting Out
One of the most valuable lessons I learned was the importance of thorough diagnostics before jumping into repairs. Rushing to replace parts without proper testing can lead to wasted time and money. Understanding that simple checks like visual inspections and wiring tests often reveal the root cause saved me from unnecessary replacements.
Another insight was the significance of calibration. Even after fixing the physical components, I realized that system recalibration is crucial for sensors to function correctly. This step often requires following specific procedures, which I initially overlooked, causing repeated warning lights and system errors.
Patience and attention to detail proved indispensable. Taking the time to meticulously clean sensors, examine connections, and perform electrical tests made a noticeable difference in the repair outcome. I discovered that DIY fixes work best when approached with a calm, methodical mindset rather than rushing through the process.
Tools and Resources That Changed My Approach
Investing in a reliable OBD2 scanner was a game-changer. It provided me with clear fault codes and helped me verify if my repairs fixed the issues. I trust brands that support extensive diagnostics because they save me from guesswork and help identify underlying problems accurately. For detailed sensor and calibration guidance, I often refer to this resource, which offers comprehensive tips and step-by-step instructions.
My multimeter became an essential companion, allowing me to check wiring continuity and sensor voltages. High-quality test equipment with precise readings gives me confidence that my electrical connections are sound. Additionally, keeping a small collection of cleaning supplies and dielectric grease ensures my sensors stay free of debris and corrosion, prolonging their lifespan.
Securing a repair manual specific to my vehicle model further bolstered my DIY efforts. These manuals provide detailed diagrams and calibration procedures often overlooked in generic guides. Combining these resources, I built a tailored toolkit that empowered me to troubleshoot effectively and confidently.
Embrace the Journey of Auto Repair
Taking charge of your vehicle’s maintenance may seem daunting at first, but with the right mindset and tools, it becomes an empowering experience. Remember, many complex-sounding issues, like bumper sensor faults, can be resolved with patience and a willingness to learn. Start small—perform visual inspections, test wiring, and consider calibration steps—and watch how your confidence grows.
Vehicle systems are evolving rapidly, making DIY diagnostics more accessible and essential. Engaging actively in your auto repair journey not only saves money but also deepens your understanding of your car’s health. So, why not give it a try today? Your car will thank you for it!
This article really highlights something I’ve noticed as a DIY enthusiast — many so-called ‘complex’ car issues are often solvable with a bit of patience, good tools, and proper troubleshooting. I recently tackled a similar bumper sensor problem after my recent winter drive, and your step-by-step approach mirrors what I did — starting with a visual inspection, cleaning the sensors, and checking the wiring with a multimeter. What I learned is that proper calibration afterward is crucial, especially for newer car models with advanced safety systems. I’d add that having a quality OBD2 scanner that supports parameter reading can really make the difference—it’s like having a diagnostic assistant right in your hand. For anyone hesitant about DIY repairs, I’d suggest investing in a guide specific to your car model, and don’t forget safety! Have others here found calibration procedures to be straightforward, or do the newer systems require a professional touch? Would love to hear other experiences.