
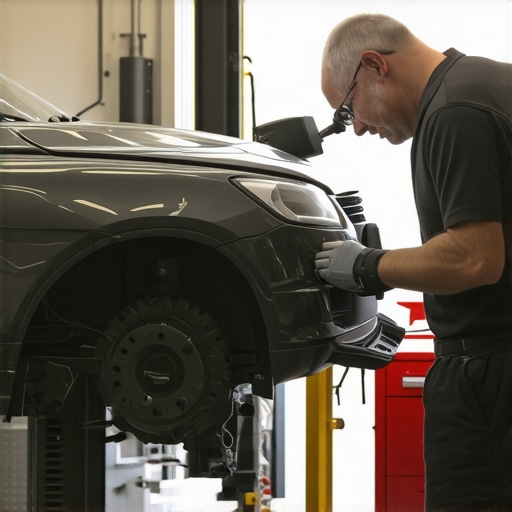
It was a frustrating afternoon when I looked closer at that seemingly minor door ding in my car. As I ran my hand over the dent, I realized it was deeper than I initially thought. And like many DIY enthusiasts, I thought, “Why not just grab some Bondo and fill it in?” But as I applied the filler, I quickly learned that not all dents are created equal—and that some require professional attention. This moment was my lightbulb: deep door dings demand more than a quick fix with Bondo.
Understanding Why Bondo Falls Short for Deep Dings
Deep door dings are often more than surface-level imperfections. They involve the metal’s structure beneath the paint, sometimes stretching or creasing. Using Bondo—an automotive body filler—might seem like an easy solution, but it’s just that: a surface fix that doesn’t address the root problem. What’s worse, filling a deep dent with Bondo without proper reshaping can lead to uneven surfaces, cracks, or even paint failure over time. Early on, I made the mistake of thinkng Bondo could handle every ding, but that quickly turned into a costly lesson in auto repair. Experts emphasize that for deep dents, the proper approach involves reshaping the metal itself, not just covering it up.
Have you ever tried to ‘patch up’ a deep dent, only to find it p poking through weeks later? If so, you’re not alone. Many car owners fall into this trap, thinking DIY fixes are sufficient. However, long-term durability depends on correct techniques, which is why I now recommend consulting with professionals or learning about proper collision renewal methods.
For more comprehensive strategies on restoring your vehicle’s bodywork, check out our detailed guide on [collision renewal strategies](https://collisionrenew.com/collision-renewal-strategies-restoring-your-car-to-perfection). Dealing with deep dings isn’t just about aesthetics; it’s about preserving your car’s structural integrity and resale value.
In the next sections, I’ll share step-by-step advice on assessing whether a dent can be DIY-repaired or if it’s time to call in a pro. Plus, we’ll explore some common pitfalls and how to avoid them. Have you faced a deep ding that just wouldn’t respond to your home fix? Drop your story in the comments—I’d love to hear about your experiences.
Assess the Damage Accurately
Start by examining the dent’s depth and shape. Use a straightedge or a paint stick to measure how far the dent extends into the panel. Remember, if the metal is creased or stretched significantly, a simple filler won’t suffice. I once tried to fix a deep dent with just Bondo, but the area cracked after a few weeks, showing the importance of proper assessment.
Gather Necessary Tools and Materials
You’ll need a combination of automotive body tools, such as a dent puller, vice grips, a heat gun, and sculpting tools. For reshaping metal, a slide hammer or a hydraulic dent extractor can be invaluable. Additionally, have protective gear like gloves and safety glasses ready. Think of this step as preparing your toolkit before tackling a plumbing issue—you wouldn’t start without the right gear.
Prepare the Surface
Clean the area thoroughly with a degreaser or alcohol to remove dirt, wax, and grease. This ensures better adhesion if you plan to apply any filler afterward. In my experience, neglecting this step can lead to poor results and the need to redo work. Proper preparation is the foundation for a smooth finish, much like priming a surface before painting a wall.
Use Heat to Make Metal More Malleable
Apply gentle heat with a heat gun around the dent. This softens the paint and metal, making reshaping easier. Be cautious not to overheat, which can damage the paint or cause discoloration. I once applied too much heat and ended up with a burnt patch, but with patience, I managed to get the metal to move more freely. Think of heating as akin to softening wax before molding—necessary for easier reshaping.
Reshape the Metal Carefully
Begin gently tapping the dent from the inside out, using a plastic or rubber hammer to minimize damage. For access, you may need to remove or pry back parts of the panel. Alternatively, attach a dent puller or slide hammer to the dimple and gradually pull it out, applying steady pressure. This process is similar to easing out a bent wire—slow and deliberate moves yield the best results. I once spent an hour gently working on a stubborn dent; patience was key to achieving a nearly invisible repair.
Refine the Surface
Once the dent is reshaped, use sanding blocks or DA sanders to smooth the area flush with surrounding panels. Start with coarse grit and progress to finer grits for a seamless finish. If the area is still uneven, perform additional gentle reshaping. My initial attempts left slight ridges, but persistent sanding and reshaping fixed the irregularities, preparing the surface for paint. Think of this as sanding a wooden surface before varnishing—precision makes all the difference.
Apply Primer and Paint for Final Finish
Spray a primer suitable for automotive use, then match your car’s paint color and apply in thin layers. Let each layer dry completely before applying the next. To blend the repaired area with the rest of the panel, feather the edges of the paint. This step seals the repair and restores the vehicle’s appearance. Remember, patience and thin coats prevent drips and runs—no shortcuts here. After carefully following these steps, I managed to restore my car’s panel, making the dent virtually invisible.
When it comes to vehicle maintenance, many car owners operate under misconceptions that can lead to costly mistakes. One prevalent myth is that all transmission issues are caused solely by low fluid levels, but the truth is far more nuanced. Proper transmission care involves understanding the type of fluid your vehicle needs, the condition of the internal components, and the driving habits that influence wear and tear. Relying solely on top-offs without a comprehensive diagnosis can result in accelerated damage, as highlighted in expert analyses such as those found at [top transmission repair tips](https://collisionrenew.com/top-transmission-repair-tips-for-long-term-vehicle-reliability).
Rolling Up Your Sleeves: Essential Tools for Auto Maintenance
When it comes to keeping your vehicle in top shape, having the right tools can make all the difference. I personally swear by a high-quality dial indicator for precise measurements during brake rotor inspections—nothing beats its accuracy when checking for warping or uneven wear. A digital multimeter is indispensable for diagnosing electrical issues, from battery drains to sensor malfunctions; my favorite is one with auto-ranging capabilities, which simplifies testing without fuss. Additionally, a good set of plastic pry tools helps avoid scratching delicate trim, especially when removing panels to access hidden components like door lock actuators or interior wiring. Investing in a reliable torque wrench ensures you tighten bolts, like wheel lug nuts, to manufacturer-recommended specifications, preventing potential wheel-off accidents or uneven brake pad wear.
Future Trends in Car Maintenance Tools
Technological advancements point towards smarter diagnostic devices and wireless interfaces. Portable scan tools that connect via Bluetooth to your smartphone can provide real-time data, fault code histories, and even guide you through repairs with augmented reality overlays. As vehicle systems become more integrated and reliant on digital controls, I see handheld OBD-II scanners evolving into comprehensive repair aids, reducing the need for frequent trips to the shop. Keeping abreast of these innovations will empower you to diagnose and address issues faster, saving time and money in the long run.
Maintaining Fast, Efficient Repairs Over Time
Long-term maintenance success hinges on disciplined schedules and high-quality parts. Regularly changing transmission fluid with top-tier synthetic oils as recommended in our expert guide ensures smooth gear shifts and prevents costly slips or burns. Using certified brake components and having your rotors resurfaced or replaced when they warp keeps stopping power reliable. For collision renewal, always prioritize proper metal reshaping rather than superficial fixes; professional techniques like hot stapling or metal cold-working restore structural integrity, extending your vehicle’s lifespan. Scalability is another key aspect: if you own a fleet or multiple cars, investing in modular maintenance systems with compatible diagnostic adapters allows you to streamline servicing across your entire fleet.
How do I keep my vehicle’s transmission in top shape over the years?
Consistency is vital. Regularly scheduled transmission fluid changes using a trusted brand of synthetic fluid help prevent slipping and gear hunting, especially in modern cars with sensitive electronic transmission controls. Monitor for signs like delayed shifting or slipping and address them promptly—early intervention saves significant repair costs. Additionally, inspecting the transmission cooler and ensuring proper cooling during hot summer drives prevents overheating. Remember, a well-maintained transmission not only enhances safety but also sustains resale value and driving enjoyment. For detailed steps, our comprehensive auto repair guide offers valuable insights on keeping your car running smoothly over time.
Finally, if you’re inspired to take your maintenance skills further, consider mastering the technique of flushing your braking system, which can prevent corrosion and improve pedal feel. This advanced tip can significantly prolong component lifespan and enhance safety—try it out next weekend!
The Hardest Lesson I Learned About Deep Dent Repairs
One of the toughest lessons I encountered was realizing that not all dents can be fixed with a quick application of Bondo. Deep door dings involve structural changes to the metal, and rushing to cover them up often results in future cracks or paint failures. This experience taught me to assess each dent carefully and opt for proper reshaping techniques, or consult professionals when necessary.
Why DIY Fixes Can Sometimes Cost More in the Long Run
I used to believe that a little sanding and filling would restore my car’s look; however, I found out that superficial repairs rarely withstand time or weather. Improper reshaping or neglecting prep work can lead to bigger issues down the line. My advice: invest in learning or hire experts for damages beyond surface level. It’s worth preventing costly rework and preserving your vehicle’s value.
How to Spot When It’s Time to Call in the Pros
Knowing when a dent exceeds DIY capacity is vital. If the metal is creased, stretched, or the damage is significant, professional tools like hydraulic dent extractors and hot stapling provide better results. I recommend checking out collision renewal strategies for insights on advanced restoration methods that ensure structural integrity and a flawless finish.
My Journey from Frustration to Confidence in Auto Repair
Trying to fix deep dings on my own initially felt empowering. However, failure to reshape the metal properly led to repeated repairs and wasted time. Eventually, I learned that patience, proper tools, and sometimes professional help save both money and stress. Now, I approach repairs with a better eye, knowing that quality work safeguards my vehicle’s future.
Getting Started Might Be Easier Than You Think
If you’re overwhelmed by deep door dings, start by assessing the damage carefully. Gather quality tools like dent pullers and heat guns, and don’t hesitate to seek expert advice if needed. Remember, small steps build confidence. Check out our comprehensive auto repair guide to help you get started on realistic, effective repairs that last.