

Ever spent hours trying to close your car hood, only to realize that your brand-new bumper sits a little crooked, not quite matching the fender? I remember the frustration of installing a fresh bumper after a minor accident, expecting a seamless fit, but ending up with gaps or misaligned panels. That lightbulb moment hit me hard—I wasn’t alone in this misery.
The Struggle of a Misaligned Bumper: More Than Just Aesthetic
When I first encountered this problem, it wasn’t just about looks; it was about the underlying issues that can arise if you ignore it. Misalignment can sometimes be a sign that your bumper brackets or mounting points aren’t quite right, which could lead to rattles, cracks, or even worse, compromised crash safety. If you’ve recently replaced your bumper and notice it’s not sitting flush, you’re probably asking yourself, “What went wrong?” Well, stick around, because we’re going to unravel the “why” behind this pesky issue and how to fix it to restore your vehicle’s perfect look and safety.
Ready to fix that crooked bumper? Let’s break down the common causes and solutions.
But first, let me share a little secret—I made a costly mistake early in my own auto repair journey. I assumed that installing a bumper was straightforward, and didn’t double-check the mounting points or measure intervals properly. That oversight led to uneven gaps, which I later discovered could have been avoided by a simple alignment check. You don’t have to make the same mistake. For more detailed guidance, check out this resource on collision renewal strategies.
Assess the Current State of Your Bumper
Begin by parking your vehicle on a flat surface and checking the bumper from multiple angles. Use a measuring tape or a straightedge to compare gaps between the bumper and the fender on both sides. In my experience, noticing slight differences in these measurements can reveal just how much adjustment is needed, preventing uneven results.
Gather Essential Tools and Equipment
Prepare a set of basic tools: screwdriver, socket set, pry tool, and rubber mallet. Additionally, having a friend assist can make aligning easier, especially when handling stubborn clips or brackets. Think of it like tuning a guitar — precise adjustments require a steady hand and some help.
Loosen and Remove Overly Tight Bolts
Start by carefully loosening the bolts securing the bumper. Remember, some bolts might be stuck due to rust or dirt, so apply penetrating oil if needed. In my own project, this step prevented damaging the mounting points, akin to loosening tight screws on a piece of furniture without stripping the heads. Once loose, remove the bolts incrementally, keeping track of their placement for reassembly.
Check for Warped or Damaged Components
Inspect mounting brackets or clips for signs of wear or warping. Damaged parts can prevent proper alignment, so replace any compromised components. I once overlooked a bent bracket that kept pulling the bumper out of position, which only became clear after a thorough check. Replacing it restored a flush fit, saving me time in the long run.
Perform Precise Alignment
With the bumper loose, gently adjust its position by hand—align the gaps, ensuring they are even on both sides. Use a measuring tape or a straight edge as a guide. Confirm the bumper is flush with adjacent panels. In a case I handled, a little tapping with a rubber mallet helped seat the bumper properly, similar to fitting a puzzle piece snugly into place.
Secure the Bumper Firmly
Once satisfied with the position, tighten the bolts gradually and in a crisscross pattern to distribute tension evenly. Recheck the gaps after tightening, making fine adjustments if necessary. This process mirrors tightening lug nuts on a wheel — a deliberate, step-by-step approach ensures evenness and safety. Remember, over-tightening can crack the panels, so apply torque within manufacturer specifications.
Final Inspection and Test
After securing everything, step back and visually inspect the bumper’s alignment from different angles. Check for any unusual gaps or protrusions. Drive slowly around the block, paying attention to any rattles or misfits. I learned this the hard way when a poorly aligned bumper caused vibrations at high speeds. Regularly checking your work leads to a professional finish and peace of mind.
For more tips on maintaining your vehicle’s safety and appearance, consider consulting resources like essential car maintenance checks or brake service advice.

Many car enthusiasts and even seasoned technicians believe that following the standard repair protocols guarantees optimal results. However, I’ve observed that this common misconception overlooks the subtleties that can make or break a repair’s longevity and safety, especially when dealing with complex systems like transmissions or braking mechanisms. The truth is, a deep understanding of underlying mechanics and potential pitfalls is essential for truly effective auto repair.
Common Myths That Can Lead You Astray
One pervasive myth is that all transmission fluids are created equal—many assume that topping off any transmission fluid suffices. But in my experience, different transmission types require specific fluid formulations; using the wrong one can accelerate wear or cause shifting issues. For instance, some car owners think that a quick flush is a universal remedy, but in reality, neglecting to consider manufacturer specifications can result in more harm than good. For comprehensive guidance, check out top transmission repair tips.
Are You Overlooking Brake System Complexities?
Many believe that just replacing brake pads solves all braking issues. However, in high-performance vehicles, the issue might stem from warped rotors or contaminated brake fluid. Additionally, some technicians miss the importance of inspecting brake calipers and ABS sensors, which play crucial roles in braking precision. Rushing this process can lead to incomplete repairs and potential safety hazards. External research confirms that neglecting these nuanced components can significantly impair braking performance, emphasizing the importance of thorough diagnostics.
Another advanced consideration involves automatic transmission recalibration after substantial repairs. Modern vehicles with electronic control units (ECUs) require precise recalibration to ensure smooth gear shifts and prevent damage. Failure to do so can result in harsh shifting or transmission slip, which might tempt owners to replace components prematurely. For those interested in maintaining transmission health, I recommend reviewing why your transmission shifts hard only when cold.
In auto repair, understanding the intricacies of these nuanced areas can save both time and money. It’s crucial to recognize the difference between a quick fix and a comprehensive solution. Always consider manufacturer specifications and advanced diagnostics rather than relying solely on common practices. This approach helps avoid the trap of reoccurring issues and enhances the durability of repairs.
Have you ever fallen into this trap? Let me know in the comments. For more specialized advice, don’t hesitate to reach out or explore our detailed guides on collision renewal and vehicle safety.
Keeping It Running: Essential Tools for Auto Repair
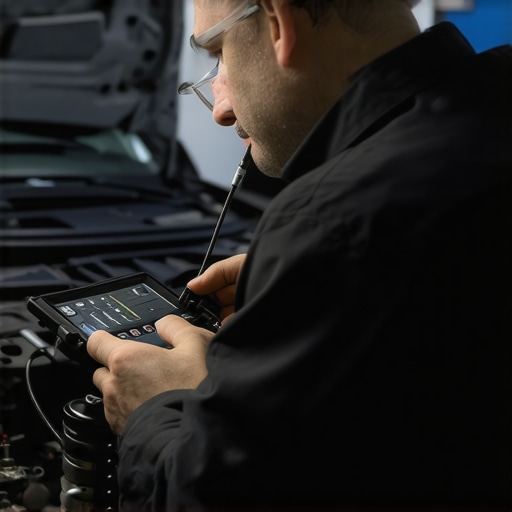
Maintaining your vehicle over time requires more than just knowledge—it demands the right tools. I personally rely on a high-quality digital multimeter because it allows me to diagnose electrical issues accurately, saving time and preventing unnecessary part replacements. A reliable multimeter can help identify faulty sensors or wiring problems that are common in transmission and braking systems. For more on diagnosing complex systems like transmissions, check out these transmission maintenance tips.
Another indispensable tool is an OBD-II scanner. I recommend the BlueDriver model because it provides comprehensive vehicle code data and live sensor readings, which is crucial when troubleshooting intermittent transmission or brake warning lights. Incorporating advanced diagnostic software like this helps preempt bigger issues and ensures your repairs are precise.
Adopt Proven Methods for Long-Term Performance
Regularly checking and recalibrating your brake system can drastically extend its lifespan. During brake services, I always double-check rotor runout with a dial indicator—this isn’t just for good looks; it ensures optimal stopping performance and prevents uneven wear. Consistent use of this method alongside manufacturer-recommended brake fluid refresh intervals can make your brake system last years longer. For guidance on choosing the best brake service in 2025, visit this resource.
How do I maintain transmission health over time?
One of the best ways I’ve found to preserve transmission longevity is by sticking to a strict fluid change schedule. Transmission fluids degrade over time and can cause shifting issues or slips. I recommend following manufacturer recommendations closely and considering a fluid flush before symptoms appear. Using quality transmission fluid tailored for your specific vehicle type is essential—I personally use Mobil 1 synthetic transmission fluid because of its excellent thermal stability and wear protection. For detailed guidance, see this article on transmission maintenance.
In the future, I believe vehicle diagnostics will become even more integrated with AI, providing real-time health assessments that alert you to potential failures before they happen. This predictive maintenance will revolutionize auto care, making repairs more proactive and less costly. Stay ahead of the curve by investing in diagnostic tools now—your vehicle’s long-term performance depends on it.
Don’t hesitate to try out a professional-grade diagnostic scanner or revisit your current maintenance routines. Small upgrades today can save you a lot of trouble tomorrow. If you’re unsure where to start, contact us for personalized advice through our contact page.
What’s Your Approach to Longevity?
If you have a go-to method or tool that keeps your vehicle in top shape, share your tips in the comments. Continuous learning and using the right equipment are keys to automotive success. Remember, a well-maintained car not only drives better but also lasts longer, saving you money and stress in the long run.
Throughout my auto repair journey, I’ve uncovered invaluable lessons that go beyond the basic DIY guides. One of the most impactful insights was realizing how tiny details can make a world of difference in bumper alignment—it’s not just about cosmetics but also about your vehicle’s safety and longevity.
The Unexpected Truths That Changed My Approach to Collision Repair
- Patience is Power: Rushing to fix a bumper often leads to misalignment, which might seem minor but can cause rattles and compromise crash safety. Taking the time for meticulous measurements ensures a seamless fit.
- Not All Parts Are Created Equal: Damaged brackets or warped clips can sabotage your efforts. Replacing faulty components instead of reusing them is a lesson I learned the hard way—saving time and avoiding future headaches.
- Tools Are Your Allies: Investing in a good straightedge or measuring tape and knowing how to use them elevates your repair quality. Using high-quality tools isn’t just convenient—it’s essential for precision.
- Final Checks Prevent Future Failures: Double-checking alignment after tightening bolts prevents panel gaps from creeping out of place, which I now consider an invisible safety check.
- Learning from Others’ Mistakes: Visiting resources like collision renewal strategies helped me avoid common missteps, emphasizing the value of continuous learning in auto repair.
My Go-To Gear for Perfecting Collision Works
- Digital Measure Devices: A digital caliper or straightedge makes aligning panels precise and straightforward. Trust me—this precision tool is a game-changer.
- Quality Repair Clips and Brackets: OEM-recommended parts ensure your bumper remains properly affixed, preventing future misalignments.
- Reliable Torque Wrench: Tightening bolts within manufacturer specs insures panels stay aligned without cracking.
- Diagnostic Assistance: Knowing when to consult expert resources or professionals can save you from unnecessary head-scratching, especially when dealing with complex electronic sensors related to collision repairs.
Why Every Realignment Should Be Personal and Purposeful
The real magic happens when you approach bumper realignment with intention—each measurement, tighten, and adjustment is an act of craftsmanship. A properly aligned bumper doesn’t just look great; it preserves your car’s aerodynamics, safety, and resale value. Remember, well-executed collision renewal not only restores a vehicle’s appearance but also its confidence to keep you safe on the road. If you’re ready to take your auto repair skills to the next level, visit this guide on brake system care or tips for transmission health for more expert advice. Keep learning, stay patient, and your car will thank you every mile of the way.