
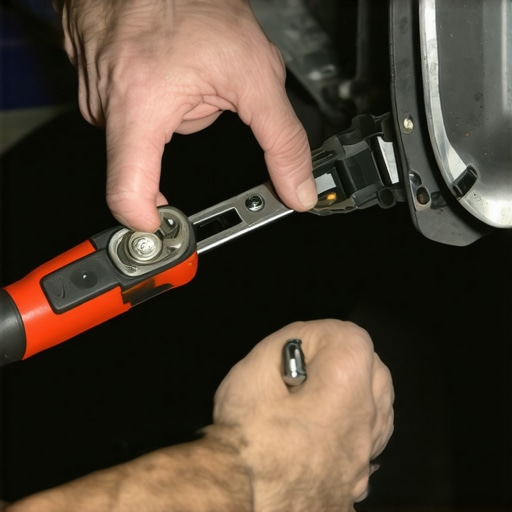
Have you ever popped the hood of your car only to find it refuses to open? That sinking feeling when you tug on the release lever and nothing happens—it’s a frustration many of us have faced at the worst possible moment. One time, I was running late, ready to jump into a meeting, and my hood latch decided to play hard to get. The more I pulled, the more stubborn it became. It dawned on me then how crucial a functioning hood latch is—not just for quick access but for safe driving and maintenance checks.
Why a Stuck Hood Latch Can Turn into a Major Headache
When your hood won’t budge, it’s not just an inconvenience; it can be a safety concern. If you can’t access your engine bay, inspecting fluid levels, checking for leaks, or fixing minor issues gets delayed. Plus, a stuck latch might indicate underlying problems like rust, cable deterioration, or alignment issues that, if ignored, could lead to more costly repairs down the line. It’s worth addressing promptly.
Is Fixing Your Hood Latch Really Worth the Hassle?
Early on, I made the mistake of ignoring the problem, thinking it would resolve itself with time. Spoiler alert: it didn’t. The latch corroded further, making what could have been a simple fix into a complicated repair. Recognizing the importance of timely maintenance saved me from more extensive work later. If you’ve faced similar issues, you’ll understand how vital it is to tackle these problems head-on. For comprehensive insights on vehicle maintenance, check out our guide on keeping your car running smoothly.
Now, let’s dive into how you can fix that stubborn hood latch yourself before it develops into a bigger headache.
Access the Hood Release Cable and Latch Mechanism
Start by opening the driver’s side door and locating the hood release lever inside your vehicle. Pull it gently to see if the latch releases partially. If the hood doesn’t pop open, a common cause is a stretched or broken release cable. To inspect, locate the latch inside the engine bay—usually near the grille—and check for visible rust, corrosion, or damage. Use a flashlight to get a better view. In my experience, applying a penetrating lubricant like WD-40 directly onto the latch and cable connection can loosen accumulated rust and dirt, making subsequent steps easier.
Lubricate and Free Up the Stuck Components
Apply a generous amount of lubricant to the latch pivot points and cable. Use a stiff brush or cloth to remove any grime or rust residue. Gently wiggle the latch with a screwdriver or a pry tool to help the lubricant penetrate. During my last fix, I held the latch with pliers while spraying lubricant to get better access. Test the release by pulling the inside lever multiple times. If the hood still won’t open, proceed to manually release the latch.
Manually Open the Hood from the Outside
Some vehicles have a secondary latch beneath the hood’s front edge. Gently feel for a release mechanism—often a small hook or lever—that can be moved to-release the latch. Use a flat-head screwdriver to pry or slide it if necessary. Remember, applying too much force risks damaging the paint or hinges, so proceed carefully. For example, I used a plastic pry tool to avoid scratches, which proved effective in freeing the latch without damage. Once you successfully release the latch, lift the hood to verify the mechanism’s condition and look for broken or bent parts.
Replace or Repair the Latch and Cable Components
If the latch is corroded or broken, replacing it is the best course of action. Purchase a compatible replacement from your vehicle’s manufacturer or an auto parts store. To replace, remove the mounting bolts with a socket wrench, disconnect the cable, and install the new latch. When reconnecting the cable, ensure it’s properly secured and lubricated for smooth operation. During my last repair, I found that adjusting the latch’s alignment during installation prevented future sticking issues. Regular inspection and lubrication of the latch help prevent the problem from recurring and ensure quick access when needed.
}image##{While many car owners believe they know the basics of auto repair and maintenance, there are nuanced truths often overlooked that can significantly impact vehicle longevity and safety. One widespread myth is that all auto repair shops are equally reliable, but in reality, not all mechanics have the same level of expertise or adherence to quality standards. For instance, CollisionRenew emphasizes the importance of genuine parts and transparent diagnostics, which are critical for ensuring long-term durability. Relying solely on price comparisons without considering technician experience or service reviews can lead to costly mistakes.
Another advanced mistake is the assumption that routine fixes like brake service or transmission repairs are simple fixes that don’t require specialized knowledge. However, improper handling of these components, especially during complex repairs like transmission flushing or brake system bleeding, can cause more damage. For example, using generic transmission fluid instead of OEM-approved oils may accelerate wear, as highlighted in our detailed guide on transmission repair tips. Understanding the nuances of fluid specifications and proper service protocols safeguards your vehicle’s performance.
The hidden nuance often missed is the relationship between regular maintenance and the diagnosis of underlying issues. Many people neglect subtle signs like irregular brake pedal feel or a slipping transmission, assuming they are minor problems. But these symptoms can indicate deeper, more serious faults that, if diagnosed early, can be remedied with less cost and inconvenience. As an expert, I advocate for proactive inspections, especially after adverse conditions or mileage milestones, which can prevent incremental damage. Visit essential car service checks to learn how routine inspections can extend your vehicle’s lifespan.
What most people get wrong about collision repair and vehicle maintenance is underestimating the importance of choosing quality service providers and understanding advanced repair nuances. Cutting corners for quick fixes can backfire, leading to safety risks or expensive repairs down the line. For example, neglecting the proper calibration after brake system repairs might cause uneven brake wear and compromise stopping power. Engaging with a reputable shop like CollisionRenew ensures adherence to best practices, which is paramount.
Why Do My Transmission and Brakes Still Fail Despite Regular Maintenance?
This is a common question among car enthusiasts and everyday drivers alike. Even with regular service, components like transmissions and brakes can fail prematurely if underlying issues are ignored. For instance, a transmission might seem to operate smoothly until a failing sensor or fluid contamination triggers a failure under load. Likewise, brake pads can wear unevenly due to caliper faults that go unnoticed during routine checks. Recognizing the importance of diagnostic precision, I recommend consulting resources such as diagnostic guides for complex systems, and ensuring your mechanic performs comprehensive tests.
In essence, understanding the subtleties of auto repair – from selecting the right parts and procedures to proactive diagnostics – is crucial for safe and reliable vehicle operation. Don’t fall into the trap of misconceptions; instead, invest in quality service and stay informed. Have you ever fallen into this trap? Let me know in the comments.Maintaining your vehicle’s vital systems like brakes, transmission, and engine components requires more than just basic knowledge; it demands the right tools and a disciplined approach. As a seasoned auto enthusiast, I rely on precision instruments to ensure every repair or inspection is carried out efficiently and accurately. One indispensable tool I use regularly is a high-quality scan tool that supports multiple protocols. For example, my Autel MaxiCOM scans all ECU modules and provides real-time data, allowing me to diagnose issues like transmission slip or sensor faults swiftly. Investing in a good scanner saves time and prevents unnecessary part replacements, aligning perfectly with our ethos of smart maintenance.
How do I maintain these systems over time?
Adopting a scheduled routine with professional-grade equipment is key. For brake systems, I recommend a calibrated brake fluid tester—such as the Bosch DOT 4 Tester—that helps determine if the fluid needs replacing before corrosion or corrosion-related issues develop, which you can learn more about in our guide on choosing the best brake service. For transmission, a dedicated fluid sampling kit allows you to analyze for tiny metal flakes or air bubbles, indicating early wear (see our top tips on transmission longevity). Regular use of these tools, combined with a detailed maintenance schedule, helps sustain long-term vehicle reliability and prevents costly breakdowns. It’s also vital to keep a logbook of inspections and part replacements to identify patterns or recurring issues. As technology evolves, so will the tools, moving toward integrated diagnostic software that can predict failures through AI analytics, making proactive maintenance more accessible. I anticipate that in the coming years, IoT-enabled sensors embedded within vehicle systems will send maintenance alerts directly to your phone, allowing for real-time monitoring of brake pad wear or fluid quality. Embracing these advancements will revolutionize car maintenance, making it more efficient and less stressful. For now, start by investing in a reliable scan tool and a few specialized diagnostics kits—they’re game changers. Try using a brake fluid tester during your next routine check, and see how early detection could save you from costly repairs or safety hazards. For more in-depth advice, be sure to visit our comprehensive service check guide.
Lessons Only Experienced Mechanics Understand About Car Latches
One thing I realized over years of repairing vehicles is that the stubborn hood latch isn’t just a minor annoyance—it’s a window into your car’s overall health. For example, persistent rust or misalignment often signals underlying issues that, if ignored, can compromise safety or lead to more expensive repairs later. Recognizing these subtle signs early has saved me time and money, and it’s why I always stress the importance of proactive maintenance. Additionally, I’ve learned that patience and the right tools—like quality lubricants and precise screwdrivers—make all the difference in a successful fix.
Tools and Resources That Transformed My Auto Repair Approach
Starting with a top-tier guide like The Ultimate Guide to Auto Repair gave me foundational knowledge that boosted my confidence. For tools, a high-quality flashlight is essential—I swear by my LED model for visibility in tight spots. A reliable penetrating lubricant such as WD-40 has also been a game changer when loosening corroded parts. Lastly, investing in a basic socket set allows me to handle most latch replacements easily. Trust me, these resources and tools are worth their weight in gold when tackling tricky automotive issues.
Turn Challenges into Confidence with Your Vehicle
Fixing your car’s stubborn hood latch is more than just a repair—it’s a reminder that you can take control of your vehicle’s maintenance while building confidence. Every successful DIY fix reinforces your skills and helps you understand your car better. Remember, maintaining your vehicle proactively ensures safety and longevity. So, next time you encounter a stubborn latch, see it as an opportunity to learn and grow as a vehicle owner. Keep exploring, keep fixing, and transform challenges into empowering achievements. How has tackling a car repair boosted your confidence? Share your story below!