
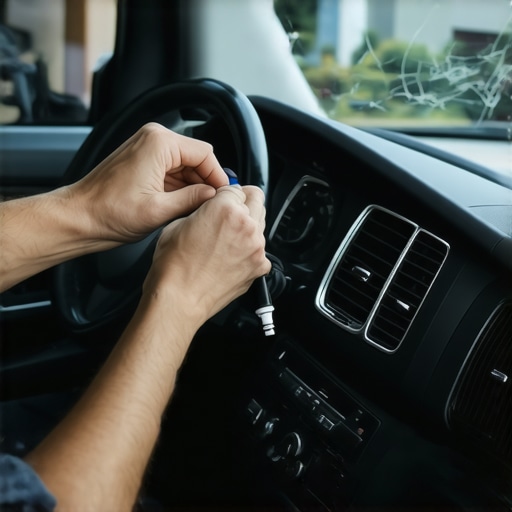
Ever had that gut-wrenching moment when you realize your car’s dashboard has a nasty crack stretching across the plastic surface? I remember mine vividly—the shock, the frustration, and honestly, feeling a bit helpless. It was one of those days where I wished I could just wave a magic wand and make it perfect again. But here’s the thing—I didn’t want to shell out hundreds for a replacement or let that crack turn my interior into a battlefield. So, I rolled up my sleeves and started digging into solutions. And let me tell you, I found some surprisingly effective tricks that any car owner can do without breaking the bank.
Why a Cracked Dashboard Can’t Be Ignored
Owning a vehicle means more than just getting from point A to B. The dashboard is the face of your car’s interior—it’s where all the controls, indicators, and that ever-important speedometer reside. A crack might seem like a minor cosmetic issue, but over time, it can cause more serious problems—like dirt buildup, further deterioration, or even affecting the structural integrity of the panel. Plus, a cracked dashboard can lower your car’s value and make your driving experience less safe, especially if cracks obscure warning lights or controls.
Is DIY Repair Actually Worth the Hype?
Let’s be honest—at first, I was skeptical. I thought, “How hard can it be?” and hesitated because I didn’t want to mess things up. Early on, I made a classic mistake I’d suggest you avoid: I tried to force a quick fix with glue that wasn’t meant for plastics, which only made the crack worse and created a mess that I couldn’t fix myself. That taught me an important lesson—doing some research and understanding the right materials makes all the difference. Now, I want to share what I learned so you can achieve a professional-looking repair without the hefty price tag or hiring a pro. If you’re tired of that unsightly crack and ready to take control of your car’s interior, stick around. In the upcoming sections, I’ll walk you through the simple steps to restore your dashboard’s look and durability.
If you’ve faced this dilemma before, you’re not alone—and there’s a way out that doesn’t require fancy tools or years of repair experience. Ready to get started? Before diving in, check out [this comprehensive guide](https://collisionrenew.com/collision-renewal-strategies-restoring-your-car-to-perfection) to understand the broader scope of automotive repairs. Now, let’s roll up our sleeves and bring your dashboard back to life!
Gather Your Tools and Materials
Before starting the repair, assemble the necessary tools: a plastic scraper or putty knife, sandpaper (around 600 grit), a clean cloth, automotive plastic filler or epoxy, masking tape, primer, paint that matches your dashboard color, and a clear coat spray for protection. I learned this the hard way when I attempted a quick fix with a household glue, which resulted in a messy appearance. Proper tools make all the difference.
Clean the Damaged Area Thoroughly
Use a damp cloth to remove dust, dirt, and grease from the cracked surface. Ensuring a clean area helps the filler adhere better and prevents imperfections. Once, I skipped this step and ended up with bubbles in the repair, making it look worse than before. Take your time and be meticulous.
Sand Around the Crack
Lightly sand the area surrounding the crack with 600-grit sandpaper. This roughens the surface slightly, allowing the filler to grip better. I also used masking tape around the area to protect the surrounding plastic from accidental scratches. This step is like scuffing paint before repainting—preparation is key.
Apply Automotive Plastic Filler
Mix the filler or epoxy as per the instructions. Apply it carefully into the crack using a putty knife, pressing firmly to fill the gap completely. Smooth out the surface as much as possible. I remembered my first attempt where I hurried and didn’t fill the crack evenly—resulting in a lumpy finish that required additional sanding. Patience is essential here.
Let It Cure and Sand Smooth
Allow the filler to cure fully, which may take several hours or as specified. Once hardened, sand the area gently with fine sandpaper to level the repair with the surrounding surface. It took me a few attempts to get it just right, but perseverance paid off.
Prime and Paint for a Seamless Finish
Apply a primer suitable for plastics to prevent mismatched textures. After the primer dries, spray on the matching paint in light, even coats. Finish with a clear coat to protect the new surface from UV rays and further damage. An unexpected spill of paint during my first try caused a streak, reminding me to work in a dust-free environment and take my time with each layer.
Final Touches and Inspection
Once the paint is dry, carefully remove the masking tape. Inspect your work—if necessary, do minor touch-ups. This process transformed my battered dashboard into a neat surface that looked almost factory-finished. Whether your crack is small or extensive, following these steps can restore your interior’s appearance and prevent further damage. If you’re unsure about tackling this project yourself, consider consulting professionals through Collision Renew for expert assistance. Regular maintenance like checking essential car service checks can also prolong the life of your dashboard and interior components.Many car owners operate under misconceptions about auto repair, which can lead to costly mistakes and subpar service outcomes. One common myth is that all mechanic shops perform equally, but in reality, expertise varies widely, especially when it comes to complex systems like transmissions and brakes. For example, some believe that replacing a transmission fluid is a simple task, but neglecting the importance of using the correct fluid type or failing to follow manufacturer-specific procedures can accelerate wear or cause damage. Advanced repair misconceptions include thinking that a minor leak is insignificant when, in truth, it could indicate underlying issues like worn seals or internal component failure, which, if ignored, might lead to costly repairs down the line.
What Advanced Signs Should You Watch for in Transmission or Brake Service?
Experienced mechanics emphasize that subtle symptoms—such as delayed shifting, unusual noises, or vibrations—are critical indicators of system health. Recognizing these signs early allows for preventative maintenance, saving both money and safety. Did you know that a harsh brake pedal response might not just be air in the lines but a sign of master cylinder deterioration? Regular inspections and staying informed about these nuances can prevent emergency repairs. For deeper insights, check out this guide which discusses essential strategies to maintain your vehicle’s longevity.
One trap many fall into is relying solely on DIY solutions without understanding the intricacies of automotive systems. For instance, using generic brake pads without considering the specific needs of your vehicle model can lead to uneven wear or reduced braking efficiency. The key is to differentiate between superficial fixes and comprehensive repairs that address root causes, such as warped rotors or contaminated brake fluid. As experts suggest, regular car service checks can reveal these hidden issues before they escalate.Furthermore, some car owners underestimate the importance of proper diagnostic procedures. Modern vehicles come equipped with advanced sensors and onboard diagnostics, and ignoring these signals or attempting to interpret them without proper tools can result in misdiagnoses. To avoid this, seek professional diagnosis and ensure your mechanic is familiar with the latest diagnostic technology. This approach aligns with the advice shared in the comprehensive auto repair ultimate guide for maintaining peak performance.
Remember, understanding the nuances, myths, and common pitfalls in auto repair is vital for protecting your investment and safety. Do you know how to spot early warning signs of transmission or brake issues? Share your experience in the comments—let’s keep the conversation going. If you’re ever in doubt, don’t hesitate to reach out through this contact page to consult with trusted professionals who prioritize your vehicle’s health.
Keeping Your Auto Repair on Track: Tools and Techniques
As a dedicated car enthusiast and professional, I believe that having the right tools is crucial for effective maintenance and repairs that stand the test of time. Over the years, I’ve personally relied on high-quality equipment and software that not only streamline my workflow but also ensure precision and durability. For example, I swear by using a digital torque wrench like the CDN PRO-20 for engine work, as it provides consistent torque application, which is vital for transmission and wheel assembly tasks. Reliable tools reduce errors and extend the lifespan of your vehicle by preventing over-tightening or under-tightening bolts.
When it comes to diagnostic software, I prefer OEM-level scan tools such as the Autel MaxiSys series. These devices grant access to manufacturer-specific codes that generic scanners often miss, helping me identify issues early—especially with critical systems like brakes and transmissions. This proactive approach minimizes long-term costs and keeps your car running smoothly over thousands of miles.
Another aspect often overlooked is the importance of proper cleaning and inspection routines. I recommend investing in a set of quality brushes, compressed air cans, and cleaning solutions designed for automotive components. Regular cleaning of the engine bay, brake calipers, and transmission casing prevents the buildup of debris and corrosion, which can cause performance issues down the line. Paying attention to these details pays off when diagnosing problems or performing preventive maintenance.
Looking ahead, I predict that future auto repairs will increasingly integrate smart diagnostics and AI-powered tools. These advancements will allow for even more predictive maintenance, catching issues before they escalate. Staying updated with this technology means adapting your toolkit and skills to keep pace with automotive innovation.
How do I maintain my vehicle’s health over time?
One effective method is scheduling regular deep inspections, utilizing tools like the essential car service checks. This practice helps catch minor issues before they become expensive repairs. Additionally, maintaining detailed records of repairs and diagnostics can identify patterns and inform better maintenance decisions. Remember, precision in repairs and timely interventions are key to extending your car’s reliability and safety.
For instance, understanding the nuances behind transmission concerns can save you from costly rebuilds. Referencing expert guides, such as top transmission repair tips, offers practical insights into troubleshooting and long-term maintenance strategies. I encourage you to start implementing a dedicated toolkit, including a quality scan tool and proper cleaning supplies, to make your auto repair journey more efficient and effective.
If you’re ready to upgrade your maintenance routine or need professional assistance, don’t hesitate to reach out through this contact page. Remember, investing in quality tools and knowledge today can save you significant time and money tomorrow, especially when it comes to vital systems like brakes and transmissions.
Lessons that Changed My Approach to Auto Repairs
- Patience Over Speed: Rushing a repair often leads to mistakes. Waiting for the filler to cure and sanding properly makes all the difference in achieving a seamless finish.
- DIY Can Be Rewarding, But Know Your Limits: While many dashboard repairs are doable at home, understanding which steps require professional expertise saves time and money. Recognizing complex issues early prevents costly mistakes.
- The Power of Proper Preparation: Cleaning, sanding, and masking are not just chores—they are the foundation of a durable, professional-looking repair. Skipping these can undo all your effort.
Tools and Resources That Made a Difference
- Automotive Plastic Filler: High-quality fillers like those from 3M or Evercoat, trusted for their adhesion and finish, helped me restore the dashboard’s surface convincingly.
- Match-Color Automotive Spray Paint: Using paint that matches the original dashboard color, I achieved a near-invisible repair. Brands like Dupli-Color are my go-to for color precision.
- Detailing and Inspection Guides: The comprehensive Collision Renewal strategies provided invaluable insights into restorative techniques beyond superficial fixes. Their tips on preventive maintenance also saved me future headaches.
Keep Pushing Forward: Your Auto Repair Journey Awaits
Auto repair, especially dashboard restoration, might seem daunting at first, but with the right attitude and tools, you can transform your vehicle’s interior and extend its lifespan. Remember, ongoing learning and patience are your best allies. Whether you’re fixing a crack or tackling more complex issues, each successful repair builds your confidence and skills. If you ever feel stuck, don’t hesitate to reach out for professional guidance. Your vehicle’s health is worth the effort, and every repair brings you closer to mastering your car’s care. Ready to take the next step?