Have you ever stepped on your brake pedal after installing new pads and felt that unsettling squeal or a spongy feel? I remember the first time I changed my brake pads—think of me, enthusiastically swapping them out, expecting smoother stops, only to be greeted by a strange hesitation and that annoying squeal that I couldn’t seem to get rid of. It was a lightbulb moment—realizing I skipped a crucial step in the process.
Why Proper Bedding Matters More Than You Think
Breaking in new brake pads isn’t just a formality; it’s about ensuring safety, prolonging your brake system’s lifespan, and avoiding costly repairs down the line. When I first learned this, I was surprised. A reputable study highlights that improper bedding can lead to uneven pad wear and reduced braking performance, which could jeopardize your safety here.
Is Bed-in Really Necessary, or Just a Myth?
Honestly, I used to think that bedding was a marketing gimmick or an optional step. I admit, I skipped it a few times on my early DIY projects, and the results were painfully clear—squeaky, uneven stops, and the dreaded brake fade during long drives. My mistake was ignoring this essential process, and I learned the hard way that your brakes deserve proper treatment right from the start. If you’ve ever had doubts or faced similar issues, you’re not alone—many enthusiasts overlook this critical step, only to regret it later. To help you avoid the pitfalls I encountered, let’s dig into exactly how to bed your brake pads the right way.
Get Ready to Bed Your Brake Pads Effectively
When I first attempted to bed my new brake pads, I underestimated the importance of a systematic approach. A hasty process led to that annoying squeal and uneven braking performance I hated. To avoid that mess, follow these concrete steps to ensure your brakes function smoothly and safely for miles to come.
Perform a Controlled Series of Accelerations
Start with Light, Steady Stops
Begin by accelerating your vehicle to around 30-40 mph in a safe, open area. Once there, apply moderate pressure to your brake pedal just enough to bring the car to a gentle stop. Repeat this process 5-6 times, focusing on smooth, consistent braking. This initial phase helps warm up the pads and rotors gradually, much like warming up muscles before a workout.
Increase the Braking Intensity
Next, accelerate to approximately 50-60 mph and perform harder stops, applying more firm pressure without locking the wheels. Do this 4-5 times, letting the brakes work harder but avoiding full lock-up. This step transfers a thin, even layer of brake pad material onto the rotor, which is critical for effective bedding.
Avoid Sudden or Hard Stops
Once you’ve completed the controlled stops, avoid abrupt or emergency braking. Think of it as walking before running; gradual bedding prevents uneven pad transfer and reduces the risk of warping rotors. Regularly check your brake pedal feel; if it remains soft or spongy, review your brake fluid level and condition, as this can impact bedding quality here.
Cool Down Period Is Essential
After the intense braking session, get back on the road and drive normally, avoiding stop-and-go traffic for the next 10-15 minutes. This cool-down phase allows the brake components to settle evenly, preventing uneven pad transfer or glazing. Think of it as letting a freshly painted surface cure—patience enhances durability.
Follow Up with Gentle Driving
In the subsequent days, drive lightly and avoid aggressive braking. Keep an eye on pedal feel and listen for squeals or vibrations, which could indicate bedding issues. Proper bedding isn’t a one-time event—it’s an ongoing process that pays dividends in your brake performance and longevity.
Remember, skip this process, and your brakes might squeal, fade, or wear unevenly. The effort you put into bedding your brake pads will reward you with smoother stops and a safer, more reliable braking system that lasts longer.
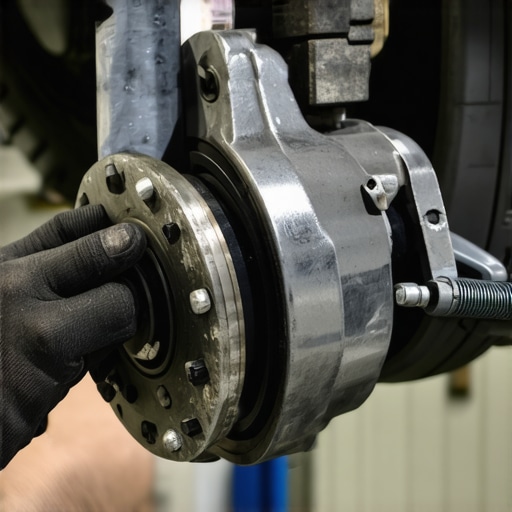
” alt=”A technician performing brake bedding process” title=”Brake Bedding Technique”/>Many car owners believe that regular maintenance is all that matters, but in my experience, the real pitfalls often lie in overlooked nuances and myths that can lead to costly repairs. For example, everyone talks about changing transmission fluid, but few realize that incorrect fluid levels or using the wrong type can accelerate wear or cause bubbling issues, complicating the repair process. A study from the Automotive Service Association emphasizes that improper fluid maintenance is a leading cause of early transmission failure, which many assume is inevitable.
Another widespread misconception is that collision repair is purely cosmetic. In reality, structural components and sensor calibrations are critical for safety and vehicle alignment. Overlooking these aspects can result in subpar repairs or even dangerous driving conditions. For instance, improper alignment after a collision can cause uneven tire wear and poor handling, leading to premature suspension deterioration.
A common mistake many make involves neglecting small signs like subtle vibrations or unusual noises, dismissing them as minor issues. However, these symptoms often indicate underlying problems such as worn bearings or failing water pumps. For example, a subtle thumping noise during turns might seem minor but could point to a failing wheel bearing, which, if ignored, might seize unexpectedly, causing further damage.
Now, let’s address a more advanced question:
How can understanding the intricacies of fluid dynamics improve your auto repair decisions?
Recognizing that fluids like brake fluid, transmission fluid, or coolant have specific properties and life cycles helps in making informed maintenance choices. For example, many overlook the importance of the simple test for a failing water pump, which can prevent overheating and expensive engine damage. Regularly checking these fluids not only prolongs your vehicle’s lifespan but also enhances safety and performance.
Don’t fall into the trap of assuming that topping off fluids is enough or that all repairs are straightforward. Being aware of these nuances allows you to identify issues early and work more effectively with your mechanic. Remember, proactive maintenance based on a deep understanding can save you a significant amount of money in the long run. Have you ever fallen into this trap? Let me know in the comments.
Invest in Reliable Equipment for Consistent Maintenance
In my experience, the cornerstone of effective vehicle upkeep is pairing quality tools with precise techniques. For example, I always keep a high-grade digital multimeter ready. It allows me to test battery voltage accurately, ensuring my car starts reliably, especially during colder months. Similarly, a laser digital torque wrench has become indispensable when tightening bolts during brake pad or suspension work, helping avoid over-tightening that can lead to warping or damage.
For fluid maintenance, I rely on a fluid extractor pump. It makes changing transmission fluid or coolant cleaner and quicker, reducing mess and preventing contamination. When inspecting or replacing sensors, I use a precision scan tool compatible with my vehicle’s make and model. This helps me read codes accurately and diagnose electrical or sensor faults without unnecessary guesswork.
Tools I Recommend for Effective Repairs
One tool I swear by is the infrared thermometer. Monitoring component temperatures during brake service or engine diagnostics provides immediate feedback, helping identify overheating issues early. Additionally, I keep a microfiber inspection mirror in my toolkit for hard-to-see spots. It’s invaluable when inspecting behind the engine bay or beneath the vehicle, saving time and improving accuracy.
Keeping your workshop organized with a modular tool chest ensures tools are accessible and prevents loss during intensive repairs. Investing in quality socket adapters and specialized wrenches ensures compatibility and reduces the risk of damaging fasteners.
Future of Auto Maintenance Tools
The trend is moving towards integrated diagnostic systems and smart tools that connect via Bluetooth or Wi-Fi. Imagine a future where your vehicle’s health report syncs automatically to your smartphone, alerting you about upcoming maintenance needs. Already, advanced diagnostic tools are bridging the gap between professional and DIY repairs, empowering owners with real-time data. Staying updated with these innovations ensures you maintain your car efficiently over the long haul.
How do I maintain my tools and prevent long-term wear?
Proper storage, regular cleaning, and calibration are key. Keep your precision tools in protective cases, clean them after each use to prevent dirt buildup, and periodically calibrate digital devices to ensure accurate readings. For example, a poorly calibrated torque wrench can cause uneven tightening, leading to component failure over time. Regularly inspecting your tools not only extends their lifespan but also ensures safety and reliability during repairs. Want to get started? Try calibrating your torque wrench using manufacturer guidelines—it’s a simple step that makes a big difference.
Incorporating these specific tools and maintenance habits enhances the quality of your repairs and helps you achieve long-term results. Well-maintained tools and a strategic approach can transform your auto care routine, keeping your vehicle running smoothly for miles to come. Remember, the effort you put into organizing and maintaining your toolkit today pays off with more reliable service tomorrow.
” alt=”Array of professional auto repair tools organized in a toolbox” title=”Organized Auto Repair Tools for Long-Term Maintenance”/>
You Learn More When Things Don’t Go Smoothly
One of my biggest insights came from neglecting the proper bedding process—skipping the controlled stops and rushing into regular driving. The squealing was a wake-up call that I hadn’t properly transferred pad material, leading to uneven wear. Realizing this taught me that investing time in correct procedures upfront saves headaches later, such as costly rotor warping or reduced braking power. That lesson pushed me to adopt meticulous habits, understanding that small details like bedding make a huge difference in safety and vehicle longevity.
Tools and Resources that Keep Me Ahead
Over time, I gained confidence by relying on quality tools like a digital torque wrench for precise bolt tightening and a infrared thermometer to monitor brake component temperatures. When it comes to reading diagnostic trouble codes, my trusted scan tool helps me avoid guesswork. These tools, paired with thorough reading, help me make better decisions, ensuring my repairs stand the test of time.
Taking Action Can Transform Your Auto Care Routine
Don’t let myths or shortcuts hold you back from mastering essential maintenance like brake bedding. Embrace the process, invest in good equipment, and stay curious. Your vehicle is more than just a machine—it’s a trusted companion that rewards your care with reliability and safety. Picking up new skills and tools empowers you to handle issues confidently and enjoy your drives even more. The journey from uncertainty to competence begins with small steps, so why not start today? What’s one auto maintenance skill you’re eager to improve? Share your thoughts below.