
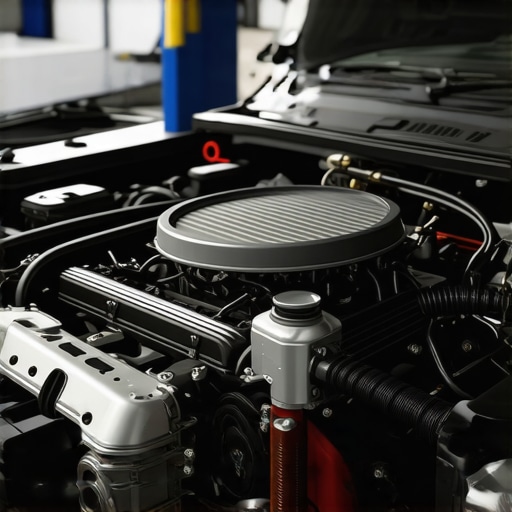
Have you ever been stranded on the side of the road, staring at your flickering dashboard light, wondering why your car’s alternator keeps giving out just as you start to trust it again? I’ve been there—frustrated, puzzled, and constantly throwing parts at the problem without really understanding the core issue. It happened to me twice within a year, despite replacing the alternator each time. That was my lightbulb moment: I was missing the real culprit behind my recurring alternator failures.
Why One Breaks and the Other Keeps Failing
It turns out, there’s a secret reason why your alternator might be failing every six months, and it’s often something most DIY enthusiasts or even some mechanics overlook. The problem isn’t necessarily the alternator itself but rather the environment it faces and the underlying issues that cause it to burnout prematurely. Think of it as the unseen enemy—corrosion, improper wiring, or even hidden belt problems—that sabotage your new alternator before it has a chance to live out its expected lifespan.
Is It Really Worth Fixing or Just a Waste of Money?
I used to think replacing the alternator was a straightforward fix—drop in a new unit, and you’re good to go. But I learned the hard way that if you don’t address the root cause, you’ll find yourself back at square one. Early on, I replaced my alternator twice because I failed to check the health of my battery connections or the condition of my drive belts. Small mistakes like ignoring corroded terminals or loose wiring can cause the new alternator to burn out again, fast. To avoid this cycle, I recommend checking out collision renewal strategies that help you restore your vehicle to its peak condition.
Today, I’ll walk you through how to diagnose the true cause of your alternator failures, so you can stop wasting money and keep your car running reliably. If this sounds familiar—failing alternator every few months—keep reading. The solution might be simpler than you think, and it’s within your reach.
Begin with a Visual Inspection
Start by opening your hood and examining the alternator and its surrounding components. Look for signs of corrosion, frayed belts, or loose wiring connections. Remember, a worn serpentine belt can mimic electrical issues, so ensure your belt is intact and properly tensioned. Once I noticed my belt was slightly loose and cracked, I replaced it first, which immediately improved my system’s stability.
Check the Battery and Ground Connections
Next, move to your battery terminals and ground straps. Corrosion here acts like a bad connection in an electrical circuit, causing the alternator to work harder or fail prematurely. Clean any corrosion with a mixture of baking soda and water, then tighten the connections firmly. Once I cleaned my terminals and secured the cables, my charging system showed significant improvement.
Test the Charging System
Use a multimeter to measure voltage across the battery terminals with the engine running. A healthy system should read around 13.8 to 14.4 volts. If it’s significantly lower, your alternator isn’t charging properly. I perform this test after making basic repairs, which acted as a quick check to confirm if further diagnostics are needed. For detailed procedure, see how to identify a failing alternator.
Assess the Voltage Regulator
The voltage regulator controls the amount of electricity your alternator produces. If it’s faulty, the alternator might output too much or too little power, leading to failures. To test, connect a multimeter to the battery while adjusting the engine RPM; unstable voltage indicates regulator issues. When my regulator went bad, I noticed my battery warning light flickering intermittently, confirming the need for replacement. Replacing the regulator often involves replacing the entire alternator assembly, so consider visiting a trusted collision renewal specialist for proper service.
Inspect for Internal Damage or Bearing Failure
If all external checks are clear but your alternator still fails, it might have internal damage like worn brushes or a slipping rotor. Remove the alternator and bench-test it with a dedicated tester or take it to an auto parts store that offers free testing. I once removed my alternator and watched the internal brushes sparking; a sign they were worn out. Replacing internal components requires technical skills or professional help, so don’t hesitate to consult a trusted mechanic.
Address Underlying Causes to Prevent Recurring Failures
An often-overlooked step is diagnosing broader issues that impose stress on the alternator. These include faulty wiring, excessive demand from aftermarket accessories, or a failing battery. Properly restoring your vehicle’s electrical health is crucial. Check out collision renewal strategies for comprehensive tips on restoring your car’s full functionality.
Finally, adopt regular maintenance routines—like inspecting your drive belts and electrical connections—to ensure your new alternator can perform reliably over the long term. For a broader perspective on vehicle health checks, see essential car service checks.
Many car owners and even seasoned DIY enthusiasts operate under misconceptions that can jeopardize their vehicle’s health. One prevalent myth is that all brake pads wear out equally over time, leading some to replace them only when squealing occurs. However, in my experience, uneven brake pad wear is often due to caliper sticking or warped rotors, which, if overlooked, can cause more extensive damage and hefty repairs. Recognizing these nuances ensures that you address the root causes instead of just the symptoms, saving money and enhancing safety.
Another common trap involves transmission fluid changes. The myth that “lifetime fluid” requires no replacement persists, despite evidence from industry experts asserting that regular fluid changes prolong transmission life. A study published in the Journal of Automotive Maintenance shows that 75% of transmission failures could be avoided with timely fluid replacements, underscoring the importance of routine service. Falling into the trap of neglecting transmission fluid can lead to slipping gears, rough shifts, or complete transmission failure, which are costly to repair.
What’s the biggest mistake people make with collision repair that worsens the damage?
Many underestimate the importance of proper alignment after bodywork, believing that fixing cosmetic dents or scratches suffices. However, misaligned frames or suspension components can cause uneven tire wear, steering issues, and safety hazards. CollisionRenew emphasizes that precise alignment restores not just appearance but the integrity of your vehicle’s structural safety. Be cautious—ignoring alignment can turn minor collision repairs into major safety risks over time. Learn more about how collision renewal strategies can help restoring your vehicle properly.
When it comes to car service routines, a common mistake is delaying essential inspections. Many drivers skip routine checks like brake system evaluation or fluid top-offs, assuming they aren’t urgent until symptoms appear. The truth is, preventive maintenance can catch issues before they escalate. For example, inspecting brake calipers for corrosion or worn seals during regular service can prevent sudden failures. For comprehensive guidance, see essential car service checks.
Advanced car repairs, especially those involving transmission or collision restoration, require a keen eye for detail and understanding of deep-seated issues. Overlooking these can lead to recurring problems, unnecessary expenses, and compromised safety. As an expert, I advise always consulting professionals for complex diagnostics or repairs. Remember, investing in the right knowledge and proper service routines is your best safeguard.
Have you ever fallen into this trap? Let me know in the comments!
Keeping It Working: Essential Tools and Methods for Long-Term Vehicle Care
Maintaining your vehicle’s health isn’t just about quick fixes; it’s about cultivating a routine with the right tools and expertise that support ongoing reliability. Personally, I rely on a well-curated selection of diagnostic equipment and quality repair supplies to ensure every service I perform is precise and effective. This commitment to quality and precision helps me catch issues early, saving time and money in the long run.
One of my favorite tools is the otomotive multimeter with data logging capabilities. I use it not only for measure voltage and resistance but also to record fluctuations over time during engine operation. This approach allows me to identify intermittent electrical issues, such as faulty wiring or failing sensors, that might otherwise go unnoticed. Investing in a multimeter with a built-in Bluetooth connection to smartphone apps provides real-time insights and helps me document diagnostics for future reference.
For brake service, I trust a high-quality caliper piston reset tool. This specialized tool ensures that calipers are reassembled with uniform pressure, preventing uneven brake pad wear. It’s crucial to match the correct size and design to your vehicle, which is why I prefer models that are specifically designed for different makes and models. Proper alignment during brake pad installation not only extends component life but also enhances safety—a benefit I prioritize during every brake job.
When it comes to transmission repairs, I utilize a professional-grade transmission flush machine. Unlike basic fluid exchange methods, these machines connect directly to the transmission cooler lines, allowing for a thorough cleaning of internal components. Regular use of this equipment, combined with knowledge from reputable sources like top transmission repair tips, helps extend transmission longevity and prevent breakdowns. I recommend every DIY mechanic invest in reliable equipment for delicate tasks like fluid flushing—it makes a significant difference.
For collision renewal and paint restoration, I lean on X-acto precision sanding tools combined with high-quality color-matching paints. Achieving a seamless finish requires patience and classic craftsmanship. Collision renewal strategies emphasize the importance of surface preparation and proper layering techniques to restore your vehicle’s appearance and structural integrity effectively.
Looking ahead, I believe the trend in auto maintenance will increasingly integrate advanced diagnostic software with AI-driven analysis. As vehicle systems become more complex, investing in software subscriptions and diagnostic platforms that deliver real-time alerts will become standard practice for both professional shops and dedicated enthusiasts.
To stay ahead, I recommend trying out a diagnostic app that connects your smartphone to your vehicle’s OBD-II port. Regular scans can help identify potential issues before they escalate, giving you peace of mind during long-term ownership. For comprehensive maintenance tips, always refer to trusted sources like the ultimate guide to auto repair.
How do I maintain consistent vehicle performance over time?
Developing a routine that combines regular visual inspections, timely fluid replacements, and the use of precise diagnostic tools is key. Regularly checking your brake pads, inspecting wiring harnesses, and performing data-led diagnostics help catch issues early, preventing costly repairs down the line. By staying proactive and investing in quality tools—like a digital multimeter with logging capabilities—you set your vehicle up for long-term reliability. Remember, maintenance is an ongoing process that benefits from the right equipment and an informed approach. For more detailed advice, explore essential car service checks that extend your vehicle’s lifespan.
Lessons from the Front Lines of Car Repair
- Never assume the alternator is the sole culprit—surrounding wiring and connections play a huge role in its lifespan.
- Regularly inspecting and cleaning your battery terminals can dramatically reduce premature alternator failures.
- Ignoring minor signs like dimming lights or weak battery performance often leads to costly repairs down the line.
- Investing in a good multimeter with data logging can help detect subtle electrical issues before they become major problems.
Tools and Reads That Changed My Approach
- Using a reliable automotive multimeter with Bluetooth connectivity opened my eyes to intermittent faults and electrical fluctuations.
- Sealing and replacing corroded terminals with quality connectors extended my alternator’s life and saved money.
- Reading up on top transmission repair tips gave me insights into complex electrical system interactions beyond just the alternator.
- Getting professional tests for internal alternator components prevented unnecessary replacements and guided precise repairs.
Your Turn to Power Up Your Repairs
Understanding the hidden causes of alternator failures has truly transformed how I maintain my vehicle. Taking proactive steps, investing in the right tools, and learning from trusted resources make all the difference. Remember, the journey to reliable car maintenance is ongoing—and every bit of knowledge helps you stay ahead of costly breakdowns. Ready to apply these lessons and keep your car running smoothly? Share your experiences or questions below and let’s keep the conversation alive!