
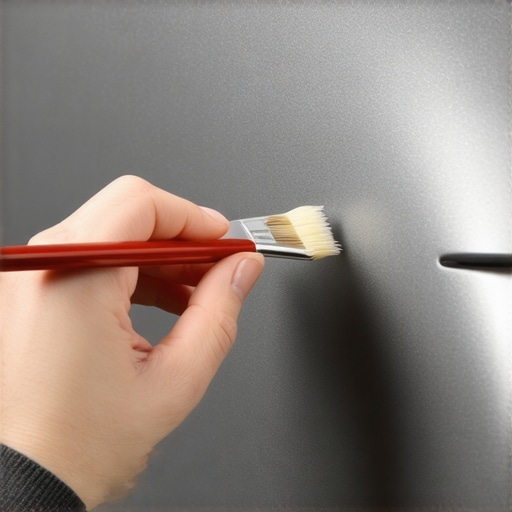
I stood in my driveway, squinting at a fresh quarter-inch chip on my hood, feeling like a total failure. I had the official paint code from the door jamb, the fancy $25 tiny brush, and a steady hand, yet the result looked like my car had caught a bright red skin disease. It was a glaring, mismatched blotch that screamed amateur hour every time the sun hit it. That feeling of sinking disappointment—where you spent money to make something look better, but actually made it look worse—is exactly what we are going to avoid today. I have been there, trust me. I once spent an entire Saturday morning fixing my door edge only to realize I had used a shade of silver that belonged on a refrigerator, not a sedan.
Your Paint Code is Just a Starting Point
Most of us think that if we find that alphanumeric string on the door frame, we have won the battle. I made that exact mistake early on, thinking NH-700M meant my bumper would look brand new instantly. The truth is, paint ages. It fades under the relentless UV rays and changes its chemical hue over time. If you just slap factory-fresh paint onto a five-year-old car, it will never blend. It is like trying to patch a faded pair of vintage jeans with a brand-new scrap of raw denim; the contrast is just painful to look at. This is why collision renewal strategies are so vital—they account for the life the car has actually lived. We are going to solve this today by looking past the label and focusing on the magic of blending. But before you get obsessed with the shine, make sure you aren’t ignoring the fundamentals found in a solid auto repair guide.
Can a DIYer Really Get a Seamless Finish?
You are probably skeptical. I get it. You have seen those late-night infomercials for magic pens that result in a lumpy, dark spot on the hood. But here is the secret: the pros do not just paint a chip; they treat it like a miniature restoration project. My biggest early-career face-palm moment was forgetting that your new paint might look too shiny compared to the rest of your weathered clear coat. I once tried to fix a scratch on my truck and ended up with a glossy streak that stood out worse than the original damage. [image_placeholder_1] It looked ridiculous. According to The Society of Protective Coatings, environmental factors like humidity and surface temperature during application can significantly impact the curing color and bond of liquid coatings by altering how the metallic flakes settle. If you are working in a damp, cold garage, your perfect match is doomed before the brush even touches the metal. Have you ever tried to fix a tiny scratch only to have it haunt you every time you walk to your car? I want to hear about your most frustrating DIY disaster. It is all part of the learning curve, much like keeping up with essential car service checks to prevent the bigger headaches down the line.
Stop Painting and Start Prepping
The most critical tool in your kit isn’t the paint—it’s the sandpaper. I learned this the hard way on a rainy Tuesday when I tried to ‘save time’ by skipping the wet-sanding phase. I just dabbed the paint onto the chip and expected it to level itself out. It didn’t. It sat there like a tiny, ugly mountain of plastic. To get that flush finish, you need to wet-sand the edges of the damage until you can’t feel the transition with your fingernail. It is a lot like how top transmission repair tips emphasize internal cleanliness; if the environment isn’t pristine, the repair fails before you even begin. Use 2000-grit paper and a lubricant—plain water with a drop of dish soap works wonders. You aren’t trying to remove the paint; you are just smoothing the ‘cliff’ at the edge of the chip so the new paint has a gentle ramp to climb.
Why Your First Layer Should Look Like a Mistake
Instead of sweeping strokes, think in ‘dots.’ I remember trying to ‘brush’ a long scratch on my fender and creating a textured mess that looked like a wood-grain pattern. Now, I use a toothpick or a micro-applicator for the tiny stuff. You want to build the paint up in layers, allowing each one to dry until the new paint sits slightly higher than the original surface. This is the ‘overfill’ stage. If you ignore the sanding or the layering, it is like ignoring why your brake pedal sinks slowly while you are sitting at a light—eventually, the small problem becomes a visual disaster or a mechanical hazard. The goal is a tiny mound of color that you will eventually sand back down to earth once it is fully cured. 
How to Make the Transition Invisible
Once your paint mound is dry, you have to level it. This is where most people panic. You are going to sand your new paint—and a little bit of the surrounding old paint—until everything is perfectly flat. If you have ever used how to check your own wheel alignment using a piece of string, you know that DIY success is all about patience and small adjustments. Use a sanding block to ensure you aren’t just pushing the paper into the divot with your fingers. When you can run your hand over the spot with your eyes closed and not feel where the chip was, you have won. If your panels aren’t lined up correctly, even perfect paint won’t hide the flaw, which is why fixing panel gaps that aren’t quite square is often the necessary next step in a full restoration project.
The Final Clear Coat Marriage
The clear coat is your armor. But here is the trick: you have to overlap the clear coat slightly further than the color layer. This creates a ‘halo’ that you can polish into the original finish. My first attempt at this resulted in a ‘dry spray’ look—a rough, matte ring around my repair. I realized I hadn’t gone far enough with my polishing compound. Think of it like a transmission shift; it needs to be smooth and progressive, not a jarring jump from one state to another. You are marrying two different eras of chemicals together, and only a high-quality rubbing compound and a lot of elbow grease will make that wedding work. A car that looks good but drives poorly is just a shiny paperweight, so while you are waiting for that clear coat to cure, it is the perfect time to investigate any other lingering issues like a soft brake pedal or a rough idle.
People often tell you that a thorough wash is all the prep you need before you start dabbing on that touch-up paint. I used to believe that until a fender repair I did on a sunny afternoon literally peeled off like a sunburned layer of skin two weeks later. The truth is, even ‘clean’ cars are often saturated with silicone from years of automatic car washes and high-gloss waxes. These chemicals bond so deeply to the substrate that standard soap and water won’t touch them. If you skip a dedicated chemical wax and grease remover, you are essentially painting over a layer of microscopic oil. This leads to the ‘fish-eye’ effect, where the new paint pulls away from the center of the repair in a desperate attempt to avoid the contaminants. It is a classic amateur trap that turns a five-minute fix into a week-long headache.
This level of precision is exactly what is required for broader vehicle health; for instance, understanding how to choose the best brake service involves looking at the hidden hardware, not just the pads you can see through the rims. I have seen guys spend hundreds on fancy paint only to ignore the fact that their car is literally shaking itself apart. If you have ever wondered why your car makes a loud pop when you shift into reverse, you know that mechanical neglect eventually screams for attention, regardless of how shiny the hood looks. You cannot build a showroom finish on a foundation of mechanical vibrating parts.
Is Your Paint Actually Drying or Just Trapping Solvents?
One of the most nuanced mistakes DIYers make is rushing the ‘flash time’ between coats. Most people think that once the paint is no longer tacky to the touch, it is ready for the next layer. This is a myth that leads to long-term failure. According to the National Institute for Automotive Service Excellence (ASE), solvent entrapment occurs when the top layer of paint skins over too quickly—often due to high heat or a thick application—trapping liquid solvents underneath. These trapped gases eventually fight their way out, creating ‘solvent pop’ or tiny bubbles that look like pinpricks in your finish weeks later. To avoid this, you must follow the chemical data sheets and realize that ‘dry to touch’ is not the same as ‘ready to recoat.’ It requires a level of patience that many lack, much like following top transmission repair tips which emphasize that there are no shortcuts to longevity. If you find your brake pedal sinks slowly while you are sitting at a light, you wouldn’t just paint the pedal and call it fixed; you’d dig into the hydraulics. Apply that same logic to your paint. Have you ever fallen into this trap where you thought you were ready for the next step, but the chemistry had other plans? Let me know in the comments below, because sharing these ‘oops’ moments is the only way we all get better at this craft. Always keep the the ultimate guide to auto repair handy for when the visual fixes lead you to discover mechanical ones.
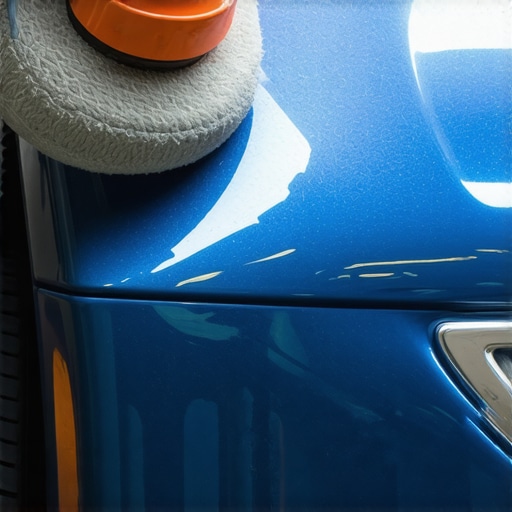
I used to think my biceps and a microfiber towel were enough to get a mirror finish. I was wrong. I ended up with a hazy, cloudy mess that looked like a greasy thumbprint on a lens. Now, I swear by a 3-inch dual-action (DA) polisher with a micro-backing plate. I use this specific size because a standard 6-inch polisher is too aggressive for modern, thin plastic bumpers and doesn’t allow for the precision needed in tight curves. If you are serious about your finish, you need to move from hand-rubbing to mechanical oscillation. This is where collision renewal strategies move from the realm of ‘good enough’ to ‘factory perfect.’
Stop relying on your biceps for a mirror finish
The biggest mistake I see is people trying to jump from 2000-grit sandpaper straight to a final wax. It will not work. You need a stepped approach—think of it as a ladder. After wet-sanding your ‘mound’ of paint, move to a medium-cut compound with a foam pad. I personally use a cross-hatch pattern, moving the machine horizontally and then vertically to ensure the heat is distributed evenly. If you get the panel too hot, you risk ‘burning’ the clear coat, which is a one-way ticket to a professional respray. Much like choosing the best brake service in 2025 requires looking for technicians who use calibrated torque wrenches, your paint repair requires calibrated pressure and speed.
How do I keep this repair looking factory-fresh for years?
Once you’ve achieved that glass-like surface, the battle shifts to protection. Modern clear coats are tough, but they aren’t invincible. According to the technical guidelines from BASF’s Glasurit division, the chemical cross-linking of a modern two-component clear coat can take up to 30 days to reach full hardness. This means if you apply a heavy carnauba wax the day after your repair, you are actually suffocating the outgassing process and might cause the paint to dull or delaminate later. Patience is the ultimate tool in your kit. While you wait for that cure time, focus on other areas of vehicle health. For instance, knowing the best way to clean salt off your cars undercarriage is vital because rust often starts where you can’t see it, eventually creeping up to ruin your beautiful hood work from the inside out.
Handheld scanners are the next DIY revolution
I predict that within the next three years, we will see affordable handheld spectrometers for home use. Currently, these are thousand-dollar tools used by high-end shops to match paint by measuring the light reflection of the actual car. Soon, you’ll be able to ‘ping’ your fender with a Bluetooth device and get a custom-mixed aerosol can that accounts for your specific level of UV fade. Until then, we rely on blending and buffing. If you notice your car is starting to show its age in other ways, like having to deal with the truth about high mileage oil and leaking seals, it’s a reminder that a car is a holistic system. You can’t just fix the aesthetics; you have to support the mechanics. Keeping an eye on how to stop sun damage from killing your cars resale value is just as important as knowing top transmission repair tips for keeping the car on the road.
My best advice for you today is this: stop being afraid of the sandpaper. Go out to your garage right now, find a hidden area like the bottom of a rocker panel or the inside of a door sill, and practice your ‘mound’ layering and wet-sanding technique. Developing that tactile ‘feel’ for when the paint is perfectly flush is a skill that will save you thousands over the life of your vehicles. Don’t wait for a major accident to learn these skills; start with a tiny chip and build your confidence during your next round of essential car service checks.
What Professionals Won’t Admit About Mastering the DIY Blend
Over the years, I have realized that the biggest hurdle isn’t the paint itself, but our own impatience. One thing most shops won’t tell you is that metallic flakes have a specific orientation. If you dab them on instead of leveling them properly, they catch the light at an odd angle, making the repair look darker or lighter than the rest of the panel. This is why collision renewal strategies emphasize the mechanical part of the repair—the sanding and polishing—over just the chemical application. I’ve also learned that fixing a chip is often the gateway to noticing other issues; while you are down there, check if your brake fluid level drops without a visible leak, as aesthetic perfection is nothing without safety.
The Specific Gear I Trust for a Glass Finish
You don’t need a professional booth, but you do need a few non-negotiables. First, invest in a set of micro-applicators—they look like tiny Q-tips but don’t shed fibers into your wet paint. Second, always keep a high-quality wax and grease remover on hand. [image_placeholder_E] Third, I recommend keeping a physical copy of the ultimate guide to auto repair in your garage for the moments when a simple paint touch-up turns into a discovery of mechanical needs. If you are dealing with older paint, a medium-cut polishing compound is your best friend to bridge the gap between the new clear coat and the original weathered finish.
Don’t Let a Small Scratch Kill Your Pride in Your Ride
There is a profound sense of satisfaction that comes from looking at a panel you repaired yourself and seeing nothing but a perfect reflection. It is about taking control of your vehicle’s legacy. Whether you are dealing with a tiny stone chip or more complex correct ways to fix a buckled hood, the principle remains the same: precision and patience win every time. Don’t let the fear of making a mistake stop you from maintaining your car’s value. Every expert was once a beginner with a piece of sandpaper and a dream. Remember that regular maintenance, like essential car service checks, keeps the car running as well as it looks. Have you ever tried to fix a paint chip only to make it look like a bigger mess? Let me know your story below!