
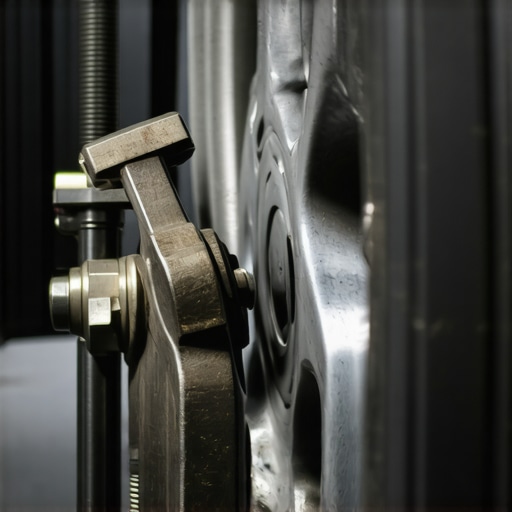
I remember whipping out my old hammer, ready to deliver a decisive blow—that’s what I thought was the only way to free a stubborn brake rotor. Afterall, I’d tried everything else: pounding, prying, cursing under my breath—but nothing budged. It was a frustrating, almost comical mess that left me questioning whether I needed specialized tools or just more patience. That lightbulb moment hit me when I realized there’s a smarter, less destructive approach—one that doesn’t involve risking damage or hurting your knuckles.
Dealing with a Frozen Brake Rotor can Feel Impossible
The truth is, a seized or rusted-on brake rotor is a common headache for car owners and DIY enthusiasts alike. Especially after prolonged exposure to moisture and road grime, rotors can stick stubbornly to the hub, resisting even the most determined tug. The conventional thinking pushes people towards brute-force methods—think sledgehammers or heavy-duty sprays—but that’s often more risky than helpful. Not only can you damage your wheel assembly, but you also jeopardize your safety and the longevity of your brake components.
Today, I’ll share a proven method I discovered through personal trial, error, and a few costly mistakes—one that saves your tools, your time, and your nerves. You’ll stop relying on hammers and learn a more systematic, less destructive technique that anyone can master, with a little patience.
If you’ve ever faced that moment of despair, wondering how you’ll ever get that rotor free without damaging your car or spending a fortune, you’re not alone. Nearly every car owner encounters this at some point, especially those who skip routine maintenance or live in humid climates. The good news is, there’s a better way to get that rotor off—one that’s effective, safe, and budget-friendly.
Before we dive into the step-by-step process, let me share a quick mistake I made early on that nearly cost me more than just time. I believed that aggressive force was the answer, which led to stripped lug nuts and scratched hub surfaces. That’s when I discovered that patience and the right techniques—not brute strength—are your best allies. For more on maintaining your vehicle and avoiding costly repairs, check out [the ultimate guide to auto repair](https://collisionrenew.com/the-ultimate-guide-to-auto-repair-keep-your-car-running-smoothly). Now, let’s get ready to conquer that stubborn rotor once and for all.
Apply Penetrating Oil to Loosen Rust
Start by spraying a generous amount of penetrating oil, like WD-40 or PB Blaster, around the center hub and lug nut studs. Allow it to sit for at least 10 minutes, giving it time to penetrate the rust and corrosion bonds. I learned this the hard way when my rotor wouldn’t budge, even after a full day of pounding—the oil made a noticeable difference in easing the resistance.
Secure the Vehicle and Prepare Your Workspace
Ensure the vehicle is parked on a flat surface, with parking brake engaged. Use wheel chocks on the wheels remaining on the ground. Loosen the lug nuts slightly but do not remove them yet. Removing the wheel will give you access to the rotor. During one of my attempts, I neglected this and had the wheel roll unexpectedly—always secure your vehicle for safety.
Remove the Wheel and Inspect the Rotor
Use a jack to lift the car, then remove the lug nuts with a wrench. Pull the wheel off gently. Once exposed, check for any obvious grime, rust, or damage. Sometimes, rust patches act like cement, blocking the rotor from moving. This is where patience and the right tools come into play.
Use a Hammer and Copper Witting
Tap around the entire perimeter of the rotor using a soft-faced hammer or a rubber mallet. This helps break the rust bond gradually without damaging the metal. I remember gently tapping, like cracking open an eggshell, until I saw the rotor wiggle. Be careful to avoid hitting the caliper, which can lead to costly repairs. Strategic non-destructive methods are often more effective than brute force.
Use a Pry Bar for Leverage
If the rotor still doesn’t move, slide a plastic or wooden pry bar between the rotor and the hub. Gently wiggle back and forth, applying leverage to loosen the rusted fit. During my experience, I used a long screwdriver as a lever, which prevented damage to the hub surface. Remember, patience here is key—not brute force.
Apply Heat if Necessary
For stubborn rotors, applying heat can expand the metal, making it easier to slide off. Use a heat gun or a propane torch, carefully heating the outer edge of the rotor—avoid the brake caliper and pads. I once heated mine for a minute, then tried prying again; the rotor slid free with less effort. Always prioritize safety when handling heat.
Assess and Prevent Future Seizures
Once the rotor is removed, clean the hub surface with a wire brush, and apply anti-seize compound on the hub face before reinstalling the rotor. Regularly inspecting and servicing your brakes can prevent future rust build-up. For comprehensive maintenance tips, visit this guide. Remember, patience and proper technique are your best friends in auto repair—saving you time, money, and frustration.Many car enthusiasts and even seasoned vehicle owners fall prey to common misconceptions about collisionrenew, brake service, transmission, and overall auto repair. One widespread myth is that all repair shops operate similarly; however, the reality is that many underestimate the importance of tailored diagnostics and personalized maintenance plans. For instance, some mechanics rely solely on visual inspections, neglecting the subtle signs like minor vibration patterns or uneven brake pad wear that could indicate deeper issues. Recognizing these nuances can preempt costly repairs down the line.
A critical mistake often made is assuming that brake pads or transmission fluid replacements are always straightforward, when in fact, the specific driving habits, environmental exposure, and vehicle history significantly influence what service intervals and techniques are optimal. Ignoring these factors may lead to premature component failure or inefficient repairs. Dynamic diagnostics, like listening for unusual noises during a test drive or analyzing sensor data, are invaluable in such cases.
Furthermore, a prevalent trap is the misconception that DIY auto repair is always cost-effective. While it can be rewarding to perform simple tasks, complex systems such as the transmission or ABS modules require specialized tools and expert knowledge. Relying on generic repair tutorials without understanding the vehicle’s unique architecture can cause inadvertent damage, leading to more expensive repairs. Dive into comprehensive guides, like this ultimate auto repair resource, to refine your approach.
For advanced car owners wondering about the subtle signs of more hidden issues, consider this: small discrepancies in shift timing or minor pulsing during braking could hint at underlying problems not immediately visible. These signs often stem from overlooked nuances such as sensor misalignments or corrosion in connector pins. Staying alert to these details can save you money and extend the lifespan of your vehicle.
So, what are some nuances you might be missing? For example, differences in brake pad compounds and their compatibility with specific driving conditions can greatly affect both safety and durability. Many underestimate how environmental factors like road salt or humidity accelerate corrosion, demanding specialized corrosion-resistant treatments or adjusted service intervals. Moving beyond the surface and paying attention to these finer details elevates your auto maintenance game.
In conclusion, forming an expert eye for these subtle but crucial details makes all the difference. It goes beyond routine checklists and encourages a mindset that appreciates the complexity of modern vehicle systems. Remember, proactive, nuanced care can prevent emergencies and costly repairs. Have you ever fallen into this trap? Let me know in the comments and share your experiences with overlooked nuances in auto repair.Maintaining your vehicle’s performance over time requires not only knowledge but also the right tools and consistent habits. One of my go-to pieces of equipment is a high-quality laser infrared temperature gun. I personally rely on it to check brake rotors and exhaust systems, ensuring they operate within optimal temperature ranges. This quick, non-contact measurement saves time and provides precise data, which is critical when diagnosing issues like uneven brake pad wear or overheating components. Additionally, a reliable OBD-II scanner, such as the BlueDriver, is indispensable for accessing real-time diagnostics and clearing error codes. I use this tool regularly to monitor sensor data, especially for complex systems like transmissions and ABS modules. These devices help catch potential problems early, preventing costly repairs and prolonging component lifespan.
For software assistance, I recommend investing in comprehensive maintenance management apps like AutoEngage or Car Scanner. These platforms help track your vehicle’s service intervals, remind you of filter replacements, fluid changes, and tire rotations. Staying ahead with scheduled maintenance is crucial for long-term reliability, and these tools make it easier to stick to a plan.
When it comes to long-term results, consistency is key. Regularly inspecting brake pads, fluid levels, and belts, and addressing minor issues before they escalate, can significantly reduce repair costs. I also emphasize the importance of using anti-seize compounds on wheel studs and hub surfaces during reassembly. This simple step makes future removals easier and prevents rust-related seizures.
Looking ahead, the trend in auto repair is heading towards more integrated diagnostic tools with AI capabilities. As sensor technologies evolve, we’ll have smarter tools that predict failures before symptoms appear, enabling truly preventative maintenance. Embracing these innovations now can keep your vehicle running smoothly for years to come.
**How do I maintain my vehicle’s critical systems over time?** Consistent inspections, timely fluid replacements, and leveraging advanced diagnostic equipment are your best strategies. Remember, investing in quality tools like infrared thermometers and OBD-II scanners isn’t just about fixing problems—it’s about preventing them. If you’re serious about longevity and reliability, give these tips a try and see the difference.
For deeper insights into effective long-term maintenance practices, check out this comprehensive guide. Incorporating these tools and habits now will pay off with a safer, more dependable ride for years to come.
What I Wish I Had Known Sooner About Brake Rotor Challenges
One of my biggest lightbulb moments was realizing that patience and proper technique outweigh brute force every time. Applying penetrating oil and giving it time to work saved me from damaging my hub, which would have led to costly repairs. I also learned that a clean workspace and securing the vehicle properly are foundational steps often overlooked but absolutely essential for safety and efficiency. These lessons transformed my approach from frantic hammering to a strategic method that works for even the most stubborn rotors.
Tools and Resources That Changed My Auto Repair Game
Investing in quality tools like an infrared temperature gun and a reliable OBD-II scanner made a world of difference in diagnostics and maintenance. This comprehensive guide has helped me understand vehicle intricacies better and plan my repairs more effectively. Additionally, courses and forums dedicated to auto repair have provided valuable insight and community support, reinforcing that continuous learning is key to mastering vehicle maintenance.
Keep Your Drive Smooth and Safe: An Emotional Push to Act Now
Remember, every moment you spend understanding and caring for your vehicle reduces the chances of unexpected breakdowns and expensive repairs down the line. You’re capable of more than you think—embrace the journey of becoming a confident DIY enthusiast in auto maintenance. Your vehicle will thank you, and so will your wallet. Don’t wait for that stubborn rotor to turn into a bigger problem—start applying these lessons today and take charge of your car’s health.