
Ever been halfway through driving and suddenly noticed your brake pedal pulsing with every press? That lightbulb moment hit me hard after I recently changed my rotors. I thought I had everything under control until I hit the brakes and felt that unsettling vibration through the pedal. It’s a sinking feeling — you wonder if you’ve messed something up or if your ride is about to turn into a headache. Turns out, this is a common issue many car owners face after rotor replacements, and it can be frustrating to pinpoint the cause.
My First Experience with Pulsating Brakes
When I first encountered this, I was pretty sure I had done the job right. I followed a routine brake replacement guide, torque specs, and even took my time to ensure everything was clean. Yet, as soon as I pressed the pedal, a rhythmic pulsing echoed through my foot. I was worried I’d wasted my weekend or, worse, damaged my braking system. That’s when I realized I wasn’t alone in this experience and that the solution might be simpler than I feared.
In this post, I’ll share the exact steps I took to resolve the pulsating brake pedal — tips that can save you from unnecessary headaches or costly repairs. We’ll cover common causes, mistakes to avoid, and how to ensure your brakes are working smoothly and safely again.
Is Brake Pulsation Actually Worth Worrying About?
Initially, I wondered if this was just a minor annoyance or a sign of something serious. I learned that uneven or unbalanced rotors, improper installation, or even contaminants can cause pulsation, impacting your safety. And that’s no small matter. According to industry experts, a vibrating brake pedal isn’t just uncomfortable — it can reduce stopping power and increase wear on other components.
One mistake I made early on was rushing through the brake bedding process, which can leave residues or uneven surfaces. That tiny oversight can lead to ongoing vibrations. So, if you’re facing this problem, don’t dismiss it as just a nuisance. Let’s get down to the practical solutions to fix this once and for all.
Ready to learn how to get your brakes back in tip-top shape? Let’s explore the common causes and straightforward fixes that can restore your confidence behind the wheel.
Check the Rotor Alignment
First, ensure the rotors are properly seated and aligned on the hub. I once hastily installed new rotors without checking their contact surface, leading to persistent pulsing. Remove the wheel, loosen the lug nuts, and check for any wobble or misalignment. Sometimes, a slight tap with a rubber mallet can help seat the rotor evenly. Precise alignment is critical; otherwise, you’re just masking a deeper problem.
Perform Brake Bedding Properly
Brake bedding is like seasoning a cast-iron skillet — it creates a smooth, even surface for optimal braking. I neglected this step initially, which caused uneven pad transfer and vibration. To do it right, accelerate gently up to 30 mph, then brake in a series of repeated stops, gradually increasing pressure. This process transfers a layer of brake pad material onto the rotor, reducing pulsation and improving overall brake feel.
Inspect for Warped Rotors
Warped rotors are a common culprit behind pulsating brakes. To check, feel for hot spots or listen for uneven brake pad contact during a spin test. When I experienced this, I used a dial indicator to measure rotor runout. Excessive runout indicates warping, which may necessitate resurfacing or replacing the rotor altogether. Remember, a warped rotor can feel like a rhythmic pulse that intensifies with speed.
Ensure Proper Torque and Assembly
Over-tightening or uneven torque on the lug nuts can cause rotor distortion, leading to vibrations. I used a torque wrench set to the manufacturer’s specifications—typically around 80-100 ft-lbs—and tightened in a star pattern. Torquing correctly ensures even pressure distribution, preventing warping. Always double-check torque after initial drive cycles.
Check for Contaminants and Residues
Contaminants like oil, grease, or brake fluid on the rotor surface can cause uneven friction and pulsation. I cleaned the rotors and pads with brake cleaner before reinstallation. Avoid touching the rotor surface with your fingers, as oils can transfer and impair braking. This step ensures a clean, debris-free surface for consistent contact.
Replace or Resurface Warped Rotors
If you find the rotors are excessively warped or scored, resurfacing or replacing them is essential. When I underestimated this, the vibration persisted, forcing me to revisit the repair. Resurfacing can be done at a shop, but if the rotors are too thin or damaged, replacement is safer. Check manufacturer specs to determine if resurfacing is viable.
Test Drive and Adjust
After completing these steps, carefully test drive your vehicle. Accelerate gently and apply gradual braking to feel for smoothness. If pulsation continues, revisit earlier steps, check for uneven pad wear, or seek professional help. Remember, your safety hinges on properly functioning brakes, so don’t rush this process.
For additional tips on maintaining brake systems or other essential car care procedures, visit this guide and keep your vehicle in top shape.
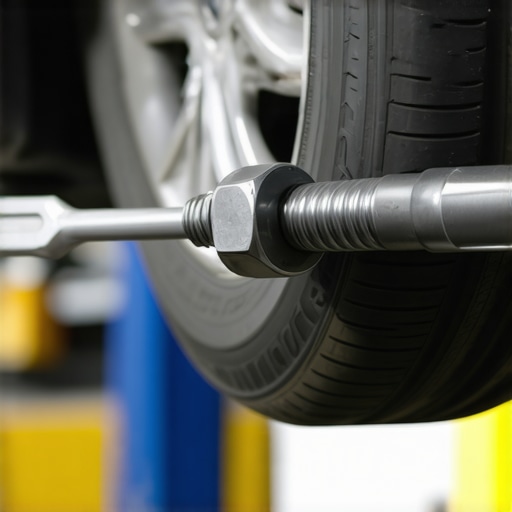 Many car owners operate under the assumption that auto repair is straightforward and sticks to a set of universal principles. However, in my experience working extensively in the industry, I’ve found that several widespread beliefs are actually myths, and understanding these nuances can save you time, money, and frustration. For example, a common myth is that all brake pads are equal, but in reality, choosing the right compound and thickness for your specific driving habits makes a significant difference in safety and longevity.
Could Your Shortcuts Be Causing Long-Term Damage?
Rushing through complex procedures like transmission repairs or ignoring subtle signs of failure—such as rough shifting or delayed engagement—can lead to costly repairs down the line. Many assume that a quick fix will suffice, but overlooking detailed diagnostics or skipping essential steps often results in incomplete repairs and compromised vehicle performance. Industry experts emphasize the importance of precise diagnostics; for instance, a misdiagnosed transmission fluid issue might appear minor but could actually stem from internal wear that requires a professional assessment.
One prevalent trap is believing that auto repair is purely mechanical, neglecting the critical role of proper maintenance and fluid checks. Regular servicing, like fluid exchanges and component inspections, often prevents major failures. Skipping these can accelerate wear on essential parts, especially within the transmission system, which heavily depends on clean, appropriate fluids to operate smoothly. For detailed insights on extending your vehicle’s lifespan through routine checks, visit this comprehensive guide.
Another misconception involves the assumption that aftermarket parts are always inferior to OEM (Original Equipment Manufacturer) components. While OEM parts are designed for exact specifications, many high-quality aftermarket options can match or even surpass OEM performance at a lower cost. The key is to choose reputable brands and consult professionals who understand the specifics of your vehicle model. This is especially relevant when considering brake components; for expert advice on selecting the best brake service, you can refer to this article.
Advanced car repair also requires awareness of subtle signals that often get dismissed. For example, a slight shimmy in the steering wheel may seem minor but can indicate uneven tire wear or a failing wheel bearing. Many drivers ignore these signs until they develop into more severe issues, like total wheel failure or suspension damage. Regular inspections and listening to your vehicle’s cues are essential to prevent escalation. Remember, what may seem like inconsequential noise or vibration can, in fact, be a hidden warning sign. For nuanced diagnosis and repair strategies, consult this detailed resource on transmission health.
In summary, understanding the deeper layers of auto repair involves challenging common assumptions, avoiding shortcuts that compromise safety, and paying attention to the subtle nuances your vehicle displays. Recognizing these advanced details can dramatically improve your car’s reliability and longevity, saving you from unwelcome surprises on the road. Have you ever fallen into this trap? Let me know in the comments and share your experiences or questions about complex repairs. The more we understand, the better equipped we are to keep our vehicles in top shape.
Mastering Your Toolkit for Auto Repair Success
Investing in the right tools is the cornerstone of maintaining your vehicle effectively and ensuring longevity. I personally rely on a high-quality digital torque wrench, like the Tekton 1/2 Inch Drive Click Torque Wrench, which provides precise torque control essential for tasks such as wheel lug nut tightening or brake component installation. Unlike analog wrenches, digital models eliminate guesswork, reducing the risk of over-tightening or under-tightening parts that can lead to premature failure.
Another indispensable tool I recommend is an infrared temperature gun. It allows me to monitor brake rotor surface temperatures during testing, ensuring proper bedding and identifying hotspots that indicate uneven wear or warping. This real-time data helps prevent extensive repairs down the line and keeps your braking system functioning optimally.
Software tools also play a vital role in modern auto maintenance. I prefer OBD-II scan tools like the BlueDriver Bluetooth Scan Tool, which connects via smartphone to diagnose engine problems quickly. It offers comprehensive fault code readings and live data streams, making diagnostics faster and more accurate—saving both time and money. Coupled with industry knowledge like expert advice on brake service, this gear empowers me to identify issues before they escalate.
Keeping Up with Long-Term Results and Scalability
Regular maintenance is my priority. I set reminders to replace fluids, inspect brake pads, and check suspension components, all using diagnostic tools to verify proper function. This proactive approach helps catch small issues early, preventing costly repairs. As your vehicle ages, consider investing in more advanced diagnostics or customizations—such as upgrading brake pads or suspension systems—to accommodate increased mileage or driving demands.
Predicting the future of auto maintenance involves embracing telematics and IoT devices. Smart systems can alert you about component wear or fluid deterioration before symptoms appear, making maintenance more predictive than reactive. Staying informed through resources like comprehensive service checks ensures your vehicle remains in top shape and adapts to evolving technology trends.
How do I maintain automotive tools and systems over time?
Proper storage is crucial—keep tools in a clean, dry environment to prevent corrosion, especially for metal parts like torque wrenches. Regular calibration of your torque tools guarantees accuracy; many manufacturers recommend recalibration every 6-12 months, depending on usage. For software tools, ensure your diagnostic apps are updated to reflect the latest vehicle models and fault codes. Additionally, maintaining a detailed service log helps track your inspections, repairs, and part replacements, facilitating better long-term planning. Remember, quality tools and consistent upkeep are investments that pay off by keeping your car running smoothly year after year. For more insights on extending your vehicle’s lifespan, visit this helpful guide. And don’t forget—try implementing one advanced maintenance habit today, like calibrating your torque wrench, to enhance your car’s reliability.
What the Quietest Mechanics Won’t Tell You About Brakes
After years of repairing and maintaining vehicles, I’ve learned that the most valuable lessons often come from unexpected moments of failure or discovery. The biggest insight I gained is that not all pulsating brakes are created equal; sometimes, it’s a sign of deeper issues that require nuanced understanding and patience. For instance, I once thought that simply replacing rotors would solve vibrations, but it turned out that proper bedding and alignment were just as crucial. Recognizing these subtle cues has transformed how I approach brake service and could do the same for you.
Tools and Resources That Truly Make a Difference
Over the years, I’ve relied on specific tools that have saved me time and improved accuracy. My favorite is the Digital Torque Wrench—precision matters when tightening lug nuts, and this tool prevents over-tightening that can warp rotors. Additionally, the Infrared Temperature Gun helps identify hot spots on rotors that indicate uneven wear. For diagnostics, I trust the BlueDriver Bluetooth Scan Tool because it provides comprehensive fault data fast. Using these resources regularly has made a noticeable difference in the quality and longevity of brake repairs, and I recommend them wholeheartedly to fellow enthusiasts.
Seize the Moment: Your Brake Mastery Awaits
Braking systems are intricate yet vital for safety, and understanding their complexities empowers you to take control. Don’t wait until pulsation becomes a squeal or, worse, a safety concern—regular inspection, proper bedding, and diligent maintenance can save you hundreds in repair costs and keep you confident on every drive. Your vehicle’s health is a reflection of your care, and stepping into the role of your own mechanic isn’t just rewarding—it’s essential. Start small today by checking your rotor surfaces or torque settings, and watch your confidence grow. Ready to take the wheel of your auto repair journey?