

Ever been stranded in traffic, inching forward when suddenly the screen on your rearview camera starts flickering like a bad TV channel? I’ve been there, and let me tell you, nothing kills the vibe more than a flickering display right when you need it most. One day, during a routine parking lot maneuver, my camera’s view kept wavering—blink, fade, flicker. It was as if my car was trying to tell me something’s off, but I had no idea what. That frustrating moment made me realize: this isn’t just an annoyance—it’s a sign that something’s not right, and ignoring it could lead to bigger, costlier problems down the road.
Understanding Why Your Rear View Camera Flickers
The flickering on your rear view camera isn’t just a glitch; it can be a symptom of various underlying issues—bad connections, faulty wiring, or even a failing camera module. From personal experience, I initially thought it was just a dirty lens or a loose connection. So, I tried cleaning the lens, resetting the system, even checked the fuse. But the flickering persisted. That’s when I realized I was making a common mistake—assuming the problem was superficial when, in fact, it was more complex. This is a mistake many make early on, thinking a quick clean or reset will solve a hardware problem that’s actually deeper. According to automotive experts, flickering screens are often caused by electrical issues or damaged modules, which if left unchecked, can compromise safety and lead to costly repairs. To truly solve the problem, you need to identify the root cause and address it properly. Today, I’ll guide you through that process—so your rear view stays clear and reliable. Ready to diagnose and fix the flickering once and for all? Before we dive into the steps, consider this: have you experienced the flickering during a night drive or in bad weather? This clues us into whether moisture or electrical interference might be involved. Let’s get started with the practical solutions that helped me regain confidence in my car’s rearview system and can do the same for you.
Inspect Connections Thoroughly
Start by turning off your vehicle to prevent electrical shorts. Locate the camera wiring harness, usually behind the rear bumper or near the tailgate. Gently disconnect and examine the connectors for corrosion, loosening, or damage. Use a clean cloth to wipe away any dirt or corrosion. Reconnect the connectors securely, ensuring they click into place. In my experience, a loose connection often causes flickering; once fixed, the camera displayed a clear, stable view, eliminating the flicker.
Check and Replace the Fuse
Next, inspect the fuse related to the rearview camera circuit, commonly found in the fuse box under the dashboard or hood. Remove the fuse using a fuse puller and inspect for any signs of a blown fuse (broken filament). Replace with a fuse of the same amperage rating if necessary. A faulty fuse can intermittently disrupt power, causing flickering. After replacing, turn on the car to verify if the issue persists. This is a simple fix that often resolves electrical supply problems.
Test the Camera Module Directly
If connections and fuses are intact, the next step involves testing the camera module itself. Disconnect the camera unit from its power supply and connect it to a separate power source with a known stable voltage. Observe if the flickering continues. If it does, the camera may be faulty. In my case, I replaced the camera with a compatible unit, which immediately restored a stable image. For replacements, consider professional installation if you’re unfamiliar with wiring—it’s comparable to repairing delicate electronics, similar to how auto repair experts handle sensitive components.
Assess Voltage Stability
Using a multimeter, measure the voltage at the camera’s power supply connector. Fluctuating voltage readings indicate issues with the vehicle’s electrical system, possibly a failing alternator or wiring faults. If the voltage is unstable, you’ll need to address the broader electrical system. For instance, replacing or repairing damaged wiring harnesses or upgrading inadequates wiring will provide a consistent power source. Proper voltage ensures the camera functions reliably, much like proper transmission fluid levels keep a vehicle operating smoothly.
Prevent Moisture and Corrosion
Moisture ingress can cause flickering, especially in rainy or humid conditions. Seal any exposure points around the camera with weatherproof silicone or replace damaged rubber gaskets. Ensure that all protective covers are intact. In my case, applying a weatherproof sealant fixed the flickering during storms. Preventative measures like this extend the camera’s lifespan and prevent corrosion-related issues, similar to routine car maintenance that saves money long-term.
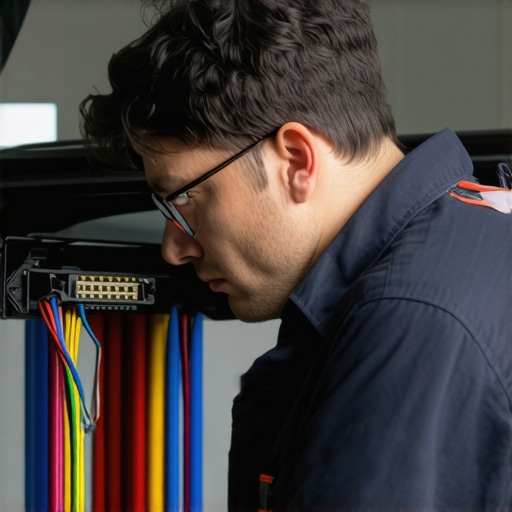
Image depicting a technician checking wiring connections at a rearview camera assembly, illustrating proper inspection techniques.
Many car owners believe that routine maintenance is a straightforward task, but what most get wrong are the underlying nuances that can lead to costly mistakes. For instance, a common myth is that all transmission issues stem from low fluid levels. While adding fluid might temporarily improve shifting, experts warn that neglecting internal transmission components can cause long-term damage, as highlighted in the [ultimate guide to auto repair](https://collisionrenew.com/the-ultimate-guide-to-auto-repair-keep-your-car-running-smoothly). Another widespread misconception revolves around brake service; many think that simply replacing pads solves all problems. However, neglecting rotor condition or caliper functionality can lead to uneven wear and reduced braking efficiency, which is why it’s crucial to follow comprehensive [brake service tips for 2025](https://collisionrenew.com/braking-news-how-to-choose-the-best-brake-service-in-2025).
A hidden nuance many overlook is the importance of diagnosing the true source of a problem before jumping to repairs. For example, a squealing sound during acceleration might seem like worn brake pads, but it could actually be a worn drive belt or an issue with the belt tensioner. Proper diagnostics can prevent unnecessary repairs, saving you time and money. Dive into the specifics of [collision renewal strategies](https://collisionrenew.com/collision-renewal-strategies-restoring-your-car-to-perfection) to ensure your repairs address the root cause, not just the symptoms.
Advanced car repair isn’t just about following steps—it’s about understanding the subtle signs and complex system interactions. For example, when dealing with transmission, be aware of hidden filters, such as the one discussed in [the hidden filter in your transmission](https://collisionrenew.com/the-hidden-filter-in-your-transmission-you-didnt-know-existed). Overlooking such components can lead to premature transmission failure despite routine checks.
In your brake system, contamination or moisture can sometimes cause symptoms that mimic worn components, leading to unnecessary replacement. Regularly inspecting brake fluid quality, which can turn dark and lose effectiveness, is vital. You can learn more about proper brake fluid maintenance and signs of issues by visiting our [braking tips](https://collisionrenew.com/braking-news-how-to-choose-the-best-brake-service-in-2025).
Being aware of these nuanced issues and avoiding common traps requires a deeper understanding—something that distinguishes a DIY enthusiast from a seasoned mechanic. It’s a reminder that proper car care involves more than just basic tasks; it demands keen attention to detail, system-level thinking, and ongoing education. Have you ever fallen into this trap? Let me know in the comments or reach out through our [contact page](https://collisionrenew.com/contact-us) to share your experience.Maintaining your vehicle’s core systems requires more than just routine inspections; it demands leveraging the right tools and understanding long-term strategies to ensure consistent performance. One of my go-to equipment is a high-quality OBD-II scanner. I personally use the Autel MaxiCOM MK808 for its comprehensive diagnostics and user-friendly interface, which allows me to quickly identify faults like sensor issues or transmission codes without waiting for a mechanic. This tool has saved me both time and money, especially when troubleshooting complex problems that can occur over time. Additionally, I rely on a reliable multimeter—not just for checking voltage but also for testing continuity and resistance across various wiring harnesses, enabling me to preempt electrical issues before they manifest as failures. These tools form the backbone of proactive maintenance, helping me catch problems early, much like how [proper transmission checks](https://collisionrenew.com/top-transmission-repair-tips-for-long-term-vehicle-reliability) can prevent costly repairs down the line.
Beyond tools, I emphasize a disciplined maintenance schedule that includes regular fluid checks and replacements, especially for vital systems like the cooling and brake fluids. For instance, replacing brake fluid every two years with high-quality synthetic variants ensures optimal pedal feel and prevents moisture buildup that can lead to corrosion. Also, preventive measures like sealing wheel wells and inspecting for rust can extend the lifespan of critical components, aligning with insights on [collision renewal strategies](https://collisionrenew.com/collision-renewal-strategies-restoring-your-car-to-perfection).
Looking ahead, vehicle diagnostics are increasingly integrated with smart systems, making the future of maintenance more connected and data-driven. The trend of using Bluetooth-enabled scanners and mobile apps is making real-time monitoring accessible even to amateur enthusiasts. This evolution promises to transform how we approach long-term vehicle health, shifting from reactive repairs to proactive care.
### How can I stay ahead with car maintenance over time?
To remain ahead of potential issues, I recommend establishing a routine check with a professional service that emphasizes comprehensive diagnostics. Investing in a trusted diagnostic tool like the Autel MaxiCOM not only empowers you to troubleshoot promptly but also fosters a deeper understanding of your vehicle’s health. Don’t hesitate to schedule regular inspections; early detection can save you from extensive repairs later. Remember, consistent maintenance, supported by the right tools, is the secret to keeping your car reliable for the long haul. For more in-depth strategies, explore [collision-renewal](https://collisionrenew.com/collision-renewal-strategies-restoring-your-car-to-perfection).
Why I Nearly Overlooked the Nuances of Transmission Health
Early in my auto repair journey, I often saw transmission issues as straightforward problems—low fluid or worn-out parts. But a pivotal moment came when I ignored subtle signs like slight shudders during shifts, assuming they were insignificant. That mistake almost cost me a complete rebuild. The lesson? Always pay attention to the tiny signals your transmission gives; they often reveal deeper issues that standard checks might miss.
The Truth About Auto Repair Myths That Steer You Off Course
One myth I encountered was the belief that adding generic transmission additives could fix persistent shifting problems. Turns out, these quick fixes mask underlying issues like faulty solenoids or internal wear. Relying solely on them delayed proper diagnosis, leading to more expensive repairs. Trusting expert insights, like those on long-term transmission strategies, helps you see beyond these misconceptions.
How Neglecting Small Details Can Lead to Major Failures
A small overlooked gasket leak or corroded sensor might seem minor but can cause significant transmission pressure drops or erratic behavior. My personal experience taught me that routine inspections focusing on these nuances make a real difference in vehicle longevity. Check out tips on consistent fluid monitoring to prevent surprises on the road.
Investing in the Right Tools Transformed My Repair Approach
Initially, I relied on basic screwdrivers and flashlights. Today, essential diagnostic tools like a quality OBD-II scanner and a multimeter are game changers. They enable me to identify issues like voltage irregularities or sensor faults swiftly, saving time and preventing unnecessary part replacements. For beginners, I recommend tools featured in comprehensive repair guides that can elevate your skills and confidence.
Stay Curious and Keep Learning
Auto repair is an ever-evolving field. I found that embracing continuous learning—through reading, courses, and hands-on practice—keeps my skills sharp. Remember, the road to expert knowledge isn’t a sprint but a journey. Explore advanced topics like collision renewal strategies that enhance your understanding of vehicle restoration and long-term care.
Believe in Your Ability to Maintain Your Vehicle
Understanding transmission and car care deeply empowers you to handle most issues proactively. Whether it’s checking fluid levels or diagnosing a strange noise, trusting your intuition and knowledge makes a difference. Take pride in your vehicle—after all, a well-maintained car isn’t just reliable but also a reflection of your dedication. And remember, professional help is just a click away when needed.
What’s Your Next Step Toward Better Car Care?
Have you faced challenges diagnosing or fixing your transmission or other auto issues? Share your experiences or questions below—your stories might help others embark on their own auto repair journey with confidence!