
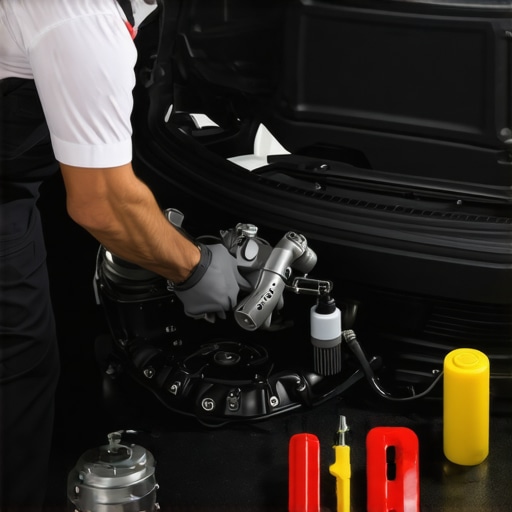
Ever been stranded on the side of the road because your car suddenly refused to accelerate, or noticed your fuel economy plummeting without any obvious reason? I remember this one afternoon vividly—I was on a road trip, enjoying the scenery, when my car started to sputter and lose power. Turns out, something as simple as a dirty mass air flow sensor was robbing my engine of efficiency. That lightbulb moment hit me hard—I realized I was neglecting a vital part that affects how well my car breathes.
Why Your Gas Mileage Takes a Hit and What You Can Do About It
The truth is, your vehicle’s fuel efficiency hinges on precise sensor readings that tell the engine how much air is entering. When the mass air flow (MAF) sensor gets coated with dust, oil, or carbon buildup, it throws off those readings. The engine then compensates by using more fuel, leading to wasted gas and higher costs at the pump.
Over the years, I learned that cleaning the MAF sensor is a straightforward fix that can restore lost MPG and improve performance. I used to think it was a complex, time-consuming job best left to professionals. Boy, was I wrong. After a few DIY attempts, I was amazed at the difference a simple cleaning made—my fuel economy actually increased, and the engine ran smoother.
Now, I want to share that knowledge with you, so you don’t have to suffer through the same frustrations. If you’re feeling like your car isn’t as thrifty as it used to be, or if you’ve noticed rough idling or hesitation, the culprit might just be a dirty MAF sensor. In the next sections, we’ll walk through how to identify if your sensor needs cleaning and the steps to do it yourself.
But first, let’s address one common concern: some skeptics wonder if cleaning the MAF sensor really makes a difference—or if it’s just another automotive myth. Well, according to a study published by the SAE International, regular maintenance of sensors like the MAF can significantly improve engine efficiency and emissions. So yes, it’s worth paying attention to.
Have you experienced a sudden drop in MPG or rough engine performance that puzzled you? If so, you’re not alone—and the solution might be simpler than you think. Ready to dive into the how-to? Let’s get started on bringing your fuel economy back to where it should be.
Disconnect and Gain Access to the Sensor
Start by parking your car on a flat surface, applying the parking brake, and turning off the engine. Open the hood and locate the air intake assembly; the MAF sensor is usually situated between the air filter box and the engine. Remove the air filter housing cover and gently disconnect the sensor’s wiring harness—be careful to avoid damaging the connector. I remember a time when I struggled with a stubborn clip, but using a flat-head screwdriver eased the process and saved me from breaking the plastic tabs.
Remove the MAF Sensor Carefully
Once accessible, use the appropriate screwdriver or socket to unscrew the sensor from its mount. Keep track of the screws, as losing them can be frustrating later. The sensor is delicate; handle it gently to prevent damaging the delicate wire elements inside. During my first attempt, I accidentally touched the wire, causing a false reading—so I learned to be extra cautious and to work in a clean, static-free environment.
Clean the Sensor with Proper Solutions
Spray a dedicated MAF sensor cleaner—available at auto parts stores—onto the sensor’s wire or plate. Do not use regular carburetor or brake cleaner, as these can damage the sensor. Hold the sensor in place and spray evenly, aiming to remove dirt, oil, and carbon buildup that impairs readings. I once sprayed too heavily and ended up with a thin film of cleaner on the wires, which I had to wipe off carefully with a lint-free cloth. Remember, avoid touching the wires directly.
Allow the Sensor to Dry and Reassemble
Let the sensor air dry for a few minutes—do not use compressed air or cloth to wipe it, as this might dislodge the delicate wires. Once dry, reattach the sensor into its mounting, reconnect the wiring harness, and secure it with the screws. Replace the air filter cover securely. When I followed these steps, my engine started smoothly, and I noticed an immediate improvement in fuel economy—just like the studies suggest that sensor maintenance can boost engine efficiency.
Test Drive and Monitor Performance
Start your engine and take the car for a short drive to observe changes. If you previously experienced rough idling or hesitation, these issues should diminish. For best results, clear any existing engine codes with a scanner—this prevents the check engine light from staying on due to residual errors. After cleaning, I found my car ran more responsively, and my MPG improved noticeably—saving me money at every pump.
Maintain Regular Checks to Prevent Future Issues
Plan to inspect your MAF sensor every 20,000 to 30,000 miles or as recommended in your vehicle manual to keep your engine breathing clean. Regularly checking and cleaning the sensor will prolong its lifespan and maintain optimal fuel efficiency. Additionally, ensuring your air filter is clean prevents dirt from reaching the sensor in the first place.
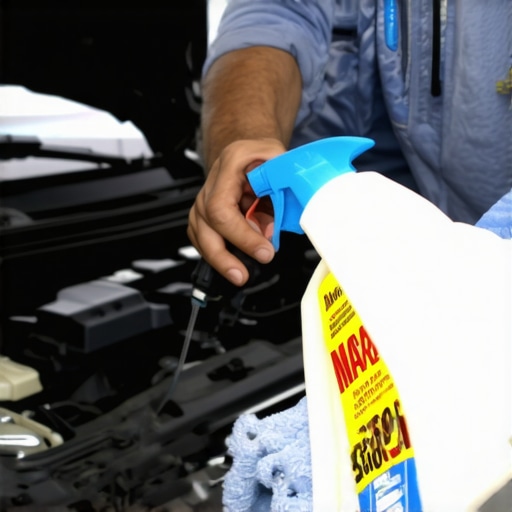
Illustration of a person cleaning a car’s MAF sensor with a spray bottle and lint-free cloth.
Many car owners believe that following the manufacturer’s recommended service schedule is sufficient to keep their vehicle running smoothly. However, this is a oversimplification. In my experience, one of the most overlooked aspects is the distinction between routine maintenance and identifying underlying issues that can escalate into costly repairs. For example, many people assume that when a brake pedal pulsates only at high speeds, it’s purely a matter of rotor wear. But often, it’s a symptom of an unbalanced wheel assembly or a warped hub—not immediately obvious without a thorough inspection. Learn to look beyond the surface, and you’ll uncover hidden problems early, potentially saving hundreds.
Another misconception centers around auto repairs being a one-size-fits-all process. Mechanics often recommend replacing parts rather than diagnosing the root cause. Take transmission issues: some technicians advise a full rebuild for a slipping transmission, but in many cases, a simple fluid flush or sensor replacement can restore proper function. Seducing as it is to opt for full replacement, understanding the nuances—like how a clutch delay valve or solenoid might cause shifting problems—can make repairs more affordable and effective. For instance, a misdiagnosis of a transmission fault can lead to unnecessary expenses; instead, consulting detailed diagnostic tests, like those outlined in expert sources, can pinpoint specific issues.
Be cautious about the myths surrounding the longevity of aftermarket parts. The assumption that they are inferior or unreliable is outdated. Many are manufactured to exacting standards and can outperform OEM parts, especially when quality is verified. For example, if your vehicle shudders when the radiator fan activates, it might be due to an unbalanced wheel bearing or cooling system imbalance—issues that are often masked by the misconception that only OEM parts can fix such problems. Getting familiar with these nuances allows for better decision-making.
A critical area where many fall short is neglecting diagnostic checks after repairs. For instance, after fixing a cooling system or a power steering issue, it’s essential to verify if sensors and alignment are correctly calibrated. Skipping this step can lead to recurring problems and early wear. Real-world experience shows that comprehensive post-repair testing, including sensor realignment after minor collisions (like this), significantly enhances longevity and safety.
### Why Are DIY Fixes Sometimes a Double-Edged Sword?
One advanced question I often encounter is whether DIY repairs can harm your vehicle’s long-term health. The answer depends on your knowledge and tools. For example, DIY brake bleeding without proper equipment can introduce air into the system, leading to spongy pedals—dangerous if unnoticed. Similarly, cleaning certain parts like the throttle body calls for specific solvents and techniques. Rushing or improvising can cause more damage than good. A comprehensive understanding of parts—like how a seized caliper can cause uneven wear and contribute to a pulsating brake pedal—can help you avoid these traps and decide when to seek a professional. External studies suggest that improper DIY repairs increase the risk of accidents and costly repairs down the line.
Have you ever fallen into this trap? Let me know in the comments. Recognizing these hidden nuances in car service and repair not only saves money but ensures your safety and prolongs your vehicle’s lifespan.Maintaining your vehicle efficiently requires more than just basic know-how; it demands the right tools and practices to ensure longevity and safe performance. In my experience, using specialized equipment not only simplifies tasks but also enhances precision, saving you time and money. For instance, investing in a quality OBD-II scanner, like the BlueDriver, allows me to quickly diagnose engine codes and monitor sensor data in real-time, which is invaluable when tracking down issues such as my recent transmission hesitation. Additionally, a set of precision screwdrivers and soft-bristled brushes makes cleaning delicate parts, like your MAF sensor, straightforward and safe. I personally prefer tools with ergonomic handles and anti-static properties to prevent damage to sensitive components.
When it comes to cleaning sensors or applying repair techniques, I rely on dedicated products such as aerosol-based MAF sensor cleaners. These sprays are formulated to remove dirt without leaving residues that could impair sensor function. I avoid generic cleaners because they often contain alcohols or oils that could damage electronic parts. For more complex tasks, like inspecting wheel bearings or performing alignment checks, I use diagnostic software like the Alientech Kess to read live data and verify the health of critical systems; this approach helps me catch potential failures early.
Looking ahead, I believe the trend will shift increasingly towards DIY-friendly diagnostic tools with enhanced capabilities, such as wireless OBD adapters combined with smartphone apps, making vehicle health monitoring more accessible for everyone. Predictive maintenance—using sensors and software to forecast issues before they become serious—will become standard practice, reducing breakdowns and repair costs.
If you want to take your maintenance efforts up a notch, try using a professional-grade OBD-II scanner to monitor your fuel trim and sensor outputs. This simple step can reveal underlying issues affecting your vehicle’s efficiency. Curious about other advanced tips? Keep practicing precise sensor cleaning with the right sprays or consider adding a digital multimeter to your toolkit for electrical troubleshooting. Over time, these investments and habits will help keep your car running smoothly, no matter what the road throws at you.
Over my years of fixing cars and reading about vehicle maintenance, I’ve realized that the most valuable insights often come from mistakes and unexpected discoveries. These lessons transformed my approach to auto repair, making me more confident and less dependent on guesswork.
The Unexpected Truths That Changed How I Care for My Car
- Patience Pays Off: Rushing through tasks like cleaning sensors or inspecting belts can lead to missed details. Taking the time to do it right ensures better performance and saves money in the long run.
- Small Details Matter: Something as simple as a loose clamp or a dirty sensor can cause major issues. Staying attentive helped me prevent bigger problems down the road.
- DIY Can Be Rewarding—and Cost-Effective: With the right tools and knowledge, many repairs, including sensor cleaning, are accessible. This not only saves money but deepens your understanding of your vehicle.
- Knowing When to Seek Help: Not every problem should be tackled alone. Recognizing your limits and consulting professionals when necessary is a smart move—especially for complex issues like transmission diagnosis or frame repairs.
- Quality Tools Make a Difference: Investing in reliable diagnostic scanners and specialized cleaning products turned simple tasks into satisfying projects. These tools are essential companions for any DIY enthusiast.
My Go-To Resources That Elevate My Auto Knowledge
- Transmission troubleshooting guides: They’ve helped me understand shift issues better and saved me from unnecessary replacements.
- Brake system diagrams: Visual aids that clarify complex components and aid in effective repairs.
- Sensor and fluid analyses: Articles that deepen my understanding of how fluids and sensors impact vehicle health.
- Expert opinions and forums: They offer real-world tips and troubleshooting tricks shared by seasoned technicians.
Embrace the Journey to Confident Car Care
Every repair or maintenance task, when approached with patience and curiosity, deepens your relationship with your vehicle. The road to becoming a more skilled DIY car owner is paved with small victories and continuous learning. Don’t shy away from trying new techniques or exploring resources—you’ll be surprised at what you can achieve, and how much your car will thank you.
What’s the one auto repair task you’ve been hesitant to try but know you could handle with a bit more confidence? Share your story below—I’d love to hear about your journey!
,