It was a chilly morning when I finally realized something was off with my car. A faint but persistent gap had developed in my fender after a minor collision, something I initially dismissed as a small cosmetic issue. But as days turned into weeks, that tiny inconsistency started to bother me more. The gap wasn’t just an aesthetic problem; it hinted at underlying damage I’d overlooked in my rush to hit the road again. That lightbulb moment made me realize how easy it is to ignore these seemingly minor gaps, only for them to become bigger, more costly headaches later.
Why Ignoring Small Fender Gaps Can Cost You Dearly
In my early days of auto repair, I made a mistake that I now deeply regret. I thought a small gap meant just an appearance tweak. I figured, “It’s minor, doesn’t affect driving, so why bother?” That oversight almost cost me a lot more than I bargained for. Over time, I learned that these gaps can signify hidden structural issues, misaligned parts, or less-than-perfect repairs that could compromise your car’s safety and long-term integrity.
But here’s the thing: many car owners overlook these signs, brushing them off with the hope that they’ll sort themselves out. Unfortunately, that’s rarely the case. A tiny gap can be a sign of deeper misalignments or frame issues that, if left unaddressed, may lead to uneven tire wear, poor handling, or even worse, safety hazards on the road.
This realization led me down a path of careful inspection, learning proper collision renewal strategies, and understanding how crucial proper alignment and repair techniques are. And I want to share this knowledge because I’ve been where you are right now—unsure if that small gap is worth fixing.
If you’ve noticed a similar issue with your vehicle’s fender or body panels, don’t ignore it. Prompt attention can save you money and ensure your safety. Curious about how to evaluate whether that gap needs professional repair or if it’s worth repairing yourself? Keep reading. We’ll go through step-by-step how to identify the real problem behind that sneaky gap and how to approach fixing it effectively. For more detailed tips, visit our [collision renewal overview](https://collisionrenew.com/collision-renewal-strategies-restoring-your-car-to-perfection).
Now, let’s get to the heart of the matter and uncover what those gaps are really telling us about our cars.
Assess the Damage Carefully
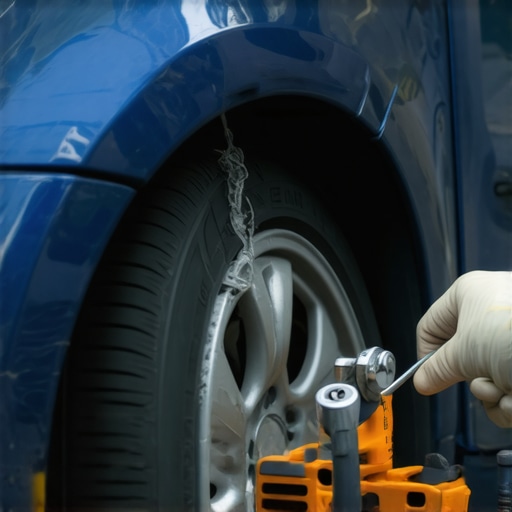
Start by visually inspecting your fender gap and surrounding panels. Use a flashlight to check for misalignments, dents, or cracks. I once approached a stubborn gap after a minor collision by placing a straightedge along the panel edges. This revealed subtle misalignments that weren’t obvious at first glance, guiding my next steps effectively.
Gather the Necessary Tools and Materials
Equip yourself with basic tools like a rubber mallet, pry bars, a plastic body panel puller, and measuring tape. Protect the paint surface with soft cloths or plastic wraps. For stubborn dents or misalignments, a heat gun can soften paint slightly, making panels more pliable. Remember, patience and precise measurements are key.
Apply Gentle Adjustments
Loosen any bolts or clips holding the panel. Carefully use the pry bar or plastic puller to realign the panel, similar to how a mechanic might gently coax a bent door into shape without cracking the paint. When I fixed a sagging bumper, I gradually loosened bolts and tapped the panel with a rubber mallet. Always check alignment frequently to avoid overcorrecting.
Use Heat for Stubborn Areas
If the panel resists adjustment, apply mild heat using a heat gun around the edges. This softens the adhesive and paint slightly, allowing more flexibility. In my experience, a gentle heat around the fender’s edge helped realign panels with minimal paint damage. Be cautious to avoid overheating, which can cause paint bubble or peel.
Fine-Tune and Secure the Panel
Once aligned, tighten all bolts incrementally, checking the fit after each step. Use a measuring tape or a feeler gauge to ensure consistent gaps. Remember, a misaligned panel can lead to further issues like wind noise or even rust. For accuracy, compare your measurements to the factory specifications or consult the vehicle’s manual. If gaps persist, consider using specialized adhesive or filling compounds for minor adjustments.
Address Underlying Damage if Necessary
If you notice structural damage, such as frame twisting or bent reinforcement bars, a more comprehensive repair is necessary. This mirrors procedures in transmission or brake repairs, where underlying mechanical issues must be addressed for long-term reliability. Visiting a professional shop might be prudent when damage exceeds simple panel adjustments. To find trusted technicians, visit our contact page.
Finish with Protective Measures
After proper alignment, apply touch-up paint or sealant if you’ve had to scrape or sand the panels. This prevents rust and maintains aesthetics. For plastic trims or painted surfaces, restoration techniques like micro-denting or repainting can help blend the repair. For thorough guidance, check our collision renewal strategies.
Test Drive and Re-evaluate
Finally, take your vehicle for a test drive. Check for unusual noises, wind noise, or handling issues. If the gap reappears or you notice misalignment, revisit your adjustments. Sometimes, settling takes a few days of driving, especially after heated repairs or panel replacements. Remember, persistent issues might indicate frame or structural problems needing professional intervention to ensure safety on the road.
Many car enthusiasts and everyday drivers alike tend to believe they grasp the core concepts of transmission and auto repair, but there are subtle nuances that often escape even seasoned owners. For instance, a common myth is that replacing transmission fluid is a simple, one-and-done task. In reality, as emphasized by experts at CollisionRenew, fluid condition and absorber material degradation over time demand more frequent and precise maintenance. Overlooking these details can lead to premature transmission failure despite adhering to the general rule of fluid replacement.
One trap many fall into involves the misconception that all brake noises indicate worn-out pads, prompting unnecessary replacement. In truth, as detailed in this guide, squealing or grinding can originate from moisture accumulation, warped rotors, or contaminants on the pad surface. Misdiagnosis can escalate costs or delay critical repairs.
A common misunderstanding surrounds the significance of subtle transmission slipping during cold starts. While some consider it normal, experts warn in top transmission maintenance tips that even minor shifts hesitation, especially when cold, can hint at impending failure if not addressed promptly.
### What’s behind the misconception that all auto repairs are equally straightforward?
Many believe simple fixes like topping up fluid or replacing filters are sufficient for long-term health. However, the actual hidden complexity involves understanding the interplay of all components—clutches, solenoids, valve bodies, and fluid quality—that influence transmission performance. Skipping professional diagnosis risks overlooking underlying issues that lead to costly repairs down the line.
A critical误区 involves neglecting the importance of proper calibration after repairs or parts replacement. For example, software recalibration for transmission control modules is vital; otherwise, the vehicle might operate inefficiently or dangerously. As pointed out in here, improper calibration can cause harsh shifting, increased wear, and eventually, failure.
Beware the Keeping your vehicle in top shape requires the right tools and knowledge. I personally rely on a set of precise, durable equipment to diagnose and perform repairs efficiently. For instance, my digital multimeter isn’t just any model—it’s a Fluke 117, renowned for its accuracy in reading electrical systems, which helps me troubleshoot wiring issues or sensor malfunctions with confidence. When dealing with transmission or brake systems, I use a laser alignment tool like the Hunter QuickGrip, which provides exact measurements to ensure proper panel alignment and frame correction, crucial for long-term durability.
Another essential is a quality code scanner. I prefer the Autel MaxiCOM for its extensive vehicle coverage and live data capabilities. This device allows me to identify underlying computer malfunctions beyond the check engine light, saving time and preventing unnecessary part replacements. When adjusting or replacing components like blower motors or sensors, I employ specialized tools such as a brake caliper piston compressor or a plastic body panel pry set, ensuring I avoid damage to sensitive surfaces.
In terms of software, I utilize repair databases like AllData or Mitchell 1. These platforms provide detailed diagrams, repair procedures, and OEM specifications, helping me follow manufacturer guidelines precisely. As vehicles evolve, so does the need for up-to-date software solutions that incorporate the latest diagnostic codes and repair techniques.
Looking ahead, I predict that diagnostic tools will become more integrated with AI, offering predictive maintenance alerts and multi-system diagnostics in real-time. This trend will make auto repair more proactive than reactive, ultimately saving car owners money and extending vehicle lifespan.
So, how do I maintain these tools over time? Regular calibration, updating firmware, and careful storage are essential. For electronic devices, I schedule biannual calibrations and firmware updates, often directly through the manufacturer’s app or software platform. Storage in padded cases and cleaning the contacts with a soft brush prevents corrosion and keeps them ready for use. Implementing these practices ensures accuracy and longevity of your tools, which is vital for effective repairs.
If you’re serious about maintaining your vehicle or repairing it yourself, I highly recommend trying the method of periodic calibration for your diagnostic equipment. Accurate readings can make all the difference in diagnosing complex issues like transmission slips or electrical faults. For trusted guidance or professional assistance, don’t hesitate to contact professionals at CollisionRenew. Remember, investing in quality tools and proper maintenance of those tools can save you time and money, ensuring your vehicle remains reliable for years to come.
Lessons Hidden Beneath the Surface of Auto Repair
One of the most profound lessons I learned is that minor imperfections like a small fender gap often reveal deeper issues—sometimes lurking unnoticed until they escalate. Tackling these seemingly insignificant problems early can save you from costly repairs later and ensure your safety on the road. Trust me, overlooking these clues only amplifies the risk and expense, so always pay close attention to those tiny details that seem off.
Another insight is that DIY fixes require more than just tools—they need patience, a keen eye, and a willingness to learn. Real progress comes from understanding your vehicle’s specific needs and knowing when to seek professional help. For example, realigning a panel might look straightforward but can turn complex if underlying structural damage exists. Recognizing your limits prevents further damage and ensures long-term reliability.
Lastly, I found that awareness of common misconceptions can drastically improve your repair outcomes. Believing that all problems are superficial or that quick fixes suffice often leads to bigger headaches down the line. Instead, approach each issue with curiosity and a readiness to dig deeper—this mindset transforms auto repair from a chore into a rewarding journey of mastery.
Gear Up with Curated Tools and Resources
For anyone serious about tackling auto repairs or collision renewals, equipping yourself with trusted tools is essential. I rely heavily on professional-grade diagnostic devices like the Autel MaxiCOM because of its extensive vehicle coverage and detailed data output, which help me identify issues early and accurately. High-quality measurement tapes and pry bars, like those from Snap-on, have become staples in my toolkit, allowing precise adjustments without risking damage to paint or panels.
In addition, comprehensive repair guides such as the Ultimate Guide to Auto Repair have been invaluable. They offer step-by-step instructions aligned with OEM specifications, smoothing out even complex tasks. I also trust online platforms like Mitchell 1 for updated repair procedures—keeping my knowledge current with industry standards helps me serve clients better and avoid costly mistakes.
Lastly, developing a network of professional contacts has been crucial. Knowing when to call in experts for structural repairs, frame analysis, or calibration ensures safety and longevity. For those wishing to deepen their skills or get professional advice, visiting our contact page can connect you with seasoned technicians committed to quality and transparency.
Take Action and Keep Your Vehicle’s Heart Healthy
Your journey into effective auto repair and collision renewal doesn’t have to stop here. Embrace the lessons learned, equip yourself wisely, and stay curious. The road to maintaining a safe, reliable vehicle is paved with continuous learning and careful attention to detail. Remember, the effort you invest today will pay off with a smoother ride and peace of mind tomorrow.
What small fix have you been putting off that might hide bigger problems? Share your experiences below and let’s discuss how to tackle those sneaky issues together!