
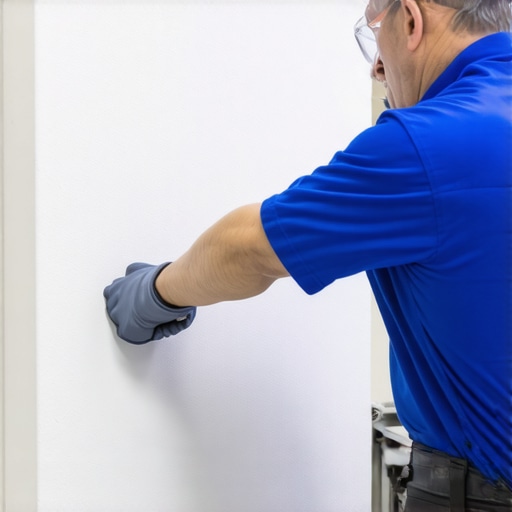
Imagine this: after finally finishing a collision repair, you’re eager to see your car looking perfect again. But as you step back, you notice that your repaired bumper doesn’t quite match the factory finish — it’s shinier or rougher, sticking out like a sore thumb. That realization hits hard. And trust me, I’ve been there, scratching my head wondering why my paint job didn’t blend seamlessly. It’s frustrating, right? Especially when you put so much effort into restoring your car’s look.
Why Matching Factory Texture Matters More Than You Think
The truth is, achieving that flawless, factory-perfect texture on plastic bumpers isn’t just about looks. It’s about preserving the value of your vehicle, maintaining its original aesthetic, and avoiding that obvious tell-tale sign of repair work. Your car’s exterior is designed to endure the elements, and mismatched textures can accelerate deterioration or cause paint to peel prematurely. Plus, a textured match affects how light reflects off the surface, giving your bumper that just-bought appearance.
I remember rushing through my first plastic bumper overhaul, thinking a quick paint job would suffice. I didn’t realize how critical the surface prep and texture matching actually are. Avoiding this detail can turn a professional repair into a glaring flaw. And believe me, I learned this the hard way, often ending up doing double the work to correct the mismatch.
Is Texture Matching Really That Crucial, or Overhyped?
Some might think that slight disparities are hardly noticeable. But studies show that imperfect finishes can reduce the perceived value of your vehicle and even affect how future buyers see your car. A 2022 report from CollisionRenew highlights that premium finishes can boost resale value by up to 20%. So, it’s worth getting it right the first time.
Early in my career, I made a rookie mistake by rushing the texture blending process, thinking I could fix it later with a little sanding and buffing. That only made things worse, creating uneven surfaces that were noticeable even at a glance. Now, I know better. Proper texture matching involves understanding the plastic’s surface characteristics and applying the right techniques from the outset.
If you’ve ever faced the dilemma of trying to conceal a mismatched bumper, or worried about your repair holding up over time, then you’re not alone. Many car enthusiasts and DIYers grapple with this issue. Luckily, I’ll guide you through exactly how to match your factory texture effectively, ensuring your repair looks just as the manufacturer intended. Ready to stop hiding your car’s flaws and start restoring that perfect finish? Let’s dive into the step-by-step process and make your vehicle look showroom-ready again.
,
Prepare Your Workspace and Materials
Start by cleaning the bumper thoroughly with degreaser and soap to remove dirt, grease, and wax. Use fine-grit sandpaper (220-320 grit) to lightly scuff the surface, creating a key for the new texture. Gather a plastic adhesion promoter, textured primer designed for plastics, and matching base coat paint. Have a spray gun or high-quality spray cans ready. Remember, a clean, well-organized workspace minimizes contamination and ensures better results.
Select the Right Texture Pattern and Technique
Identify the factory texture pattern—most bumpers have either a fine, semi-gloss texture or a coarser finish. To replicate it, practice on a scrap piece of similar plastic or inconspicuous area. Use a textured spray primer or an additive mixed into the primer to create the desired finish. Applying multiple thin coats rather than a thick one helps achieve a uniform, natural look. As I did with my last repair, testing spray patterns on scrap material prevented costly mistakes on the actual bumper.
Apply Textured Primer Correctly
Spray the textured primer in light, even strokes, maintaining a consistent distance of about 8-12 inches from the surface. Keep your hand steady and move in smooth, overlapping passes. If using a textured additive, mix it thoroughly into the primer according to manufacturer instructions. Let each coat dry completely—rushing this step leads to uneven textures, which I learned the hard way when my first attempt looked unnatural. Patience here is key.
Matching The Color and Clear Coating
Once the texture foundation has cured, apply the base coat paint in thin layers, allowing adequate drying time between coats. Use color-matched paint, which can be obtained from your vehicle manufacturer or professional paint supplier. After color matching, a clear coat enhances durability and shine, sealing in the texture and color. Apply the clear in multiple light coats, avoiding runs or pooling. I once skipped the clear coat, which led to a dull finish and faster wear—so don’t overlook this step.
Final Blending and Refinement
After everything has dried, inspect the texture match under different lighting conditions. Light sanding with ultra-fine sandpaper (1500 grit) can help blend minor imperfections, but be careful not to remove the texture. Use a polishing compound to restore gloss, matching the surrounding area seamlessly. Remember, the goal is a uniform surface that feels and looks factory-like. I found that patience during blending prevents noticeable anomalies that could otherwise give your repair away.
Achieving a perfect factory texture on plastic bumpers demands precision, patience, and practice. It’s a skill that, once mastered, transforms a DIY repair into a professional-looking finish. Take your time with each step, experiment on scrap materials, and never underestimate the impact of a detailed prep process. For more tips on refining your auto repair skills, visit CollisionRenew’s comprehensive guide.
 When it comes to collision repair and auto maintenance, many car owners operate under beliefs that can actually hinder effective solutions. One widespread myth is that all professional repairs are equally reliable, but in reality, the quality varies significantly based on the shop’s experience and techniques. For instance, some believe that a quick paint touch-up can mask a deeper structural issue, which is a costly mistake that can compromise safety and longevity. As an expert, I advise always requesting transparency about the repair process and insisting on detailed evaluations before proceeding. Moreover, a common oops is assuming that DIY fixes are sufficient for complex issues like transmission rebuilds or brake system upgrades. While basic maintenance can be DIY-friendly, advanced repairs require precision done by seasoned technicians to prevent long-term damage. For example, improper transmission fluid replacement or misaligned brake calipers can lead to uneven wear and costly repairs down the line, as highlighted by expert guides. Now, let’s address a nuanced question that often stumps even seasoned DIYers: How do you tell if your transmission is subtly slipping without noticeable jerks?
What subtle signs should I look for to detect early transmission problems before they become severe?
Transmission slipping might not always be dramatic — you could feel delayed engagement, delayed acceleration, or odd noises during shifts. Regular diagnostics and attentive monitoring of fluid color and level can catch issues early. Remember, even if your car seems fine, unseen wear can cost thousands if left unchecked. As I emphasize in detailed analyses, proactive maintenance is key to extending your vehicle’s lifespan. Missteps like neglecting the importance of proper fluid services or ignoring early warning signs often lead to catastrophic failure. Have you ever fallen into this trap? Let me know in the comments. Staying informed about these nuances ensures your repairs are durable and your safety uncompromised. For more insights, check out essential car service tips.
Invest in Quality Equipment for Long-Term Success
When it comes to maintaining your vehicle, having the right tools is paramount. I personally rely on a high-quality digital torque wrench because it ensures fastener tightening is precise, preventing over-tightening or under-tightening that can lead to future issues. Unlike cheaper models, a reliable torque wrench with a digital readout reduces the risk of damaging sensitive components like transmission casings or brake calipers, ultimately saving you money and headaches in the long run. It’s also worth investing in a stethoscope mechanic for diagnosing engine noises, as it allows for pinpoint accuracy when identifying problems like worn-out belts or failing bearings, which is vital for effective auto repair.
Harness Cutting-Edge Software for Diagnostics
In today’s tech-driven automotive landscape, software tools are indispensable. I personally use a professional-grade OBD-II scanner that connects via Bluetooth to my smartphone, providing real-time data on engine performance, transmission status, and emission systems. This tool simplifies the troubleshooting process significantly, often revealing issues before symptoms become severe. For instance, early detection of transmission slipping can prevent costly rebuilds; as discussed in top transmission repair tips, proactive diagnostics extend your vehicle’s lifespan. Upgrading to a scanner with advanced functions, such as freeze-frame data and live graphing, equips you to take immediate action, ensuring your car remains reliable for years to come.
Master Proper Maintenance Techniques
Simple yet effective, routine maintenance like correctly changing oil, replacing filters, and inspecting brake pads can drastically improve vehicle longevity. I recommend using a high-quality automotive maintenance checklist to stay organized. For example, applying quality lubricants and ensuring proper torque specifications during assembly prevents unnecessary wear. A practical tip I follow is keeping a detailed maintenance log—this helps track components that typically need replacement around certain mileage points. Investing in a magnetic drain plug during oil changes can catch metallic debris early, hinting at potential internal engine issues before they escalate. Remember, consistent, methodical upkeep keeps your car running smoothly and reduces unexpected breakdowns.
Plan for Future Challenges and Scaling
As your skills grow, so should your toolkit. Projects like converting your car to hybrid power or upgrading to high-performance parts demand specialized tools and software. I predict that automotive repairs will increasingly integrate digital diagnostics platforms and 3D printing for custom parts, making repairs faster and more precise. To prepare, consider investing in a portable oscilloscope for detailed electrical diagnostics or a 3D scanner to create exact replicas of broken components. Embracing these tools now positions you ahead of the curve and allows for scalable repair solutions, whether you’re working on your own vehicle or supporting a small auto shop. For those eager to expand their capabilities, I recommend reading about emerging trends in auto repair strategies to stay informed.
How Do I Maintain My Auto Tools Over Time?
Proper maintenance of your equipment is essential for accuracy and longevity. Regularly calibrate your torque wrench and calibrate electronic diagnostic tools according to manufacturer recommendations. Keep hand tools clean and lubricated, and store them in a dry, organized space to prevent rust and damage. Software tools require periodic updates to stay compatible with newer vehicle models, so subscribe to manufacturer firmware releases. Additionally, inspect cables and connectors for wear and replace them if necessary. My tip is to create a scheduled maintenance calendar with reminders—this habit ensures your tools are always ready when you need them, avoiding delays or faulty diagnostics that can compromise your repair quality. Continual care for your equipment ultimately safeguards your investment and keeps your vehicle maintenance efficient and effective.
Lessons No One Tells You About Perfecting Your Repair Craft
- Sometimes, the toughest lessons come from the simplest oversights—like neglecting the initial surface prep. I once skipped proper sanding before spraying textured primer, only to see unevenness glaring back at me. That experience taught me that patience during prep saves hours of correction later.
- Matching the factory texture isn’t just about replication; it’s about understanding the plastic’s nature. I found that experimenting with scrap pieces of similar plastic provides invaluable insight, making the real repair smoother and more predictable.
- Equipment quality makes a noticeable difference. Upgrading to a professional spray gun or textured additive has transformed my results. Investing in these tools pays dividends in the longevity and appearance of each repair.
- Timing is everything. Rushing through drying times or skipping clear coats can compromise the finish. I’ve learned that respecting each layer’s cure time ensures a seamless, durable bond that looks factory fresh a year down the road.
- Finally, don’t underestimate the power of lighting. Inspecting your work under different lighting conditions reveals imperfections you might miss otherwise, guiding precise touch-ups that elevate your craftsmanship.
Tools and Resources That Elevate My Auto Repair Game
- Spraytech’s textured spray primer: I trust it for consistent application and reliable finish matching, which minimizes rework.
- Repairology’s automotive paint matching guide: This resource offers in-depth tips on color and texture matching, a must-have reference for every professional.
- Degreaser and surface prep kit by ProClean: A clean surface is non-negotiable. This kit ensures optimal adhesion and surface quality.
- High-quality spray guns from AutoSprayPro: Precision and control come with better equipment, making textured applications flawless.