
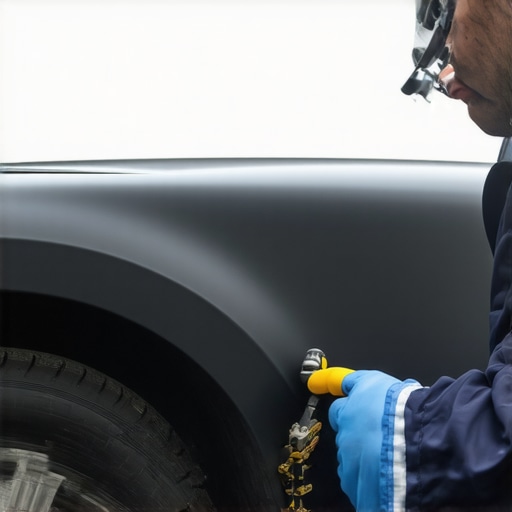
It happened during what I thought was just a routine parking lot misadventure—scratches across my beloved matte finish, instantly stealing the sleek, understated vibe I loved. Frustration kicked in. I stared at the tiny scars, feeling helpless. I couldn’t help but wonder if I’d have to live with them forever or shell out a fortune trying everything under the sun to fix it. Sound familiar? Trust me, you’re not alone in this struggle. I’ve been there, and I want to share what I’ve learned since then—because your matte finish car deserves to look flawless without breaking the bank.
Why Scratches on Matte Finish Can Feel Like a Personal Attack
If you’ve ever owned a vehicle with matte paint, you know how special that finish feels—smooth, velvety, and undeniably stylish. But here’s the thing: those scratches seem to appear out of nowhere, and once they do, they’re harder to fix than you might think. Unlike glossy paint, matte finishes require a delicate touch. A simple scratch can turn into a glaring eyesore that ruins the entire look of your car. And trust me, I’ve spent hours trying to buff, polish, and even cover up these imperfections, only to find that most quick fixes do more harm than good.
What I didn’t realize at first is that regular touch-up techniques used on gloss paints don’t work on matte finishes—they can cause further damage or even make the scratches stand out more. Early on, I tried grinding away at it, assuming I could buff out the flaw easily. Instead, I ended up with uneven patches and lost a bit of that perfect matte texture. That mistake taught me a valuable lesson: **knowing the right approach is essential.**
So, if you’re staring at those pesky scratches and wondering if you’ll ever get that pristine, showroom look back, I promise you—there’s hope. Today, I’ll guide you through practical, proven methods that have worked for me. We’ll focus on how to repair scratches in matte finish paint without sacrificing that silky, uniform appearance. It’s about working smarter, not harder, and understanding the nuances of matte paint repair. And if you’re curious whether all the hype around professional repair is worth it, I’ll cover that too.
Is DIY Repair on Matte Finish Really Possible Without Making Things Worse?
Honestly, I used to think only professionals could handle it. But I learned early on that a few common mistakes—like using glossy touch-up paint or abrasive materials—can make repairs look worse than the scratches themselves. Trust me, I tried a lot of flawed methods before discovering the right techniques. For more in-depth insights, check out this guide on restoring your car to perfection. It emphasizes the importance of matching textures and finishes precisely, especially with matte paint. Now, I want to make sure you avoid those pitfalls and get your car looking like new again.
Ready to dive into the practical tips and tricks that will save you time, money, and frustration? Let’s get started so you can finally put those scratches behind you and enjoy that flawless matte finish once more.
Prepare Your Workspace and Gather Supplies
Start by finding a clean, well-lit area away from direct sunlight—think of it as your surgical theater for car repairs. Gather matte paint touch-up kits, micro-fiber cloths, a gentle clay bar, painter’s tape, and a soft applicator pad. I learned this the hard way when I rushed into repairing a scratch in my driveway without proper tools, which led to uneven texture. Having everything ready saves time and prevents mistakes.
Clean and Decontaminate the Damaged Area
Before fixing the scratch, wash the area with a pH-balanced automotive cleaner to remove dirt and oils. Use a clay bar gently to lift embedded contaminants—it’s like using a dental scraper to clean teeth but much gentler. I once skipped this step, which caused the new paint to lift or peel later. Proper cleaning ensures adhesion and a smooth finish.
Mask Off the Surrounding Surface
Use painter’s tape to surround the scratch, creating a clean boundary—imagine outlining a painting before applying touch-up paint. This prevents accidental overspray onto the matte surfaces. In my earlier attempt, I accidentally colored neighboring panels because I didn’t tape properly, making the repair look worse.
Apply Matte Touch-Up Paint Carefully
Use a soft applicator to dab the matte paint onto the scratch, avoiding brushes that can leave streaks. Light dabbing is preferable to brushing; think of it as stamping rather than painting. I once tried to brush on the paint, resulting in uneven patches and glossiness, which contrasted sharply with the matte finish. Patience and gentle application are key.
Matching the Texture and Finish
Many overlook this step, but applying a matte clear coat after the touch-up preserves the uniform texture. Use a spray designed for matte finishes, holding the can at the recommended distance, and spray in light, sweeping motions. I experimented with gloss clear coats initially, which made the area shine unnaturally—highlighting the repair instead of blending in seamlessly.
Allow Proper Curing and Final Inspection
Let the paint cure for the time specified—usually 24 hours—before washing or exposing the area to moisture. Once cured, gently inspect the area: if the texture feels off, lightly buff with a matte detailing clay or a soft cloth. I learned that rushing this step leads to peeling or uneven spots, so patience really pays off. For more advanced touch-up techniques, check out restoring your car to perfection.
Consider Professional Help if Necessary
If after these steps the scratch remains visible or texture mismatch is evident, it might be time to consult a professional. They have specialized tools and experience to blend repairs flawlessly, preventing further damage. Remember, attempting to fix deep scratches yourself can sometimes do more harm than good—especially with matte finishes where texture integrity is crucial. To explore other complex auto repair topics, visit auto repair guide.
When it comes to vehicle maintenance, many car owners fall prey to misconceptions that can lead to costly repairs and subpar performance. One common mistake is assuming that all transmission issues are similar, leading to a one-size-fits-all approach. In reality, transmission failures often involve nuanced factors like fluid degradation, solenoid problems, or sensor miscommunications that require advanced diagnostics. Believing that a simple fluid change is always the fix can be misleading, as some transmissions need firmware updates or component replacements instead. This underscores the importance of understanding the complexities behind each issue rather than relying on generic solutions.
Another widespread myth is that regular car servicing can prevent all major problems. While routine maintenance does reduce risks, it doesn’t guarantee immunity from unforeseen failures. For example, brake components like calipers and rotors can develop issues rapidly due to driving habits or environmental factors, which might be overlooked if inspections are superficial. Recognizing these subtle signs and investing in thorough diagnostics can save money and prolong your vehicle’s life.
In the realm of collision repair, a common trap is underestimating the importance of matching factory textures and finishes. Many technicians might apply Bondo or filler without considering the final appearance, resulting in mismatched surfaces that can be glaring to discerning eyes. This mistake can be avoided by choosing specialists trained in advanced techniques to match texture and color perfectly, ensuring a seamless repair that preserves your car’s value.
For brake service, the misconception that cheaper parts and quick fixes suffice is tempting but risky. Brake systems are critical safety components; neglecting proper rotor resurfacing or using subpar pads can lead to uneven wear and reduced effectiveness. Advanced mistakes include neglecting the subtle pulsation or squeal diagnostics, which often indicate underlying issues like warped rotors or caliper sticking—problems that demand a detailed examination rather than superficial fixes.
Let’s address a question that challenges even seasoned technicians: How can new sensor technologies in modern vehicles obscure the root causes of transmission slipping? Modern cars equipped with multiple electronic controls can mask mechanical faults, making troubleshooting more complex. Relying solely on diagnostic codes without physical inspection can lead to misdiagnosis. Experts like those at Collision Renew emphasize the importance of combining diagnostic tools with hands-on assessments for accurate repairs, especially as cars become increasingly computerized. You can read more about comprehensive auto repair strategies on restoring your car to perfection.
Are you aware of these hidden pitfalls? Have you ever fallen into this trap? Let me know in the comments and share your experiences so we can all learn to avoid these costly mistakes.
Investing in the Right Tools for Reliable Auto Care
When it comes to maintaining your vehicle, especially for transmission, brake, or collision repairs, having the right tools makes all the difference. Personally, I rely on a high-quality digital multimeter like the Fluke 115. It’s precise, durable, and invaluable for diagnosing electrical issues such as sensor malfunctions or wiring faults, ensuring that minor problems don’t turn into major repairs over time. For example, monitoring voltage levels during transmission diagnostics can preempt slipping or shifting issues, aligning with tips found in top transmission repair strategies.
For brake service, I always carry a brake caliper piston rewind tool and a digital brake fluid tester. These allow me to evaluate brake fluid quality and visually confirm whether the calipers are functioning smoothly, which is essential in preventing uneven pad wear or pedal sinking problems. The importance of this detailed approach is echoed in latest brake service advice.
Maintaining Your Vehicle for Long-Term Success
Keeping your car in top shape isn’t just about tools—it’s about consistency and understanding the right methods. Regularly using an infrared thermometer like the Flir ONE helps monitor engine and transmission temperatures, enabling proactive maintenance before overheating or other issues arise. By routinely checking critical components, you extend their lifespan and reduce unexpected breakdowns. As vehicles become more complex, integrating diagnostic software such as OBD2 scanners from brands like BlueDriver allows for detailed error code analyses, helping you spot problems early—aligning with what is discussed in auto repair best practices.
How do I maintain transmission health over time?
Implementing regular fluid change schedules combined with diagnostic scans can significantly improve transmission longevity. Additionally, applying a professional transmission flush can remove debris and prevent common issues like slipping or rough shifting. Don’t forget to check for signs of sensor or solenoid failure, which often go unnoticed until they cause noticeable performance problems. Consider utilizing a quality transmission oil like Red Line MT-90—trusted by professionals—to ensure optimal performance. Staying ahead with these maintenance routines can prevent costly repairs later on. To learn more about keeping your vehicle’s systems in top shape, visit restoring your car to perfection.
Finally, always keep an eye on your vehicle’s service history and consult with professional technicians when in doubt. Regular inspections, coupled with the right tools, set the foundation for a reliable, long-lasting vehicle. Ready to test your maintenance skills? Try performing a transmission fluid analysis with a diagnostic scanner—it’s a simple step that can uncover early warning signs of failure and save you money in the long run.
What I Didn’t Expect About Matte Finishes That Changed Everything
Discovering the nuances of matte paint was a revelation; I realized that patience and precise techniques are essential. Mistakes I made early on taught me the importance of respecting the texture and finish, which ultimately saved me time and money. This experience highlighted that understanding the delicate balance in repairs is crucial for maintaining that sleek, velvety look.
The Surprising Power of the Right Tools and Techniques
Having the proper supplies, like matte touch-up paint and gentle clay bars, transformed my approach. I learned that shortcuts—like rushing without masking or skipping cleaning—only lead to worse results. Investing in quality tools and following the correct procedures ensures repairs blend seamlessly, preserving your vehicle’s aesthetic and value.
Realizing When It’s Time to Call in the Experts
Despite gaining confidence with small fixes, I understood the limits of DIY, especially for deep scratches or texture mismatches. Knowing when professional help is worth the cost prevented further damage. Remember, specialized techniques and equipment can make all the difference in achieving a flawless finish—see how expert restoration strategies can guide you.
The Hidden Value of Patience in Auto Repairs
Rushing the curing process or skipping final inspections only cements mistakes. I realized that good repairs require patience—letting paint cure fully and inspecting carefully prevents future issues. This lesson has made me more deliberate, ensuring that every repair stands the test of time and keeps my vehicle looking pristine.
My Secret Weapons for Long-Lasting Results
Tools like matte-specific clear coats and meticulous masking are game-changers. They help me replicate factory textures and prevent mismatched patches. Incorporating these into your repair routine guarantees a smoother, more professional result that feels durable and looks natural—think of it as giving your car a fresh, factory-quality finish.
Building Confidence in Your Own Auto Care Skills
Every successful repair boosts my confidence, showing that with the right knowledge and tools, you can maintain your vehicle’s beauty without overspending. Start small, learn from each experience, and don’t hesitate to seek professional advice when needed. If you’re inspired to try your hand at DIY repairs, explore detailed guides at restoring your car to perfection.
Curated Recommendations for Matte Finish Miracles
For top-quality tools, I trust the best car maintenance kits that include matte-compatible paints and applicators. Books like Auto Repair Made Simple have deepened my understanding. Lastly, connecting with seasoned professionals through trusted auto specialists ensures ongoing support for tricky repairs.
This Is Your Moment to Shine with Confident Repairs
Remember, mastering the art of matte repair isn’t just about fixing scratches—it’s about caring for your vehicle with patience and precision. Every successful project is a step toward extending your car’s lifespan and keeping it looking stunning. Embrace the process and enjoy the satisfaction of restoring that flawless matte finish—your ride deserves it.
What’s the biggest challenge you’ve faced when repairing your vehicle’s paint or surfaces? Share your story below and let’s learn from each other’s experiences!
,