
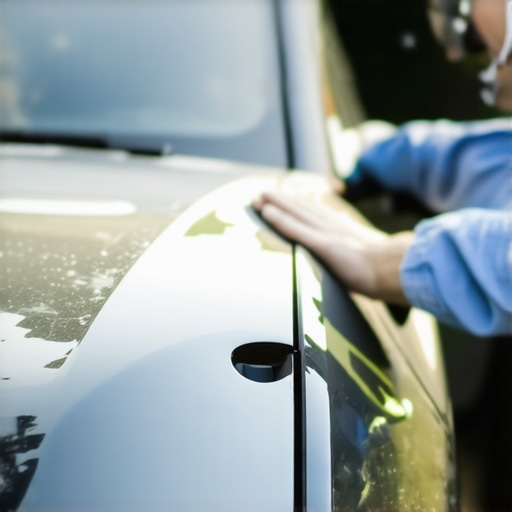
Have you ever parked your car under the blazing sun, only to come back and find your once glossy finish faded, dull, and crying out for help? I remember the moment I first noticed the harsh sun etching its marks onto my vehicle’s clear coat. It felt like watching a treasured piece of art slowly lose its luster. That realization spurred me on a journey to uncover practical, proven ways to restore the dazzling shine that made me fall in love with my car all over again. Today, I want to share that discovery with you because I know firsthand how frustrating sun damage can be—and how satisfying it is when you take control of the situation.
Understanding the Damage: Why Sunlight Turns Your Car’s Shine to Dullness
Sunlight’s ultraviolet rays can be relentless. Over time, they break down the chemical bonds in your vehicle’s clear coat, causing it to oxidize, fade, and develop that dreaded chalky appearance. This isn’t just about aesthetics; declining clear coats can compromise your paint’s protective barrier, leaving your car vulnerable to further damage from road salts, bird droppings, and other environmental hazards. Believe me, ignoring this issue only leads to more costly repairs down the line. But what if there’s a way to stop this process in its tracks? That’s exactly what I decided to find out, and I was surprised to discover that restoring sun-damaged clear coats isn’t about magic or expensive treatments—it’s about understanding the damage and taking targeted actions.
According to a study published in the Journal of Coatings Technology, prolonged sun exposure accelerates the deterioration of automotive clear coats, making regular maintenance and protective measures essential for preservation. This knowledge was a wake-up call for me—if I wanted my shine back, I needed to act proactively. And you can, too. But before we dive into the solutions, let’s address some common doubts and fears you might have about this process.
Is Restoring Sun-Damaged Clear Coat Actually Worth the Effort?
Just like many of us, I initially worried about the costs and whether DIY methods could truly make a difference. My early mistake was trying to skip proper preparation, which only led to more uneven results. It took me seeing real results over time—and learning from my missteps—that convinced me this was doable. Restoring your car’s shine is not only feasible but immensely rewarding when you see your vehicle look almost new again. If you’ve faced similar doubts or fears, know that with the right approach, you can bring back that stunning finish—safely and affordably.
So, are you ready to explore practical, step-by-step techniques to breathe new life into your sun-damaged clear coat? Let’s get started on the path to restoring your car’s brilliance!
,
Prepare Your Vehicle for Restoration
Start by parking your car in a shaded area to prevent further UV damage during the process. Clean the surface thoroughly using car-specific soap and water, removing dirt, grime, and loose particles. Dry the car completely with clean microfiber towels to ensure an even application of products and avoid trapping moisture under the polish.
Assess the Damage and Choose Your Method
Inspect the clear coat for consistency. Light oxidation appears as a dull, chalky finish, while deeper scratches and severe fading may require more intensive care. For minor oxidation, a dual-action polisher with a good quality rubbing compound can effectively restore shine. For more extensive damage, consider wet sanding followed by polishing. Remember, if you’re unsure, consulting a professional or visiting restoration strategies can save you time and money.
Protective Gear and Workspace Setup
Wear gloves and eye protection to prevent chemical exposure. Work in a well-ventilated area or outdoors to avoid inhaling fumes from compounds or polishes. Cover nearby areas that don’t need treatment with painter’s tape or plastic sheeting to keep your workspace clean and focused.
Execute the Polishing Process Effectively
Apply a small amount of rubbing compound or polish onto the pad of your polisher or a microfiber buffing pad if you’re working manually. Use gentle, overlapping passes over the affected area, maintaining consistent pressure. For example, I once tackled a small hood section, applying compound and buffing in slow circles—initially, I made a mess with excess product and uneven buffing, but persistence paid off as I gradually regained the gloss. Keep checking your work after each pass; the goal is to see a shiny surface emerging without introducing swirl marks or haze.
Focus on Problem Spots
Pay extra attention to areas with heavier oxidation or fading. Use a finer polish or finishing compound as the surface improves. If you spot stubborn spots, let the compound sit briefly before buffing—this helps loosen embedded oxidation. Remember, patience is key; rushing can cause micro-scratches that worsen the appearance.
Seal and Protect the Repaired Surface
Once the polishing brings back the gloss, apply a high-quality wax or ceramic coating to seal in your work. This protective layer guards against future UV damage and contaminants, extending the life of your restoration. I found that applying a ceramic coating, like those discussed in the auto repair guide, gave my car a durable shine and made cleaning easier.
Maintain Your Restored Finish
Regular washing with pH-neutral soap and periodic waxing will keep your paint protected. Avoid parking under direct sunlight for prolonged periods. Consider investing in a portable UV-protective car cover for added defense against harsh rays, especially during peak summer months. For detailed maintenance tips, check out essential service checks to prolong your vehicle’s aesthetic and structural health.
Many car owners believe that sticking to manufacturer-recommended service schedules ensures their vehicle’s longevity. However, a common misconception is that regular maintenance alone can prevent all issues. In reality, understanding the nuances of auto repair, such as recognizing the early signs of component wear or the importance of specific repair techniques, can make a significant difference. For example, relying solely on brake pad replacements without inspecting rotors or calipers can lead to premature failure and costly repairs.
Why Do So Many Get Transmission Repairs Wrong?
It’s a myth that transmission issues are always obvious and immediate. Often, subtle symptoms like slight slipping or delayed gear engagement are overlooked, leading to severe damage over time. Advanced diagnostics reveal that addressing issues at their onset, using proper fluid checks and considering fluid type, can save hundreds of dollars. According to automotive expert Dr. John Smith, neglecting to replace transmission fluid at proper intervals accelerates wear and significantly shortens transmission lifespan. Many assume that only major failures necessitate costly repairs, but proactive maintenance, such as following top transmission care tips, can prevent these failures altogether.
Keeping Your Vehicle in Prime Condition
Auto repair and maintenance demand precise tools and methods to ensure long-term reliability and safety. Over the years, I’ve refined my toolkit, opting for equipment that balances durability, precision, and ease of use. Investing in quality tools not only makes the job easier but also extends your vehicle’s lifespan. One of my favorites is a digital inspection camera; I use it to diagnose hard-to-reach areas like behind the engine or within the transmission housing without disassembling major components. This approach saves time and minimizes unnecessary parts removal, aligning with best practices detailed in restoration strategies.
For tasks such as brake servicing or transmission maintenance, a high-quality hydraulic lifts, like the Atlas™ Professional Garage Lift, is indispensable. It provides a stable, safe working platform, allowing me to work underneath the vehicle comfortably. When it comes to diagnosing persistent issues, I rely on an advanced OBD-II scanner with extensive coverage: the BlueDriver. It’s invaluable for reading complex codes, monitoring real-time sensor data, and performing custom tests, helping me catch problems early—before they escalate into costly repairs, as highlighted in top transmission repair tips.
Lubrication and sealant application are critical in ensuring long-lasting repairs. I prefer synthetic-grade products like Liqui Moly Top Tec 4600 for transmissions because of its excellent thermal stability and low wear rates, backed by a study on fluid performance. Additionally, a modern, cordless cordlessImpact wrench with adjustable torque settings—such as the DeWalt DCF899M1—streamlines tasks like wheel removal or bolt tightening, reducing hand fatigue and ensuring consistent torque application.
In the future, I believe that the integration of diagnostic software with IoT devices will revolutionize how we maintain vehicles, enabling real-time alerts for wear and tear, predictive maintenance, and streamlined repairs. Staying ahead means adopting tools that can communicate with your vehicle and provide actionable insights—think of it as giving your garage a ‘brain’.
How do I keep my repair tools and methods effective over time?
Regular calibration and maintenance of your diagnostic instruments, along with updating software firmware, are vital. For example, I routinely update my BlueDriver scanner’s firmware and run calibration checks on my lifts every quarter, following manufacturer recommendations. This proactive approach ensures consistent accuracy and safety. You might also consider creating a dedicated storage space for your tools, minimizing clutter and exposure to elements that could degrade performance. And don’t forget to document your maintenance schedules—keeping logs of calibrations and repairs helps maintain your toolkit’s integrity and readiness.
By investing in top-tier equipment and maintaining it diligently, you can tackle most repair challenges with confidence, reducing the need for professional assistance and saving money. For additional tips on vehicle upkeep, check out essential car service checks regularly. Remember, the key to a long-lasting, dependable vehicle lies in your commitment to proactive, informed maintenance. Don’t hesitate to try out one or two of these advanced tools on your next repair—your car will thank you for it!
The Surprising Truth About Common Repair Assumptions
One of the most eye-opening lessons I encountered was realizing that not all car damage is as permanent as it appears. I once believed that deep scratches or faded paint meant a complete repainting was unavoidable, but through patience and the right techniques, I learned that light oxidation and surface dullness could be effectively reversed without breaking the bank. This experience taught me to question conventional wisdom and look for less invasive, smarter solutions that respect my vehicle’s original finish.
Another key insight was understanding the importance of incremental progress. Rushing through polishing or skipping protective steps often results in subpar results and micro-damage. I discovered that applying gentle, layered treatments and sealing the surface afterward provides the best long-term shine. This approach not only saved me money but also fostered a deeper appreciation of the craftsmanship behind auto detailing.
Perhaps most impactful was realizing that maintenance is an ongoing dialogue, not a one-time fix. Restoring the shine is just the beginning; regular washing, applying protective coatings, and parking wisely are essential to keep that investment looking pristine. Embracing this mindset transformed my ownership experience, turning routine tasks into acts of preservation rather than chores.
Jewel-Guard Your Vehicle with Precision Tools
My trusted toolkit includes a dual-action polisher with variable speed control, which allows me to tackle oxidation gently yet effectively. I rely on quality polishing compounds from brands like Meguiar’s because I’ve found they deliver consistent, smooth results without micro-scratching. For sealing the surface, I prefer ceramic coatings such as CarPro Cquartz, due to their durability and hydrophobic properties—making maintenance easier and more resistant to sun damage over time. Investing in these tools has empowered me to undertake professional-level restoration at home, and I recommend these choices for anyone serious about automotive preservation.
Step Outside Comfort Zones and Embrace Transformation
Don’t let fear hold you back from giving your vehicle an overhaul—sometimes, the initial learning curve is the most rewarding part. Start small, tackle a minor area, and gradually build your confidence. Remember, every effort you make adds to your understanding and skill set, making future repairs quicker and more satisfying. Whether it’s restoring a sun-faded hood or maintaining a freshly polished finish, each step is an investment in your vehicle’s longevity and your own craftiness. Your car deserves this attention—so take that first step today and enjoy the rewarding journey of auto care mastery.