
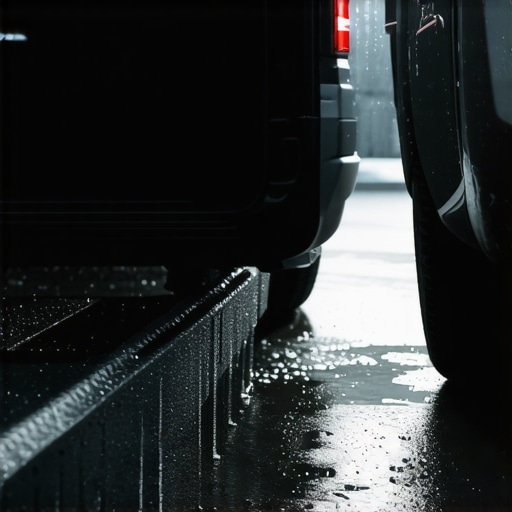
It happened to me on a seemingly normal Saturday afternoon—after what I thought would be a straightforward rear bumper repair, I noticed a peculiar puddle forming in my trunk each time it rained. At first, I brushed it off, thinking maybe I had spilled something, but days went by, and the water kept coming back, soaking my belongings and raising red flags.
Why Water Leaks After Bumper Repairs? Understanding the Hidden Culprit
Leaking water into your trunk after a bumper repair isn’t just annoying—it can lead to serious damage like rust, mold, or electrical issues if left unaddressed. The reality is, during bodywork, certain seals or drainage paths might get overlooked or disrupted, creating perfect entry points for moisture. In my case, a misaligned or damaged trunk seal was the culprit, allowing rainwater to seep in whenever I drove through a wet driveway or parked under a cloudy sky.
My early mistake was assuming that the bumper repair wouldn’t affect anything beyond the visible panels. That assumption, I later learned, is a common trap among many car owners who aren’t familiar with the nuances of car sealing and drainage systems. According to automotive experts, improper reassembly or neglecting to check drainage pathways during repairs can inadvertently cause leaks that are tricky to diagnose without a keen eye.
If you’re facing this frustrating scenario, don’t worry—you’re not alone, and this is a fixable problem. Over the next sections, I’ll walk you through the practical steps to identify the source of the leak, assess whether your seals are intact, and how to restore your trunk’s protective barrier effectively. Remember, catching leaks early can save you from costly repairs down the line.
Before we dive into the solutions, have you experienced water intrusion in your trunk after a repair or accident? Share your story—I know how disheartening it can be when your vehicle isn’t functioning as it should. Now, let’s get closer to resolving this issue before it turns into a bigger headache.
Inspect the Trunk Seal Carefully
Start by opening your trunk and examining the rubber seal that goes around the lid. Look for cracks, tears, or areas where the seal has come loose. Use a flashlight to check for gaps or deformities. I once found a small tear in my seal after a thorough visual inspection, which was the main entry point for water. Replacing a damaged seal can be done easily by removing the old one gently and installing a new, OEM-approved gasket, ensuring a tight fit that prevents future leaks. Proper sealing is essential—consider inspecting seals during your regular vehicle maintenance routine to catch issues early.
Test Drainage Pathways
Locate and Clear Drainage Holes
Most vehicles have small drainage channels or holes at the base of the trunk lid or within the trunk floor. To locate them, gently remove any trunk liner or inspect the underside of the lid. Use a fine wire or compressed air to clear blockages—dirt and debris can clog these paths, causing water to back up and seep through seals. I once unclogged a drain with a flexible wire, which immediately improved drainage during my test after a rainstorm. Clearing these passages ensures water flows out freely, preventing build-up inside the trunk.
Simulate Rain to Confirm
Pour water over the trunk exterior during a light rain or use a garden hose with a spray nozzle. Observe from inside the trunk or through the taillights for leaks. This hands-on test helped me identify a compromised seal that only leaked when water was poured at specific angles. Adjust the position or replace the faulty seal if water shows signs of ingress. Ensuring your drainage pathways are clear complements seal integrity and keeps moisture out. For comprehensive guidance on auto repair, visit this detailed repair guide.
Address Flashing or Damaged Seals
If inspection reveals damaged seals, order a compatible replacement. Use a plastic trim removal tool to detach the old seal carefully, avoiding damage to surrounding panels. Before installing the new seal, clean the mating surfaces with mild soap and water to ensure adhesion. Press the new gasket firmly into place, ensuring all edges are sealed tightly. In my case, replacing the seal restored the trunk’s dryness and prevented further water intrusion during subsequent storms. Regularly check seals and drainage as part of your annual vehicle check to catch issues early.
Secure Connectors and Light Fixtures
Sometimes, water leaks aren’t just about seals but also compromised connectors or light fixtures. Remove tail light assemblies to inspect for cracked gaskets or corrosion. Seal any openings with appropriate weatherproof silicone sealant. After reassembling, run a water test to verify that no leaks occur around these points. During my repair, resealing tail light contacts eliminated a persistent leak that seemed unrelated to the main seal—highlighting the importance of checking all potential entry points.
Preventative Maintenance Makes a Difference
Once you’ve fixed the leak, apply a layer of silicone-based sealant along the edges of the seal or drainage holes for extra protection. Regularly clean your trunk area and check for debris buildup that could obstruct drainage. Doing so saved me from recurring water problems, especially during heavy rains. For more tips on maintaining your vehicle’s longevity, explore preventative maintenance tips.
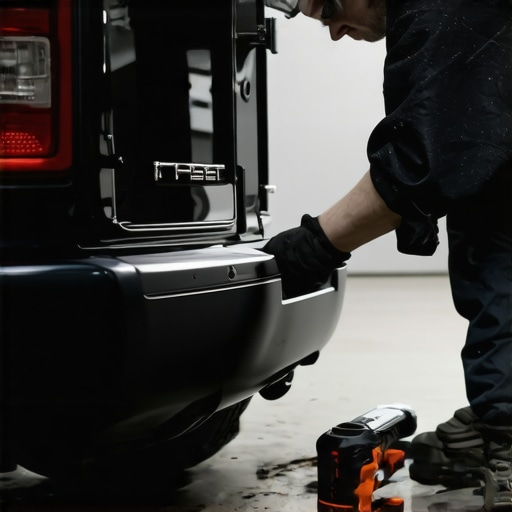 When it comes to automotive repair, many car owners operate under misconceptions that can lead to costly mistakes. For example, a widespread myth is that all transmission fluid needs service at the same intervals, but in reality, modern sealed transmissions often require less frequent maintenance if monitored correctly. Relying solely on the maintenance schedule without understanding the specific needs of your vehicle’s transmission can result in premature failure. Similarly, in brake service, there’s a common belief that replacing brake pads alone suffices, ignoring the importance of inspecting and servicing the calipers, rotors, and hydraulic system. Neglecting these interconnected components can cause uneven wear or even brake failure.
A critical nuance many overlook is the impact of the vehicle’s driving environment on maintenance needs. For instance, driving predominantly in stop-and-go city traffic accelerates brake pad wear and necessitates more frequent inspections. Conversely, highway driving tends to be gentler but may cause different issues, such as brake dust buildup affecting sensors.
One advanced mistake is assuming that the absence of warning lights means everything is fine. Modern vehicles often have sophisticated sensors that can detect early signs of component wear or failure, which may not trigger dashboard alerts immediately. Regular detailed inspections are essential, especially if your vehicle has high mileage or specific driving conditions.
From an expert perspective, understanding the hidden nuances can significantly enhance maintenance longevity and safety. For example, improper bleeding procedures during brake service can introduce air into the hydraulic system, reducing braking efficiency—a mistake that can be dangerous. Ensuring technicians follow manufacturer-specific brake fluid bleeding protocols, and understanding the importance of quality replacement parts, makes a difference. As highlighted in [this expert study](https://collisionrenew.com/braking-news-how-to-choose-the-best-brake-service-in-2025), choosing the right service can prevent future costly repairs.
Embracing a nuanced approach means recognizing that materials, driving habits, and environmental factors all influence how your vehicle should be maintained. Regularly consulting comprehensive guides—like [this ultimate auto repair resource](https://collisionrenew.com/the-ultimate-guide-to-auto-repair-keep-your-car-running-smoothly)—can help you avoid common pitfalls. Remember, proactive maintenance tailored to your specific vehicle and driving style can prevent minor issues from escalating into major repairs.
Have you ever fallen into this trap? Let me know in the comments. Staying informed about these hidden nuances helps you become a smarter car owner and extends your vehicle’s lifespan.
Keeping your vehicle in top shape requires the right tools and a disciplined approach. Over the years, I’ve developed a set of specific equipment and methods that ensure my auto repairs and maintenance are both effective and efficient. Investing in quality tools isn’t just about convenience—it’s about ensuring safety, long-term durability, and minimizing costly visits to the repair shop.Why I Trust Diagnostic Scanners for Precise Troubleshooting
For me, the cornerstone of effective auto maintenance is diagnostics. I rely on an OBD-II scanner like the BlueDriver because it connects easily to my smartphone and provides comprehensive error code readings. This tool doesn’t just tell me that there’s a problem; it offers the specifics, such as checking for pending codes or live sensor data. Regularly scanning my car helps me catch issues early, like pending emission system faults or transmission glitches, preventing small problems from escalating. As vehicle electronics become more complex, having a reliable diagnostic tool will be standard practice for any proactive car owner.
Precision with Quality Torque Wrenches
One tool I highly recommend is a digital torque wrench. Proper torque application is crucial when working on brakes, wheel bearings, or transmission components. Over-tightening can damage parts or cause leaks, while under-tightening risks component failure. I use a torque wrench set for specific torque values recommended by manufacturer specs—like 80 ft-lbs for wheel lug nuts or 25 ft-lbs for certain control arms. It’s an investment that pays off in the long run, especially when performing tasks like brake pad replacement or suspension work. For detailed torque specifications, I always consult the reliable tips on transmission maintenance.
Advanced Cleaning with Brake and Parts Components
Maintaining parts like calipers, rotors, and other components requires proper cleaning. I utilize a high-pressure parts washer with a specialized cleaning solution that dissolves grease, rust, and brake dust effectively. This tool allows me to prepare parts thoroughly before reassembly, ensuring optimal performance and longevity. The precision cleaning also helps me spot potential issues like corrosion or cracks early. Remember, cleanliness is key to auto repair—especially for parts exposed to heat, moisture, and debris.
Preparation for Long-Term Reliability
Long-term results depend on not just fixing issues but adhering to scheduled maintenance routines. For example, I follow the recommended service interval for transmission fluid changes using synthetic products like Valvoline MaxLife Multi-Vehicle ATF. Regular fluid swaps keep internal parts lubricated and cool, reducing wear. Additionally, I utilize a UV leak detection kit to verify seal integrity during inspections. This proactive approach ensures that small leaks are caught before they turn into costly repairs.
Future of Car Maintenance Tools and Trends
Looking ahead, the integration of smart technology will revolutionize how we maintain our vehicles. Think wireless diagnostic modules, AI-driven maintenance schedules, and remote monitoring systems that notify owners of issues in real time. Technologies like predictive analytics for transmission issues are already on the horizon, making car ownership more manageable and less risky.
How do I maintain auto repair tools and methods over time?
Consistently checking calibration of your torque wrenches, updating diagnostic software, and replacing worn-out cleaning solutions are keys. Regularly inspecting your equipment ensures precision, which is critical for safe and effective repairs. I also schedule routine reviews of my toolkit, discarding outdated or damaged items. For comprehensive guidance on maintaining your tools and techniques, refer to essential vehicle maintenance tips.
Start by trying out a diagnostic scan before your next repair—it’s a small step that adds tremendous value in confirming the car’s health and preventing surprises. Remember, investing in quality tools and staying disciplined with your maintenance routines will save you time, money, and headaches in the long run.
Throughout my years working with cars, I’ve learned that the most valuable insights often come from unexpected lessons. When it comes to transmission and brake service, there are nuances and misconceptions that can either make or break your vehicle’s longevity. Embracing these hidden truths has empowered me to make smarter decisions and avoid costly mistakes in auto repair.
Lessons That Challenged My Assumptions About Auto Maintenance
- Not all fluids are created equal: I once believed that routine transmission fluid changes were unnecessary for sealed transmissions. Realizing that high-quality, manufacturer-recommended fluids and proper service intervals are crucial changed my approach entirely.
- Seals aren’t just rubber: During brake repairs, I used to ignore the importance of inspecting tail light gaskets and connectors. Proper sealing and weatherproofing can be the difference between a dry trunk and persistent leaks.
- Surface cleaning matters more than I thought: Regularly cleaning calipers and drain pathways prevents rust and debris buildup, which can silently cause failures.
Tools That Transformed How I Approach Repairs
- Advanced diagnostic scanners: A reliable OBD-II scanner like BlueDriver has helped me detect issues early, saving me time and money. Investing in quality diagnostic tools is invaluable for understanding what your car truly needs.
- Precision torque wrenches: Ensuring bolts and nuts are tightened to spec prevents over-tightening or under-tightening, both of which can cause long-term damage. This small investment pays dividends over time.
- UV leak detection kits: Quickly identifying minor leaks before they become big problems keeps my repairs efficient and effective.
Why Staying Curious Changes Everything
Auto maintenance isn’t just about following a schedule; it’s about understanding the intricacies of your vehicle. My experience has shown me that diving into the details—like reading the ultimate auto repair guide—can reveal secrets that extend your car’s life and improve safety. Embracing curiosity and continuous learning turns routine repairs into opportunities for mastery.
Embrace the Journey: Keep Improving Your Auto Knowledge
Every repair, every inspection is a step toward becoming a more confident car owner. By sharing lessons learned, tools trusted, and questions faced, we create a community that helps each other grow. Remember, the more you know, the better your vehicle performs—and the easier it becomes to prevent issues before they escalate. What’s the biggest auto repair myth you’ve discovered? Share below and let’s learn together!