
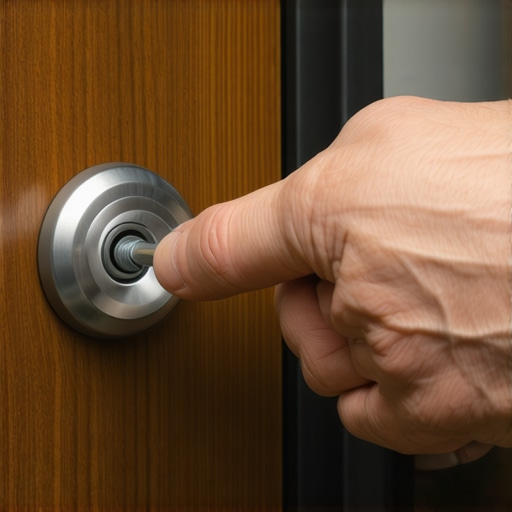
There I was, standing in the pouring rain, pulling on my driver’s side door handle while it just flopped back and forth like a dead fish. No ‘click,’ no resistance, just a hollow feeling of impending doom and a late arrival to my morning meeting. I’ve been there. I’ve also been on the other side of it—where the handle is so sticky you have to use two hands and a prayer just to get the latch to pop. It’s one of those minor car annoyances that suddenly becomes a massive headache when you’re in a rush.
Stop Yanking on That Poor Door Handle
Believe me, I learned the hard way that brute force is never the solution to a mechanical problem. A few years back, I thought a ‘good tug’ would fix a stuck latch; instead, I heard a sickening snap and had to learn how to fix a door handle that is stuck in the open position because I’d obliterated the internal plastic clip. Fixing a loose or sticky handle is usually about finesse, not muscle. Whether it’s a worn-out return spring or just decades of road grime gumming up the works, the fix is often simpler than you think. This falls under the kind of routine maintenance most people ignore, but it’s as essential as following the ultimate guide to auto repair to keep your daily driver from feeling like a bucket of bolts.
Is a loose handle actually a safety risk?
You bet it is. While it might just seem like a nuisance, a handle that doesn’t return to its seat can actually prevent the door from latching securely. According to data from the National Highway Traffic Safety Administration (NHTSA), door latch and handle malfunctions are serious enough to trigger federal safety recalls because they can lead to doors swinging open during transit. It’s not just about convenience; it’s about making sure your collision renewal strategies include the small mechanical bits that keep you inside the car. If your door feels like it’s barely hanging on, you’re not just dealing with a ‘character quirk’ of an old car—you’re dealing with a potential hazard. Have you ever felt that heart-stopping moment when a handle just doesn’t catch?
Identify the Culprit Before You Start Unscrewing Everything
Before we dive into the tools, we need to know if we’re dealing with a simple lubrication issue or a broken internal component. Just like learning how to fix a dashboard that rattles over every bump, you have to find the source of the noise—or in this case, the lack of tension—first. A loose handle usually points to a stretched cable or a disconnected rod, while a sticky one is almost always a sign of corrosion or old grease that has turned into glue.To actually fix the problem, you have to stop staring at the outside of the door and get to the guts of the machine. Think of your door panel like a protective shell; you need to remove it to perform surgery on the skeleton underneath. Start by locating the hidden screws—they’re usually tucked behind the pull handle or inside the armrest pocket. Using a plastic trim tool is non-negotiable here. I’ve tried using a flathead screwdriver before, and all I got was a mangled door card that looked like a dog had chewed on it. Slowly pop the perimeter clips until the panel hangs free, then disconnect the window switch wiring.
Get Behind the Panel Without Breaking Plastic
Once you’re inside, you’ll see a series of metal rods and plastic clips. This is where most handle issues live. If your handle is loose, one of those plastic clips has likely snapped, or a rod has popped out of its guide. It’s a lot like the precision needed for essential car service checks to extend your vehicles life—you’re looking for anything that isn’t sitting flush. 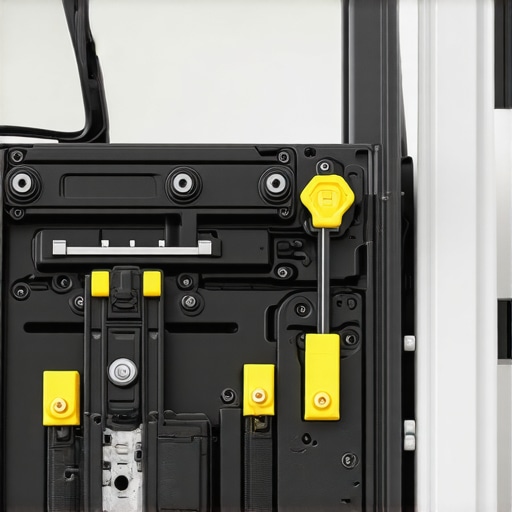
Hunt Down the Slack in Your Linkage
If the handle flops without moving the latch, check the connection between the exterior handle and the latch assembly. Often, the rod is fine, but the plastic bushing that holds it in place has disintegrated. You can buy these clips for a few dollars, which is a lot cheaper than a full replacement. I once spent an entire Saturday afternoon fighting with a ’98 sedan handle that felt like it was set in concrete. I kept spraying lubricant blindly into the keyhole, hoping for a miracle. It wasn’t until I finally pulled the door card off that I found a literal wad of pet hair and dried coffee from a previous owner gumming up the pivot point. A simple scrub with a toothbrush and some fresh grease fixed it in five minutes. Just as you’d check for wear when you learn how to check your brake pads without taking the wheels off, you’re looking for physical obstructions or broken connectors here.
Lube the Pivot Points the Right Way
If the handle is sticky, the factory grease has likely turned into a thick, abrasive paste. Do not just spray WD-40 in there and call it a day. That stuff is a solvent, not a long-term lubricant; it will eventually dry out and make the sticking worse. Instead, use a high-quality white lithium grease or a silicone-based spray. Apply it to every moving pivot point and work the handle back and forth until the action feels smooth again. This kind of attention to detail is what separates a DIY hack from someone following the ultimate guide to auto repair. If your door still won’t behave, you might be looking at a failing latch mechanism itself, which is a more complex swap but follows the same logic of disconnecting the linkage rods first. Just like when you need to know how to tell if your transmission is slipping or if its just a sensor, diagnosing the handle is about isolating the part that isn’t doing its job.Everyone tells you that if the handle moves but the door stays shut, you just need a new handle. But here is the nuance: in modern vehicles, the handle is just the messenger. I’ve seen DIYers spend eighty bucks on a new OEM handle only to realize the electronic actuator was the real culprit. It’s the same logic behind why your car’s safety sensors need a reset after any front-end work. These components are part of a delicate ecosystem. If you replace the hardware but don’t address the calibration or the wiring, you’re just throwing parts at a ghost.
The Vapor Barrier Trap That Leads to Moldy Carpets
The most common mistake I see when people dive into door repairs is neglecting the vapor barrier—that thin plastic sheet behind the door card. Most people rip it off or leave it dangling. Big mistake. That plastic is the only thing keeping rainwater from soaking your interior carpet and frying your door speakers. If you don’t reseal it with proper butyl tape, you’ll end up with a musty smell that no amount of air freshener can fix. It’s a level of detail often missed in the ultimate guide to auto repair, but it’s what separates a professional job from a weekend botch. 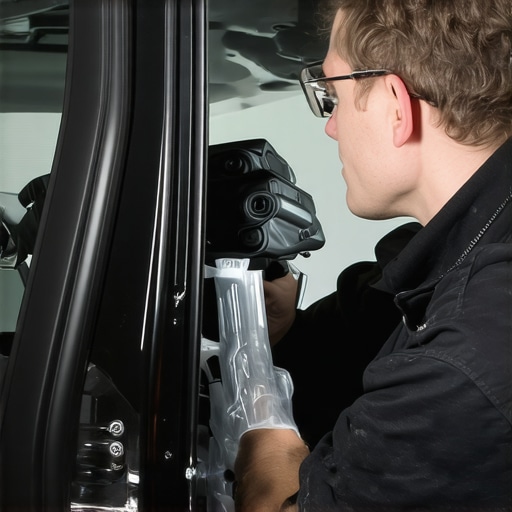
Don’t Blame the Handle for a Dead Latch
Often, the problem isn’t even in the door itself. I’ve seen cases where a struggling electrical system causes the power locks to only halfway engage, leaving the handle feeling limp. Much like how you need top transmission repair tips for long-term vehicle reliability to understand that a shifting issue might just be a sensor, your door handle relies on consistent voltage. Another ‘oops’ factor involves the mounting bolts. Modern handles are often plastic-on-plastic. If you over-torque those bolts, you won’t just secure the handle; you’ll crack the mounting housing, creating a permanent rattle that sounds like a jar of pennies every time you hit a pothole. It’s the same precision needed when you’re looking for braking news: how to choose the best brake service in 2025—torque specs matter.
Why do modern handles fail even when the mechanical bits are perfect?
As cars get smarter, they get more complicated. A study by the Society of Automotive Engineers (SAE) highlights that ‘smart’ entry systems now rely on hall-effect sensors rather than physical contact points. This means a slight misalignment in your door frame—perhaps from a minor bump that didn’t even leave a scratch—can trick the car into thinking the door is locked or jammed. This is where collision renewal strategies become vital; a technician needs to check the structural alignment, not just the handle. If you’re dealing with a dead handle, look beyond the surface. Have you ever fallen into this trap where you replaced a part only to find out the problem was actually three inches to the left? Let me know in the comments.Falling into that trap usually means you’re looking at the symptoms rather than the disease. To avoid being the person who replaces a perfectly good handle when the issue is a three-dollar plastic clip, you need the right kit in your garage. I stopped using flathead screwdrivers for interior work a decade ago after I gouged a hole in a leather armrest. Today, my go-to is a set of nylon pry tools. They are rigid enough to pop those stubborn door card clips but soft enough that they won’t mar your finish. If you’re serious about following collision renewal strategies to keep your car looking factory-fresh, these non-marring tools are your best friend.
The Survival Kit Every DIYer Needs
Beyond the pry tools, keep a can of PTFE-based dry lubricant on hand. Unlike standard grease, it doesn’t attract road grit, which is the primary killer of door latches. Think of it as a specialized version of essential car service checks to extend your vehicles life. You also need a set of Torx bits. Manufacturers love using T20 and T30 screws for door assemblies because they’re harder to strip than a standard Phillips. If you try to force the wrong tool, you’ll end up with a rounded-off bolt that requires a drill and a prayer to remove. It’s the same level of precision you’d expect when researching braking news: how to choose the best brake service in 2025—the right hardware makes all the difference.
How do I keep my door handles working like new for years?
The secret is a quick annual flush. Once a year, I take five minutes to spray a little silicone lubricant into the latch mechanism on the side of the door and the key cylinder. This prevents the internal springs from seizing up due to moisture. According to the technical guidelines from I-CAR (the Inter-Industry Conference on Auto Collision Repair), maintaining these pivot points is critical because a seized latch can put undue stress on the internal linkage, eventually causing the handle’s mounting points to fatigue and snap. Just as you wouldn’t ignore the signs when you tell if your transmission is slipping or if its just a sensor, you shouldn’t ignore a handle that requires even a tiny bit of extra effort to pull. #IMAGE_PLACE_HOLDER_D#
Where Car Entry Tech is Heading Next
Looking ahead, the physical door handle is actually becoming an endangered species. With the rise of flush-mounted electronic handles and proximity sensors, we’re moving away from mechanical rods and cables toward purely digital interfaces. While this looks sleek, it means future ‘repairs’ will involve more software resets and sensor calibrations than actual grease and wrenches. It’s a shift very similar to what we see in modern gearboxes; sometimes you need top transmission repair tips for long-term vehicle reliability just to handle the electronic shift-by-wire modules. For now, however, our mechanical handles still need physical care. Before you put your door panel back on, check the bottom of the door shell for the tiny drain holes designed to let rainwater out. If these are clogged with leaves or gunk, your door becomes a swimming pool, and no amount of grease will save your handle from rusting from the inside out. Clear those drains with a zip tie—it’s the ultimate pro tip for a long-lasting repair. If you want to dive deeper into keeping the rest of your car just as reliable, check out the ultimate guide to auto repair for more maintenance deep-dives.
Three Hard Truths About Door Latch Surgery
Over the years, I have dismantled hundreds of door panels, and I have realized that these repairs are 90% psychology and 10% mechanics. Here is the insider perspective you won’t find in a service manual. First, plastic is your primary enemy; modern interior clips are essentially disposable, so always keep a few spares on hand before you begin. Second, cleaning is almost always superior to replacing. Half the ‘broken’ handles I inspect are simply gummed up with years of spilled coffee or road salt that has calcified the pivot points. Finally, if the handle feels fine but the door won’t shut, check your striker plate. Sometimes a sagging door puts so much pressure on the latch that the handle physically cannot overcome the friction. If you are dealing with other strange cabin noises while you’re at it, you might want to look into how to fix a rattling heat shield without buying a new one, as those vibrations often travel through the frame and into the door shell.
The Tool Bag I Carry for Every Interior Job
To avoid the heartbreak of scratched leather or cracked vinyl, you need more than just a screwdriver. I personally swear by a nylon trim removal kit—these tools are rigid enough to pop stubborn clips but soft enough that they won’t mar your finish. I also recommend a magnetic parts tray; there is nothing more frustrating than hearing a tiny screw bounce into the depths of your driveway. For lubrication, stay away from thick greases that attract dust; instead, use a PTFE-based dry spray. If your hands are already dirty and you notice your controls are grimy, it is the perfect time to learn the reason your steering wheel is sticky and how to clean it to ensure your entire driving environment feels restored. These small investments in the right gear turn a frustrating afternoon into a professional-grade restoration.
#IMAGE_PLACEHOLDER_E#
Stop Fighting Your Car and Start Enjoying the Ride
Living with a door that requires a secret handshake just to open is a constant drain on your daily sanity. It is one of those small mechanical hurdles that, once cleared, makes your entire vehicle feel five years younger. Taking the time to master these nuances is a core pillar of the ultimate guide to auto repair. You do not need a lift or a specialized diagnostic computer to fix a floppy handle—just a bit of patience and the right lubricant. However, if you suspect your door misalignment stems from a deeper issue, it is worth investigating how to tell if your frame is bent after a minor fender bender to ensure your door geometry isn’t permanently compromised. Don’t let a sticky handle ruin your morning routine any longer. Have you ever accidentally snapped a plastic clip while trying to fix something inside your door? Let me know in the comments below!