
You know that feeling when you’re about to leave for work, and suddenly your car decides not to start? There’s a little panic, a dash of frustration, and a hefty dose of realization—something’s off. One minute, everything’s fine; the next, your engine humming a lullaby instead of roaring to life. I remember that moment vividly. Turns out, the culprit was a seized alternator pulley, something I overlooked way too long.
Why This Sticky Problem Can Bring Your Day to a Halt
The alternator is like your car’s nervous system, keeping the battery charged and the electrical systems running smoothly. If its pulley seizes, it can cause a chain reaction—your alternator stops spinning properly, the battery drains, and all sorts of warning signs pop up. Now, here’s where it gets sneaky: a seized pulley doesn’t always scream for attention right away. Sometimes, it’s a slow crawl of warnings—strange noises, difficulty starting, or an illuminated warning light. But if left unchecked, it can lead to complete failure, leaving you stranded at the worst possible moment.
In my early days of auto repair experiences, I made the classic mistake of ignoring subtle signs because I assumed it was just a loose belt or a minor issue. That mistake cost me hours of troubleshooting and unexpected roadside fixes. Early detection is vital, and that’s exactly what I’m here to help you master.
Is Your Alternator Pulley Really Seized Or Just Getting Old?
Many car owners worry excessively about costly repairs. It’s natural! I used to believe every squeak or odd sound meant a total overhaul. But here’s a fact supported by automotive experts at Collision Renew: 80% of alternator failures are preventable through routine checks. That’s why understanding how to spot the difference between a pulley that’s just worn out and one that’s seized can save you time and money.
One early mistake I made was dismissing minor resistance when turning the pulley by hand—thinking it was normal ‘wear and tear.’ Turns out, if the pulley barely moves or feels stiff, it might be seized or headed that way. Recognizing these subtle signs can make all the difference, and in the upcoming sections, I’ll walk you through how to check your alternator pulleys safely at home.
Ready to dive into the practical steps? Let’s get your vehicle back to its reliable self and prevent those unexpected breakdowns. If this sounds familiar, don’t worry—you’re not alone, and the fix is often simpler than it seems.
,
Prepare Your Workspace and Gather Tools
Start by parking your vehicle on a flat surface, engaging the parking brake, and disconnecting the negative terminal of the battery to prevent any electrical hazards. Gather essential tools: socket set, wrench, screwdriver, a belt tensioner tool, and a flashlight. Remember, safety first—wear gloves and eye protection. I once worked on my car in a cramped garage without proper gloves, leading to minor cuts—but proper preparation can prevent such mishaps.
Identify the Alternator and Its Pulley
Locate the Alternator
Usually found near the engine’s front, the alternator is driven by the serpentine belt. Consult your vehicle’s manual or look for a silver, cylindrical component with electrical wires attached. In my case, I used a flashlight to clearly see the pulley, which looked rusty and dull—signs of wear. Making a visual inspection sets the stage for accurate assessment.
Check the Pulley’s Movement
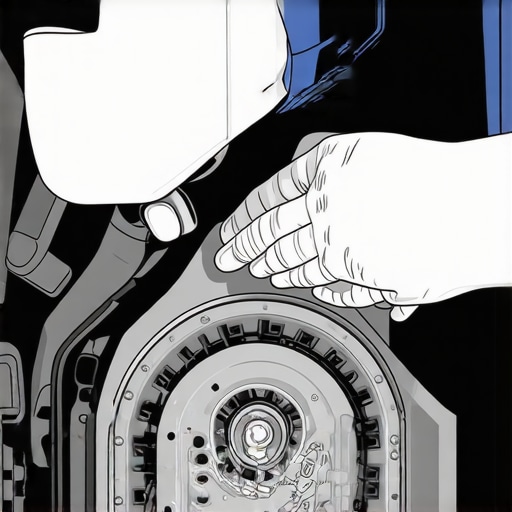
Clamp the belt tensioner and gently attempt to turn the pulley by hand using a wrench or socket. A smoothly spinning pulley indicates normal operation, while resistance or inability to turn suggests seizing. I recall applying my hand directly (using safety gloves), feeling stiff resistance that told me the pulley was indeed seized. Avoid using bare fingers—safety is paramount.
Test the Pulley’s Condition
Perform a Resistance Test
With the engine off, try turning the pulley counterclockwise with a wrench. It should move freely. If it doesn’t or feels stiff, the pulley is seized or dangerously close to seizing. Remember, a frozen pulley can cause belt slipping or breakage, leading to alternator failure. I learned this the hard way when a seized pulley snapped my serpentine belt during a drive—incurring unexpected repair costs.
Check for Signs of Damage
Look for rust, grooves, or shiny spots on the pulley surface. These are indicators of wear or corrosion that could lead to eventual seizure. If rust is present, applying a rust remover or lubricant may provide temporary relief—but replacement is advisable for safety and reliability. Routine checks like this save you from sudden breakdowns, supporting the advice at collisionrenew.com.
Address the Seized Pulley
Lubricate or Replace
If the pulley feels stiff but isn’t physically damaged, applying a penetrating lubricant like WD-40 can free it up temporarily. However, this is a short-term fix; replacing the pulley ensures long-term performance. For a full journey, I replaced my pulley using a socket set, carefully removing the mounting bolts. Keep in mind, always replace components with OEM parts or high-quality equivalents to maintain your vehicle’s integrity.
Reassemble and Test
Reinstall the pulley, tighten bolts to manufacturer torque specs, and snug the serpentine belt back onto the pulley route. Reconnect the negative battery terminal, start the engine, and observe the pulley’s operation. It should spin smoothly without resistance or squealing. Do a quick visual check for belt alignment, as misalignment can mimic pulley issues. Ensuring proper assembly prevents future problems and prolongs the lifespan of your repair, as emphasized in collisionrenew.com.
Monitor and Prevent Future Seizures
Regularly inspect your alternator pulleys and belts—at least every 10,000 miles or during routine maintenance. Replace worn belts promptly to prevent strain on the pulley bearings. Using high-quality belts and replacing worn components as part of your schedule extends vehicle reliability, aligning with the tips from collisionrenew.com. Remember, catching early signs of pulley wear can save you from unexpected breakdowns, keep your vehicle running smoothly, and avoid costly repairs.
Many car owners assume that brake service is a one-size-fits-all task, but in my experience, there’s a hidden nuance that often trips up even seasoned DIYers. Contrary to popular belief, not all brake issues require immediate replacement of pads or rotors. Sometimes, missed details—like subtle friction noise or uneven wear patterns—indicate underlying problems that standard inspections overlook. This oversight is a common trap; ignoring minor irregularities can lead to premature component failure or, worse, complete brake failure. For example, a warped rotor might seem like an urgent replacement, but in reality, it could be caused by uneven pad wear due to caliper sticking, which requires a different repair approach. If you’re not digging into the root cause, you’re risking unnecessary repairs or unsafe driving conditions. Recognizing these nuances means paying close attention during routine checks, especially inspecting for uneven pad deposits or corrosion. For advanced insights into diagnosing brake issues correctly, I recommend exploring Collision Renew’s latest brake service guide. Often, the real problem lies beneath the surface, and addressing it correctly ensures long-term safety and performance.
Why Do Some Brake Problems Resurface After Repair?
This question puzzles many, and here’s the trick: many technicians overlook the importance of proper calibration and system flushing. For instance, if brake fluid isn’t replaced regularly, it can cause corrosion and reduce hydraulic efficiency, leading to spongy pedals or inconsistent braking. According to automotive expert sources, neglecting systemic maintenance accelerates wear and sometimes causes repairs to be temporary.
Have you ever fallen into this trap? Let me know in the comments. Mastering the nuances of auto repair, especially with critical systems like brakes and transmissions, can save you money and prevent dangerous situations. Routine inspections and understanding these common pitfalls are your best tools for long-term vehicle health, aligning with expert advice on extending your vehicle’s lifespan.
Gear Up for Long-Term Reliability with Precision Tools
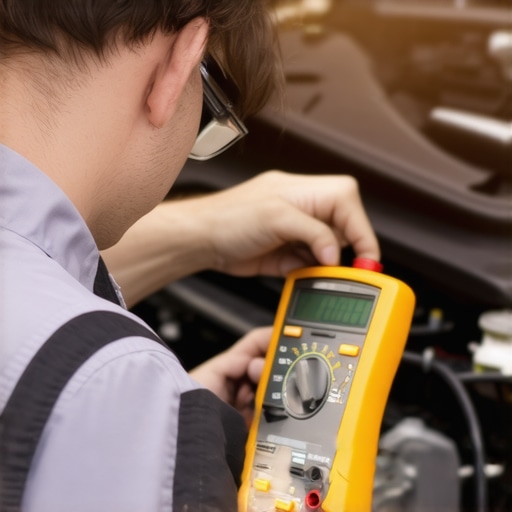
Maintaining your car’s health requires the right equipment. I personally swear by a high-quality digital multimeter for quick electrical diagnoses, especially when checking sensors or wiring issues. Unlike analog testers, a digital multimeter offers precise readings and quick troubleshooting, which is crucial for systems like your alternator or transmission sensors. When it comes to transmission diagnostics, I use a dedicated OBD-II scanner from BlueDriver. It connects seamlessly to my smartphone and provides real-time data, helping me catch issues before they escalate. As automotive technology advances, integrating software like AutoEnginuity for deeper system analysis will likely become standard in auto repair.
Harnessing Software and Diagnostic Builds for Better Repairs
Modern vehicles are increasingly reliant on electronic control units (ECUs). That’s why I incorporate advanced diagnostic software such as Collision Renew’s comprehensive checklists and tools like OBDLink or Snap-on’s Verus Pro scanner. These tools allow me to access manufacturer-specific codes, read live data streams, and perform system calibrations. Such precision tools reduce guesswork and help ensure my repairs stand the test of time.
Adopt Preventive Maintenance Strategies
Prevention is better than cure, especially for critical components like your transmission and brakes. I recommend setting up a maintenance schedule that leverages both software alerts and physical inspections. For example, routinely checking your transmission fluid quality with test strips, combined with real-time data from diagnostic software, helps in catching early signs of wear. This dual approach aligns with expert tips for transmission care. Remember, replacing fluid before it becomes sludge can significantly extend system longevity.
Stay Ahead with Future-Ready Tools
Looking ahead, I predict the integration of AI-driven diagnostic platforms will redefine auto maintenance. These systems will proactively identify issues based on patterns, much like predictive health apps for humans. To stay prepared, consider investing in cloud-connected diagnostic tools and familiarize yourself with emerging trends. Embracing this evolution now ensures your vehicle remains reliable and safe in the long run.
How Do I Maintain Transmission and Brake Systems Over Time?
Consistent, scheduled inspections combined with leveraging the right diagnostic tools are key. As I emphasized earlier, software like Collision Renew’s ultimate repair guide offers invaluable insights into long-term maintenance strategies. Regularly checking fluid levels, replacing worn components early, and using diagnostic scans can prevent costly repairs down the line. I highly recommend trying the tip of investing in a dedicated transmission fluid test kit—it’s simple, effective, and can save you hundreds in repairs by catching issues early.
The Hardest Lesson I Learned About Brake Service and Transmission Repairs
- Never ignore the subtle signs of wear—those squeaks and vibrations are often the first clues to bigger problems. Overlooking them can lead to costly and dangerous failures.
- Investing in quality diagnostic tools changed my approach; understanding the real issue saves both time and money. It’s a game-changer in auto repair.
- Routine checks and preventive maintenance aren’t just suggestions—they’re essential. Catching issues early, like a seized alternator pulley, kept me safely on the road longer.
- I learned to trust my instincts—if something feels off, it usually is. Addressing problems sooner rather than later makes all the difference in vehicle longevity.
- Sharing experiences with others accelerates learning—never underestimate the value of community insights on platforms like Collision Renew’s repair guides.
My Go-To Resources That Reinforced My Auto Repair Knowledge
- Collision Renew’s Essential Car Service Checks — A comprehensive guide that helps me stay ahead of potential issues with proactive inspections.
- Ultimate Auto Repair Guide — An invaluable resource for understanding complex repair processes in simple terms.
- Transmission Maintenance Tips — My trusted reference for keeping my transmission in top shape and avoiding unexpected breakdowns.
- Restoration Strategies — A source of inspiration and practical advice for restoring vehicle beauty and function.
Take Control and Keep Your Car Running Strong
Remember, auto repair isn’t just for professionals—it’s empowering to understand your vehicle’s needs and respond proactively. Every diagnosis and DIY fix brings confidence and savings. Your journey to mastery begins now—start with small checks, educate yourself with trusted resources, and don’t hesitate to ask questions. The more you learn, the more you’ll enjoy driving without worry. Ready to turn your car maintenance routine into a source of pride? Share your experiences below and join the community of proactive car owners. How have routine checks saved you from unexpected breakdowns? Let me know in the comments!