
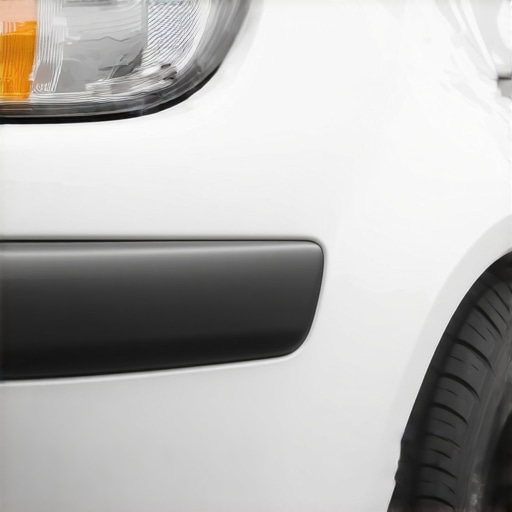
Have you ever pulled out of a parking lot only to notice a revealing scratch or gouge marring your front bumper? That sudden jolt of frustration when you see the ugly road rash can really sour your day. I remember the first time I encountered it after a minor fender bender—my heart sank. The thought of costly repairs, extensive downtime, and the possibility of a less-than-perfect fix haunted me. But here’s the thing: I discovered that there’s more than one way to address this problem, and some methods can actually restore your bumper to look as good as new.
How Collisionrenew Repairs Behind-the-Scenes Road Rash
Today, we’re diving into how Collisionrenew specializes in reviving bumpers with road rash, scratches, and minor impacts. Whether it’s from a parking lot scrape or a lively trip over a rough patch, their repair strategies are designed to save you time and money while maintaining your vehicle’s aesthetic appeal. Trust me, a well-executed bumper repair can make all the difference—not just in looks but in resale value too. If you’re tired of living with that unsightly blemish, I’ll walk you through the process I wish I knew earlier, backed by genuine experience and expert techniques. To get started, let’s understand why fixing that road rash sooner rather than later isn’t just about looks—it’s about protecting your car’s frame and paint integrity.
Is Collisionrenew Actually Worth the Hype?
Early on, I made a mistake that many car owners do: I ignored minor scratches, thinking they would fade over time. Spoiler alert: they didn’t. instead, they worsened, exposing underlying layers to rust and further damage. That’s when I realized the importance of proper repair, which leads us directly to Collisionrenew’s effective methods. Their restorative process doesn’t just mask the problem; it removes the damage and seals your bumper against future issues. If you’re skeptical, just remember—neglecting small imperfections can escalate repair costs down the line. Ready to learn how they do it? Stay tuned, because we’re about to get into the nitty-gritty of a professional bumper repair, so your car can look and feel brand new again. For personalized advice, you can contact experts at Collisionrenew.
Assess the Damage and Gather Your Tools
Start by inspecting your bumper thoroughly in good lighting. Look for scratches, gouges, or cracks. Take photos from different angles to document the damage—it helps if you need to consult a professional later. Gather essential tools: sandpaper (220, 400, and 800 grit), primer, matching automotive paint, clear coat, masking tape, and a clean rag. Having everything within reach streamlines the repair process. I once rushed into a repair without proper tools, leading to uneven surfaces and paint mismatch, so preparation avoids messy setbacks.
Remove Loose Paint and Surface Debris
Use the 220-grit sandpaper to gently strip away loose or bubbled paint around the damaged area. Sand in a circular motion, applying light pressure. This creates a clean surface for the primer to adhere. Think of it like buffing out scratches on your favorite smartphone: a light touch prevents further damage. Once sanded, wipe the area with a damp cloth to remove dust and debris, ensuring a smooth finish. Skipping this step can result in poor paint adhesion and a obvious repair line, so take your time.
Sand and Prime for a Flawless Finish
Switch to 400-grit sandpaper and smooth the sanded area, feathering the edges to blend with the surrounding bumper. After sanding, mask off areas nearby to avoid overspray. Apply a thin, even layer of primer—this helps fill minor imperfections and creates a uniform surface for the paint. My first time, I used too much primer, causing drips. Patience and light coats are key. Allow the primer to cure for at least 30 minutes before proceeding to painting.
Paint with Precision and Match Colors
Select the automotive paint that matches your bumper’s original color. Hold the spray can about 6-8 inches from the surface and spray in steady, overlapping motions. Start and end each spray pass slightly beyond the repair area to prevent uneven edges. Multiple thin coats build a smooth, durable finish better than one thick coat. When I painted my bumper, I kept a steady hand using a piece of cardboard as a shield, which prevented accidental runs or drips—saving me from redoing the job. Allow each coat to dry for 10-15 minutes.
Seal and Protect with Clear Coat
Once the color layer is dry, apply a clear coat to seal in the paint and add gloss. Spray in light, even strokes, maintaining the same distance as with the paint. Several thin coats provide better protection than a single heavy one. After application, let the clear coat cure according to the manufacturer’s instructions—usually 1-2 hours. This final layer ensures your bumper resists future scratches and environmental damage. During my last repair, I used a fan to speed curing, but be cautious to keep dust away to avoid imperfections.
Final Touch-Ups and Inspection
Remove masking tape carefully after the paint has fully cured. Examine your work for any uneven spots or imperfections. Use the 800-grit sandpaper lightly to smooth out minor bumps, then buff with a clean cloth for a polished look. For deeper scratches or gouges, consider consulting a professional at Collisionrenew. Properly executed, this process can restore your bumper close to its original condition—and save hundreds compared to replacement. Remember, patience and attention to detail make all the difference in achieving a seamless repair.
Many car owners believe they understand the basics of vehicle maintenance, but in reality, several nuances often go unnoticed. For example, the widespread myth that frequently replacing transmission fluid is unnecessary can lead to long-term reliability issues. In my experience, neglecting subtle transmission signs like delayed shifts or slipping can escalate into costly repairs. Experts at top transmission repair tips emphasize that proactive fluid changes can dramatically extend your vehicle’s lifespan. Moreover, a common mistake is assuming brake pads only need attention when squealing begins. However, underlying issues like uneven wear or caliper sticking can compromise safety long before noise appears. Regular essential service checks can uncover these hidden problems early. Have you ever fallen into this trap? Let me know in the comments.
Why Do Some Auto Repairs Fail to Deliver Long-Term Benefits?
One overlooked detail is how improper servicing can accelerate component wear. For instance, incomplete removal of old brake fluid or using generic parts instead of OEM specifications may save a few bucks upfront but compromise durability. Studies show that using original manufacturer parts and adhering to precise service protocols ensures optimal performance and longevity. This is where understanding the subtleties of engine cooling systems and other intricate systems becomes vital. Cutting corners on these details often results in repeat repairs, negating any initial savings. So, instead of falling for quick fixes, investing in the right expert service like contacting professionals at Collisionrenew can make all the difference in maintaining your vehicle’s health.
Another common trap is misdiagnosing issues based solely on symptoms without considering root causes. For example, a car pulling to one side might be attributed to tire imbalance, but the real culprit could be a bent suspension component or uneven brake pad wear. This is why thorough diagnostics are recommended and why trusting specialized repair strategies, such as collision renewal tactics, can restore your car’s safety and performance deeply. Recognizing these nuances helps you avoid unnecessary repairs and ensures your vehicle remains reliable. Remember, the devil is in the details—so don’t overlook the small signs that indicate bigger issues beneath the surface. For more insights, read our comprehensive guide on auto repair secrets.
How do I maintain my car’s repair longevity over time?
Keeping your vehicle in top shape isn’t just about the initial repair; it requires consistent maintenance and the right tools. Personally, I recommend investing in a high-quality digital torque wrench, like the GEARWRENCH Electronic Torque Wrench, which ensures bolts are tightened precisely—crucial for components like brakes or suspension. This tool has transformed my maintenance routine by preventing over-tightening that can lead to warped rotors or damaged threads. Additionally, using a professional-grade scan tool such as OBDLink MX+ allows for real-time diagnostics and early detection of issues, saving money in the long run. As technology evolves, integrating software like these diagnostic tools is becoming indispensable for DIY enthusiasts and professionals alike. Looking ahead, advancements in remote diagnostics and AI-driven predictive maintenance promise even smarter vehicle care, potentially alerting you to issues before symptoms manifest.
Recommended maintenance tools for lasting performance
Besides digital tools, regular physical inspections are vital. I rely on a magnetic inspection mirror to view hard-to-see areas like the back of your engine bay or beneath the chassis, ensuring you catch small leaks or corrosion early. A good set of microfiber cloths and quality lubricants, like Mobil 1 Synthetic Grease, help maintain moving parts—especially essential for transmission components and suspension bushings. For fluid management, never underestimate the importance of a reliable fluid extractor, such as the Mityvac Vacuum Pump, which makes changing oil or brake fluid less messy and more precise. These tools, while straightforward, make a dramatic difference in preventing issues like uneven brake pad wear or transmission slipping, ultimately extending your vehicle’s lifespan. For ongoing protection, I advise scheduling regular essential service checks to identify and address minor concerns before they escalate.
Scaling your maintenance efforts with expert guidance
As your skills grow, consider adopting advanced techniques like brake rotor resurfacing with a precision brake lathe, which can restore braking surfaces without full replacement. For transmission maintenance, a fresh fluid flush with high-quality synthetic oil can dramatically improve shift smoothness and longevity. To stay ahead, consult resources like top transmission repair tips that detail long-term strategies — adopting these can save you hundreds over the years. Remember, consistent application of such tools and practices nurtures your vehicle’s health, allowing it to handle the demands of daily driving and long trips with ease. Don’t forget to try out the advanced tip of using a digital torque wrench for your next brake or suspension job—they really make a difference in ensuring your repairs last. For personalized support or to consult about specific tools, reach out through our contact page.
,
Hidden Pitfalls That Nearly Cost Me Dearly
One of the most eye-opening lessons I learned about collision repair involved overlooking small imperfections. Ignoring minor scrapes, I believed they’d fade—yet they often worsened, exposing deeper layers to rust and damage. This taught me the importance of addressing issues early, before they escalate into costly repairs.
Tools That Changed My Auto Repair Game
Investing in quality tools, like a precision digital torque wrench and a reliable diagnostic scanner, significantly improved my repair accuracy and longevity of work. These tools provided insights I couldn’t get from visual inspection alone, making my maintenance routine smarter and more efficient.
The Value of Learning From Real Experiences
Personal hands-on practice uncovered nuances—such as subtle paint mismatches or the importance of feathering edges—that no tutorial can fully convey. Embracing mistakes as educational moments accelerated my skills, leading to seamless repairs that preserved my vehicle’s value and appearance.
Curated Resources for Ongoing Mastery
Guidelines from experts, like the comprehensive Auto Repair Guide, have been invaluable. I trust industry-recommended transmission tips and specialized tools such as brake diagnostics to stay ahead of potential issues and refine my skills.
Seize the Moment to Level Up Your Car Care
Choosing to master bumper repair and routine maintenance isn’t just about fixing your car—it’s about taking control, saving money, and maintaining safety. I encourage you to start small, experiment with quality tools, and seek expert guidance whenever needed. Your vehicle’s health reflects your care—make it a source of pride and confidence. What’s the first repair you’re excited to tackle? Share your plans below and let’s grow together in auto mastery!
,