
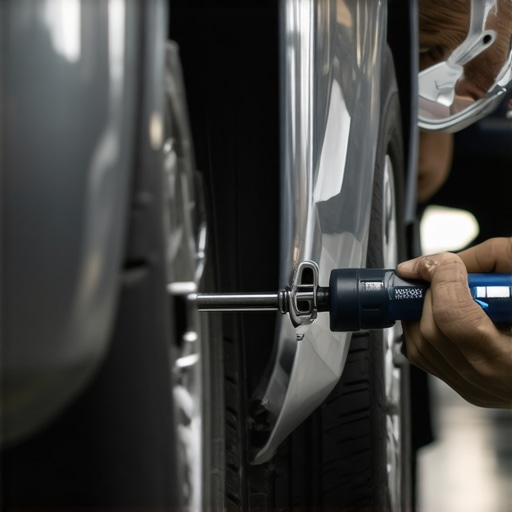
It was just a minor tap, barely enough to make my stomach drop momentarily. But the aftermath? My front fender looked like it had been through a minor earthquake. I remember thinking, “Is this repair really worth the cost?” Later, I learned that many car owners face similar frustrations after seemingly insignificant bumps, worrying whether a quick fix can really restore their vehicle’s look and safety.
Why Even Small Impacts Can Leave Big Impressions
Many people assume that only major collisions cause significant damage. The truth is, even low-speed taps—often at under 10 mph—can misalign your fenders or cause subtle dents that aren’t immediately obvious. These tiny dings can lead to more serious issues if left unaddressed, including uneven tire wear or compromised aerodynamics. It’s not just about looks; it’s about maintaining the integrity of your vehicle and ensuring safety on the road.
When I first encountered this problem, I was tempted to ignore it, thinking it would self-correct or that a quick paint job would suffice. However, an early mistake I made was assuming I didn’t need professional help—leading to more costly repairs down the line. I’ve since discovered that specialized techniques like those used by Collisionrenew not only realign fenders but also restore them without invasive body fillers, saving both time and money. So, if you’ve faced that nagging doubt about whether your minor bump is worth fixing properly, you’re not alone—and there’s an effective solution.
Is Fender Repair After a Low-Speed Tap Really Worth the Effort?
I used to think that small dents weren’t a big deal. But after experiencing how an improperly repaired fender can lead to rust and further damage, I realized that tackling the repair early is a smart move. Professional realignment techniques ensure your vehicle maintains its original shape and structural safety. Curious how these methods work and whether they’re suitable for your car? Keep reading, because I’ll guide you through the process and share tips to make your repairs last. Want to dive deeper? You might find our collision renewal strategies page helpful.
Assess the Damage Carefully
Start by examining your fender in good lighting, feeling for dents or misalignments. Use a plastic pry tool to gently check if the panel is loose or if there are hidden cracks. Remember, even small visible dents can hide underlying issues, so take your time. I once missed a tiny crease in my car’s front left fender because I only glanced quickly; that oversight led to rust later, emphasizing thorough inspection.
Remove the Fender for Better Access
Disconnect the Wheel and Undo Fasteners
Loosen the lug nuts, lift the vehicle with a jack, and remove the wheel for unobstructed access. Locate all screws, bolts, and clips holding the fender—common places include wheel well liners and engine bay edges. Keeping a dedicated toolbox with socket sets and clips helps. I once struggled because I didn’t keep track of all fasteners, causing delays during reassembly.
Detaching the Fender Carefully
Gently pry the fender away from the body using plastic pry tools to avoid scratches. Use a mirror and light to check for hidden clips. This step is akin to peeling a sticker without tearing; patience prevents damage. During my first attempt, I used a metal tool, which left marks—a costly mistake that taught me the importance of proper tools.
Addressing Dents Without Paint
Apply a paintless dent repair method by using a specialized dent removal kit. Place glue tabs on the dented area, then use a glue puller to gently lift the panel back into shape. Consistent, measured pulls prevent overstressing the metal. I tried this on my own, with mixed success—some dents responded well, others required professional attention, but the technique saved me money and preserved factory paint.
Use Heat or Cold to Relax Metal
Sometimes, applying heat with a heat gun to the area for a few minutes or placing an ice pack on the backside helps in making the metal more malleable. Think of it like warming dough before shaping it. I experimented with this on a small dent; the heat softened the metal enough to flatten the dent with gentle pressure, streamlining the repair process.
Reinstall and Realign for a Perfect Finish
After repairs, reattach the fender by reversing removal steps. Ensure all bolts and clips are tight, and the panel aligns seamlessly with adjacent panels—like fitting the last piece into a puzzle. During my project, I used a carpenter’s level as a makeshift guide to ensure the fender sat perfectly. This attention to detail not only looks better but prevents future issues like wind noise or water leaks.
Final Checks and Test Drive
Visually inspect the repair, check for gaps, and confirm that all fasteners are secure. Before lowering the vehicle, double-check that the wheel is correctly mounted. Take a steady drive to listen for unusual sounds or misalignments. My last test drive revealed a slight wobble due to a loose bolt, illustrating the importance of thoroughness. For more comprehensive insights, review our collision renewal strategies.
When it comes to auto repair, there’s a wealth of misconceptions that can cost car owners time and money. Many believe that routine transmission service or brake maintenance is just a matter of adding fluid or replacing parts, but in reality, the nuances are often overlooked. For example, some think that any noise during acceleration indicates a transmission problem, yet expert insights show that such symptoms can stem from issues like a worn-out CV joint or even engine misfires—so diagnosing accurately is vital.
Maintaining Your Vehicle with Precision Tools
Keeping your car in top shape over the years requires not only knowledge but also the right equipment. As someone who has extensively worked on auto repairs, I recommend investing in a high-quality digital torque wrench. Unlike standard wrenches, a digital torque wrench ensures that bolts—especially those on critical components like brake rotors or transmission mounts—are tightened accurately, preventing over-tightening or under-tightening, which can lead to costly issues down the line. For larger jobs, a reputable hydraulic lift is indispensable; it provides safety, stability, and unobstructed access to the undercarriage, making tasks like oil pan replacement or transmission service much more manageable. Additionally, a comprehensive set of plastic pry tools helps avoid damaging paint or trim, which is crucial during fender realignment or body panel repairs.
Equally important are diagnostic tools. A reliable OBD-II scanner, such as the BlueDriver or Innova models, allows you to read and clear error codes precisely, saving you hours of guesswork. Personally, I prefer models that include live data streaming and basic sensor testing because they help diagnose issues like slipping transmissions or engine hesitations more effectively. Remember, investing in proper tools not only ensures safety but also enhances the quality and longevity of your repairs.
Leveraging Software for Accurate Diagnostics
Modern vehicles are equipped with complex electronic systems that demand advanced troubleshooting. I utilize OEM-specific diagnostic software, which communicates directly with your car’s ECU. These tools provide detailed insights into system health, allow recalibration of sensors after repairs, and even diagnose issues that generic scanners might miss. For example, after replacing a transmission fluid or performing a realignment, running software diagnostics can confirm that all systems are synchronized, reducing the risk of future failures. In the long term, mastering these diagnostics can save you hundreds, if not thousands, by preventing unnecessary part replacements.
Making Maintenance Routine and Easy
The key to long-lasting auto repairs is consistency. Schedule regular car service checks and adhere to manufacturer recommendations. Using specialized cleaning tools, like brake caliper brushes or fuel system cleaners, can keep components like brakes and fuel injectors functioning smoothly over miles. Also, consider maintaining a detailed repair log—this practice helps identify recurring issues early, such as brake rotor warping or transmission slipping, so you can address them proactively.
Scaling Your Auto Maintenance Efforts
As your skills grow, so does your capacity to handle more complex repairs or even small-scale upgrades. For instance, I’ve personally transitioned to performing wheel restoration and alignment on my own, improving ride quality and safety. To manage scaling, invest in a good service manual specific to your vehicle model—resources like our comprehensive repair guide can be invaluable. Predictably, as systems become more sophisticated, integrating software updates and sensor recalibrations will be essential for maintaining optimal performance.
How do I Keep My Car Running Smoothly Over Time?
Regularly using a diagnostic scanner to monitor sensor data, staying on top of fluid replacements, and performing proactive realignment checks can dramatically extend your vehicle’s lifespan. For example, routine transmission care helps prevent slipping and gear issues. Think of maintenance as a preventive shield—it’s more cost-effective than repairs after failure. To bolster your efforts, I recommend trying the advanced technique of using a laser alignment system for precise wheel positioning, which I personally use for ensuring perfect geometry, thereby reducing tire wear and improving fuel economy. As technology evolves, expect tools like AI-powered diagnostic systems to become more accessible, making long-term vehicle care even more efficient and accurate.
Lessons Hidden Behind Small Bings
- Sometimes, the smallest tap can hide underlying damage you won’t see at first glance, emphasizing the importance of professional inspections even for minor impacts.
- Skipping quality repair techniques can cost more in the long run—trusting experts and their methods, like collision renewal strategies, saves time and money.
- Patience and proper tools make all the difference—rushing through fender realignment often leads to future headaches, whereas doing it right ensures safety and longevity.
Tools and Resources That Changed My Approach
- The BlueDriver OBD-II scanner has been invaluable for accurate diagnostics, helping me catch issues early before they escalate into costly repairs.
- Investing in a quality hydraulic lift and plastic pry tools made reinstallation and realignment tasks much safer and more precise, preventing damage to surrounding panels.
- Our ultimate guide to auto repair offers detailed steps and expert insights—it’s the resource I wish I had when I first started working on cars, simplifying complex procedures.
Walking Your Path with Confidence
If you’ve ever hesitated to fix that little dent, remember that proactive repairs preserve your vehicle’s safety and value. Embrace the process, utilize trusted tools, and don’t be discouraged by initial setbacks. Every successful repair builds your skills and confidence, bringing you closer to mastering auto care.
What small repair have you been putting off, and what’s stopping you? Share your story below—I’d love to hear about your experiences and help you take that first step toward fixing it.