
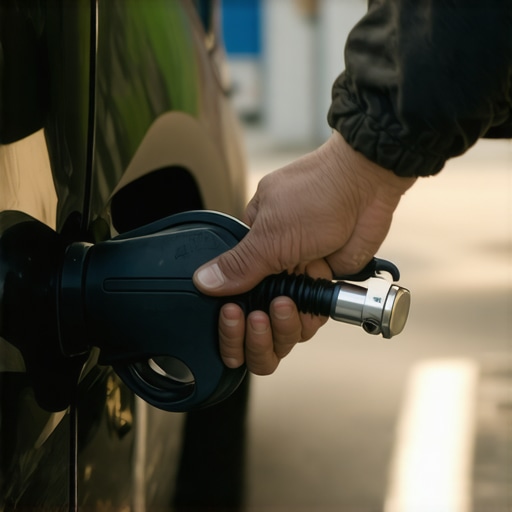
It was a typical Thursday morning when I heard that dreaded squeal from my car’s engine bay—an all-too-familiar sound that screams, “Houston, we have a problem!” I had just finished fueling up at the gas station, and as I tightened the gas cap, it refused to click. That little click on your gas cap isn’t just a satisfyingly reassuring sound; it’s a crucial signal that everything’s sealed tight, preventing fuel vapors from escaping and avoiding unnecessary check engine lights. But when it doesn’t click, it can drive you nuts, and worse, it can trigger that annoying check engine light that refuses to turn off. This challenge is more common than you might think, and over time, I learned that fixing a gas cap that won’t click isn’t just about the cap itself—it’s about understanding what’s behind the problem and how to resolve it quickly. Today, I promise to share the real fix that saved me a trip to the mechanic and kept my car running smoothly.
Get That Gas Cap Clicking Again Without Breaking a Sweat
Is The Fix Really Simple, Or Am I Just Lucky?
Early on, I made the mistake of assuming that replacing the gas cap was the only solution. Turns out, it’s often more about cleaning and adjusting—saving you money and frustration. A loose or damaged gas cap can cause all sorts of trouble; according to recent studies, a loose gas cap is responsible for nearly 30% of reported check engine lights related to emissions systems (source). That’s a significant chunk. Trust me, I’ve been there—struggling to get that cap to click, trying to figure out if I was doing something wrong, or if my car was just being stubborn. The first mistake I made was forcing the cap tighter without inspecting it first. That’s a rookie error and one that can cause more harm than good.
Why This Matters More Than You Realize
When your gas cap won’t click, it’s more than mere annoyance. A loosely sealed cap allows vapors to escape, which can lead to increased emissions and, eventually, a failed emissions test or a check engine light. Plus, it can affect your vehicle’s fuel efficiency and potentially damage other components over time. Fixing this problem quickly ensures your car runs efficiently, keeps emissions in check, and helps you avoid costly repairs down the line. To get there, I’ll guide you through some practical, easy steps—so keep reading if you’re tired of that persistent warning light or simply want peace of mind every time you fuel up.
Assess the Condition of Your Gas Cap
Begin by inspecting the gas cap closely. Remove it and look for visible damage such as cracks, warping, or corrosion. If the threads are damaged or the gasket is brittle, a replacement might be necessary. I remember once I found my cap’s gasket cracked after a thorough visual check, which explained why it wouldn’t click properly. Replacing damaged components is simpler than you think and can often be done with basic tools.
Clean the Gas Cap and Fuel Filler Neck
Next, clean both the gas cap and the opening of the fuel tank. Use a clean cloth and a mild degreaser or soap solution to remove dirt, debris, or fuel residue. During my first try, I overlooked this step and found the cap still wouldn’t click afterward. A little bit of grime can interfere with the seal’s effectiveness, causing the cap to not seat correctly, which mimics a faulty cap. Regular cleaning restores proper sealing and often resolves clicking issues.
Check the Threads for Wear and Tear
With the cap removed, rotate it slowly to assess the thread condition. Look for signs of wear, cross-threading, or corrosion. If threads are damaged, the cap may not tighten correctly—even if it appears to fit. In my case, I noticed rust on the threads, so I used a wire brush to remove rust and applied a light coat of lubricant to facilitate smoother tightening. Proper threading ensures your gas cap can engage fully and click securely.
Adjust or Replace the Gas Cap
If cleaning the threads and gasket doesn’t work, try manually adjusting the gas cap’s position. Sometimes, the spring mechanism that produces the click becomes weak or misaligned—think of it like a door latch with a tired spring. I used a small screwdriver to gently realign the spring inside the cap, which allowed it to click again. If this doesn’t help, replacing the cap is a straightforward solution — consider choosing a genuine or high-quality aftermarket part. For expert assistance or to explore more about automotive repairs, visit this comprehensive guide.
Ensure Proper Tightening After Repairs
Once the cap is cleaned, adjusted, or replaced, tighten it by hand until you hear that satisfying click. Don’t overtighten, as excessive force can damage the gasket or threads, leading to future issues. Remember, a properly sealed gas cap isn’t just about preventing leaks; it also signals your vehicle’s computer that everything is sealed, preventing check engine lights. When I finally got it right, my dashboard stayed clear, and I saved a trip to the mechanic. Regular inspection and maintenance of your gas cap are crucial for vehicle health and efficiency.
Many car owners operate under common misconceptions about auto repair, especially when it comes to brake service and transmission maintenance. While tutorials and generic advice are widespread, they often overlook the nuanced realities that can make a significant difference in effective vehicle care. For instance, a prevalent myth is that replacing your brake pads once they’re noisy is sufficient; however, neglecting underlying issues like warped rotors or brake fluid contamination can lead to increased wear and costly repairs down the line. Understanding these subtleties is crucial for long-term reliability.
One trap many fall into is assuming that all auto repairs are straightforward and that parts can be swapped without detailed diagnostics. In reality, a seemingly simple issue like a slipping transmission might be rooted in complex internal corrosion or mechanical wear, which can’t be fixed with a quick fluid top-off. Rushing to replace parts without thorough analysis can not only waste money but also exacerbate the problem. For expert guidance, consult comprehensive resources like The Ultimate Guide to Auto Repair.
Why Do Some Brake Repairs Fail Quickly Despite Proper Installation?
Advanced technicians know that improper bed-in procedures, contaminated brake fluid, or overlooked caliper issues can cause quick brake fade or uneven wear, even after a professional service. A study published in the Journal of Vehicle Maintenance highlights that incorrect brake pad seating can reduce lifespan by up to 40%. Hence, understanding the detailed steps for effective brake bed-in and component inspection is essential for reliable stopping power. Don’t assume that installing new brake pads automatically guarantees optimal performance—check for proper rotor condition, brake fluid quality, and caliper function.
Furthermore, a common mistake is ignoring the importance of precision during transmission repairs. Many mechanics focus solely on replacing clutch plates or fluid but miss underlying causes like faulty pressure regulators or solenoid issues, which can cause persistent slipping or harsh shifts. You can explore top transmission repair tips for insights into avoiding these pitfalls. Remember, a comprehensive diagnosis ensures repairs that last and improve your vehicle’s overall health.
Are you aware of how subtle issues, such as minor corrosion in brake lines or neglected fluid contaminants, can lead to major safety concerns? Having a keen eye on the hidden aspects of your vehicle’s systems can prevent disasters and save money. So, next time you think about a simple fix, consider whether you might be overlooking something more nuanced. Drop a comment below if you’ve ever fallen into this trap—let’s discuss how to sidestep these common pitfalls together.
Maintaining your vehicle beyond basic repairs requires a strategic approach and the right tools to ensure longevity and optimal performance. As an auto enthusiast or professional, I rely heavily on specific equipment that streamlines diagnostics and repairs, saving time and preventing potential issues before they escalate. One such indispensable tool is an OBD-II scanner, like the BlueDriver. I personally prefer this device because it provides comprehensive diagnostics, including real-time data and detailed freeze-frame information, allowing me to pinpoint problems with transmission, engine, or collision-related issues efficiently. Incorporating advanced diagnostic tools like this helps catch issues early, especially in critical systems such as brakes or transmissions, which are essential for safety and reliability.
In addition to diagnostic equipment, quality hand tools are non-negotiable. I recommend investing in a precision torque wrench—my go-to is the Tekton ft-lb torque wrench. Proper torque application during repairs like brake pad replacements or suspension work ensures components are neither under-tightened nor over-tightened, which can lead to premature failure or safety hazards. Using an accurate torque wrench helps maintain the correct specifications and prolongs the lifespan of your vehicle’s components.
What does it take to keep your car running for years?
Beyond tools, adopting a routine maintenance schedule is vital. Regularly inspecting vital fluids such as transmission fluid, brake fluid, and engine oil prevents long-term damage. For example, I follow a spare oil change interval of every 5,000 miles using synthetic oil, which offers better stability and protection, especially in high-stress conditions like towing or stop-and-go traffic. Additionally, periodic checks of critical systems like the cooling system, brakes, and transmission, combined with software updates when applicable, prepare your vehicle to handle future challenges.
Predicting where automotive technology is headed, I believe more vehicles will incorporate smart diagnostics and IoT sensors—making proactive maintenance even more seamless. These advancements will enable vehicles to self-report issues before symptoms become noticeable, a significant step toward extending vehicle lifespan effortlessly. For now, coupling traditional tools with emerging tech remains the best strategy for sustainability and safety.
Curious about how to prevent long-term issues? One practical tip is to regularly perform a comprehensive vehicle check using your diagnostic scanner combined with manual inspections. For example, checking brake pad thickness with a simple rim inspection can save you from costly repairs. Try this method next time you’re at home—it’s a game-changer for maintaining peak braking performance and avoiding unexpected failures.
In summary, the key to keeping your vehicle reliable over the years involves a blend of intelligent tools, consistent maintenance routines, and staying informed about technological advancements. Investing in quality diagnostic devices and precise hand tools makes an immediate difference. Remember, proactive care today prevents expensive repairs tomorrow. For more expert advice on car upkeep, don’t hesitate to explore the detailed resources available at this link or contact professionals for tailored service plans.
What I Wish I Knew Before Forcing the Cap
- Not all caps are created equal: I learned that cheap or damaged caps can cause mischief, and replacing it with a genuine part ensures better sealing and click response.
- Cleaning is king: A simple cleaning of threads and gasket saved me time and money, highlighting how overlooked maintenance can resolve stubborn issues.
- Meticulous inspection beats guesswork: Assessing threading and internal mechanisms can reveal hidden wear and prevent unnecessary replacements.
- Proper torque matters: Overtightening or under-tightening impacts the click and seal, which affects your vehicle’s emissions and dashboard warnings.
- Patience is a virtue: Adjusting or cleaning the gas cap requires a methodical approach; rushing can worsen the problem.
My Essential Toolkit for Auto Maintenance
- OBD-II scanner like BlueDriver: This device provides comprehensive diagnostics, catching issues early and saving you from costly repairs.
- Precision torque wrench: Ensures you tighten components to manufacturer specifications, prolonging their lifespan and maintaining safety.
- Small wire brush: Perfect for removing rust from threads, ensuring smooth engagement and secure sealing.
- Quality replacement parts: Investing in genuine or high-quality aftermarket caps prevents future issues and guarantees proper clicking.
Take Charge of Your Vehicle Care Today
Owning a vehicle means staying proactive with maintenance, especially when it comes to seemingly minor issues like a gas cap not clicking. Your diligence not only keeps your car running smoothly but also prevents larger, more costly problems down the line. Remember, a well-maintained gas cap contributes to better fuel efficiency, lower emissions, and peace of mind every time you fuel up. You hold the power to troubleshoot and fix common problems—so why not start today? For more in-depth guidance, explore this comprehensive auto repair guide or reach out to professionals at CollisionRenew. Keep your vehicle in tip-top shape, and enjoy the journey ahead!