
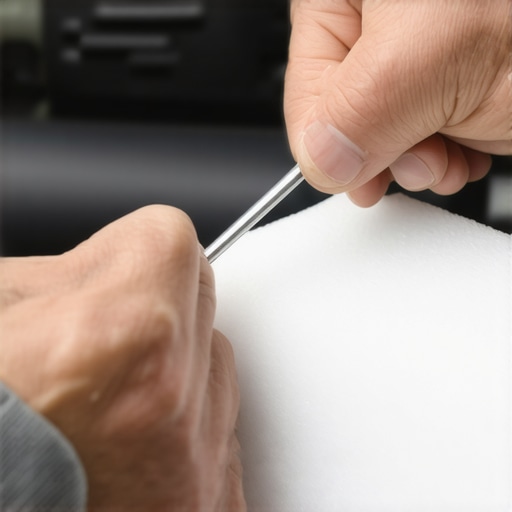
I remember the exact moment I reached my breaking point. I was driving down a backroad, the kind with more patches than original asphalt, and my dashboard sounded like a bag of angry LEGO bricks being shaken by a caffeinated toddler. Every bump was a rhythmic click-clack-squeak that vibrated right into my skull. I tried the classic move: I turned up the radio. But even at max volume, I could still feel that plastic-on-plastic friction. It makes your car feel cheap, old, and neglected, even if you’ve kept up with essential car service checks religiously. That noise isn’t just an annoyance; it’s a distraction that turns a peaceful commute into a stress-test. Today, I’m going to show you how to hunt down those elusive ghosts in your dashboard and silence them for good without spending a fortune at a shop.
Why You Should Stop Ignoring That Constant Chirping
Ignoring a rattle is easy until it isn’t. For months, I told myself it was just ‘character’ or that the car was getting older. The truth is, these noises often stem from small plastic clips that have lost their tension or wiring harnesses that have shaken loose from their anchors. If your car feels loose when driving over bumps, a rattling interior only magnifies that sense of instability. When I first tried to fix mine, I made a massive rookie mistake: I shoved a bunch of folded-up business cards into the gaps. It worked for about three miles before they fell out and I realized I needed a real strategy. According to SAE International, Noise, Vibration, and Harshness (NVH) is one of the leading factors in driver fatigue, meaning that rattle is actually making you more tired on long hauls. By addressing these small friction points, you aren’t just fixing a sound; you are restoring the luxury of a quiet cabin. Have you ever felt like your car was falling apart just because of one tiny, persistent squeak?
Is it actually worth the hassle to tear things apart?
Many people fear that poking around behind the instrument cluster will only lead to more problems, or worse, an expensive trip for professional auto repair. I’ll be honest: you don’t need to be a master mechanic. Most of the time, the fix involves simple felt tape, foam strips, or tightening a few hidden screws. You don’t have to pull the entire dash out to find the culprit. We are going to focus on the ‘pressure test’ method—a simple way to locate the exact spot where two surfaces are rubbing together. If you’ve been putting this off because it seems too technical, stick with me. We’re going to use the same mindset used in collision renewal strategies to ensure everything fits as tight as it did the day it left the factory.
Master the Pressure Test to Stop the Noise
The ‘pressure test’ is the gold standard for interior diagnostics, and it requires a methodical touch. The first rule is simple: never do this while you are the one driving. I once tried to pinpoint a buzz near my passenger-side vent while navigating a roundabout, nearly clipped a curb, and realized that my life was worth more than a quiet car. Have a friend drive you over a predictably bumpy road—a gravel path or a neglected city street works best. As they drive, use your fingertips to apply firm pressure to the seams where the dashboard meets the A-pillars, the radio surround, and the glove box. When the rattle stops under your touch, you have found the ‘clash point.’ It is a moment of pure mechanical satisfaction, similar to how collision renewal strategies restore the structural integrity of a vehicle. 
Pack the Gaps Without Making a Mess
Once you have identified the culprit, you need the right shim. Please, for the sake of your interior, put down the duct tape. Heat will eventually turn that adhesive into a sticky, black sludge that will ruin your plastics. Instead, pick up a roll of automotive-grade felt tape or thin adhesive foam strips. These materials provide the ‘cushion’ needed to stop plastic-on-plastic friction without adding bulk. Use a plastic pry tool—never a flathead screwdriver—to gently widen the gap and slide a small piece of felt into the interface. I remember a particularly stubborn buzz in a 2015 sedan where I had to layer the felt like a surgical graft; the difference was night and day. Precision here is as vital as following top transmission repair tips; being sloppy with your materials just creates uneven gaps that look worse than the noise sounds.
Check the Hidden Clips Behind the Trim
Sometimes the issue isn’t two panels rubbing; it is a broken or loose plastic clip holding them together. If you apply pressure and the noise persists, you may need to pop the trim piece off entirely. Inside, look for white or yellow plastic ‘Christmas tree’ clips. If one is bent or white from stress, replace it. I once spent three hours chasing a ‘metallic’ rattle in my dashboard only to find a loose 10mm socket that a previous owner had dropped down the defroster vent. Before you tear the whole dash apart, ensure you aren’t actually hearing a rattling heat shield or an engine bay component vibrating against the firewall. Vibrations are master deceivers; they travel through the frame and can make a loose bolt under the car sound like it is right in your lap.
Verify the Sound Isn’t Coming from the Chassis
If your cabin is secured but the ‘rattle’ feels more like a ‘clunk,’ the problem is likely deeper than a loose piece of plastic. If you’ve tightened every screw and the car still groans over speed bumps, you might be dealing with the hidden suspension issues that a standard wheel alignment wont fix. Interior work is about comfort, but if the vibration is coming through the steering wheel or the floorboards, it is time to shift your focus from the dashboard to the wheel wells. A quiet cabin is only truly enjoyable when you know the mechanical bones of the car are just as solid as the trim.Let’s dig deeper into the most common mistake I see: treating the symptom instead of the disease. The biggest error most DIYers and even some professional shops make is assuming that a sound’s perceived location is its point of origin. In the world of high-end auto repair, we call this the ‘ventriloquist effect.’ Your dashboard is essentially a giant speaker box that amplifies vibrations from across the frame. If you spend three days shimming your dash panels while your brake rotors keep warping every few months, you aren’t fixing the car; you’re just silencing the messenger. The National Institute for Automotive Service Excellence (ASE) suggests that technicians must differentiate between ‘squeak and rattle’ and mechanical ‘vibration and harshness’ to avoid unnecessary part replacements. If the noise only happens at a specific speed, like when you hit 65 mph, it is almost certainly a rotational balance issue rather than a loose screw in your glovebox. 
The Chemical Trap That Ruins Your Interior
A common trap is reaching for the wrong lubricant. I’ve seen well-meaning owners spray silicone or petroleum-based solvents directly into dashboard seams to stop a squeak. This is a massive mistake. Many automotive plastics react poorly to these chemicals, leading to ‘blooming’ or permanent white discoloration that looks like a salt stain. Worse, relying on quick-fix fluids or aerosol sprays often masks a mechanical friction point that eventually leads to structural failure of the trim clips. Instead, use dry PTFE sprays or, better yet, the felt tape method we discussed earlier. Precision is your best friend here; sloppy application just leaves a greasy residue that attracts dust and turns into a grimy mess within a week.
Is that interior rattle actually a sign of mechanical failure?
The short answer is: quite often. When a car’s engine or transmission mounts begin to fail, the powertrain’s natural frequency isn’t dampened correctly. This creates a low-level harmonic that vibrates the lighter, thinner components—like your dash trim or instrument cluster—long before you ever feel the engine ‘shake.’ Following top transmission repair tips means checking your mounts as soon as new cabin noises appear. If you only focus on the trim, you’re missing the warning signs of a mounting bracket that is about to let go. Have you ever fallen into this trap and spent hours fixing the wrong thing? Let me know in the comments. By the time you feel the vibration in your seat, the ‘rattle’ has usually been screaming at you from the dashboard for months. Real expertise lies in knowing when to put down the felt tape and pick up a torque wrench.
Build a toolkit that actually stops the noise
To get professional results, you have to stop using whatever you find in the kitchen junk drawer. I spent years trying to make do with flathead screwdrivers and electrical tape, only to end up with gouged plastic and a sticky mess. Now, I never touch an interior without a dedicated set of nylon non-marring pry tools. These are essential because they flex just enough to pop a clip without scarring the dashboard. My go-to for actual noise suppression is Tesa 51608, which is the exact high-end PET fleece wire harness tape used by German manufacturers. It’s thin, heat-resistant, and provides that factory-level dampening that standard tapes simply can’t match. When you combine these tools with essential car service checks, you’re not just fixing a sound; you’re maintaining the vehicle’s structural integrity. 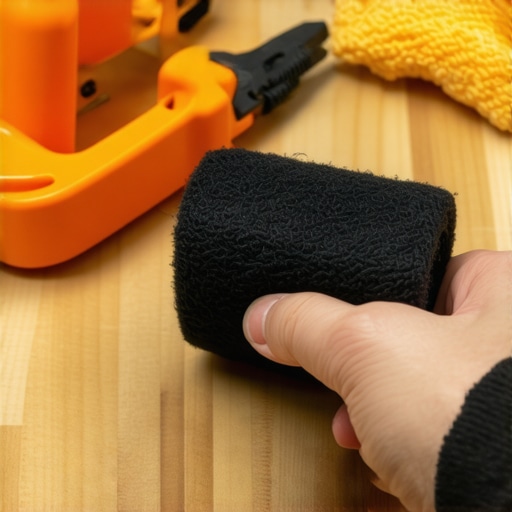
How do I maintain a silent cabin over years of driving?
Long-term success depends on a proactive approach to the car’s mechanical health. You have to realize that a quiet interior is a byproduct of a healthy powertrain. I make it a point to inspect my engine and transmission mounts every time I do an oil change. If those mounts harden or crack, no amount of felt tape will save your dashboard from the resulting harmonics. This is where following top transmission repair tips for long-term vehicle reliability becomes crucial. A smooth-shifting car creates fewer shockwaves that loosen interior clips over time. As noted in the 3M Automotive Design Guide, specific pressure-sensitive adhesives and foam spacers are engineered to dissipate vibrational energy, but they can only do so much if the source of the vibration is a mechanical failure. I also recommend a yearly ‘tighten-up’ session where you specifically check the bolts on the seat tracks and the glovebox hinges, as these are high-traffic areas prone to loosening.
Silence is the future of automotive luxury
As we move toward a world dominated by Electric Vehicles (EVs), the quest for a quiet cabin is going to become even more intense. Without the mask of a combustion engine, every tiny squeak from a loose window regulator or a rubbing trim piece becomes deafening. We are seeing a massive shift in collision renewal strategies where technicians must focus as much on acoustic insulation as they do on paint matching. If you want your current car to feel modern for another decade, you need to master these NVH (Noise, Vibration, and Harshness) fixes now. Treating your car to a high-quality brake service can also eliminate the high-frequency squeals that eventually vibrate through the steering column and rattle the instrument cluster. I challenge you to take thirty minutes this weekend to perform the ‘pressure test’ I described earlier—identify just one rattle and fix it using automotive-grade felt. You’ll be surprised how much more expensive your car feels when the only thing you hear is the road.
The Hard Truth About Why Dashboards Never Stay Quiet Forever
After years of tinkering, I realized that the seasons are your biggest enemy. Plastic panels expand in the summer sun and contract in the winter chill, which means a dash that was silent in July might start singing in January. One lightbulb moment for me was realizing that over-tightening screws is often worse than leaving them a bit loose; too much tension prevents the plastic from shifting naturally and leads to those sharp, cracking sounds. Also, remember that your dashboard is an acoustic chamber. Sometimes a vibration from the engine bay or even an issue found during a brake service can travel up the steering column and manifest as a rattle in the instrument cluster. It is rarely just one thing; it is an ecosystem of fit and finish.
The Gear That Separates Amateurs From Quiet Car Masters
If you want to move beyond the phase of stuffing napkins in gaps, you need a specific kit. I personally swear by PET Fleece Tape because it mimics the factory dampening used by luxury brands. Unlike electrical tape, it does not get gooey when the car sits in a hot parking lot. I also recommend a set of Nylon Pry Tools to avoid the dreaded screwdriver gouge on your soft-touch plastics. For the truly dedicated, a Mechanic’s Stethoscope can help you listen through the dash to find exactly where a bolt has vibrated loose. These tools transform the job from a guessing game into a surgical procedure, much like the precision needed for the ultimate guide to auto repair. If you notice other strange symptoms, like when your interior lights flicker, it might be time to look at the wiring while you have the panels off.
Finally Take Control of Your Commute
Fixing that one persistent rattle changes the entire way you feel about your vehicle. Suddenly, it does not feel like an old bucket of bolts; it feels like the precision machine it was designed to be. Don’t let a small buzz ruin your love for driving. If you can hear yourself think, you can enjoy the road again. If you find that the noise is actually coming from outside, you might need to learn how to fix a rattling heat shield instead. Take that first step today and reclaim your peace of mind. What is the most annoying rattle you have ever had to chase down in your car? Let me know in the comments below!