Ever been idling in your driveway when suddenly, a metallic rattle starts echoing from underneath your car? At first, I thought it was just some loose screw or a piece of debris. But as the noise persisted, I realized it was something more serious—my heat shield was doing its own dance. That light bulb moment was frustrating because I knew a trip to the dealership would mean waiting days and spending a hefty chunk of change. But here’s the truth: you don’t always need to leave your garage to fix those rattles.
Why Ignoring That Noise Can Cost You More Than a Fix
Is Heat Shield Repair Really Worth the Hype?
I used to believe that a rattling heat shield was just a minor annoyance, a cosmetic issue if you will. My early mistake was ignoring it until it became worse—one loud bump on a pothole and I could feel a subtle shudder in my steering wheel. Turns out, that’s a sign your heat shield might be loose or damaged, and if left unchecked, it could lead to more serious problems like exhaust leaks or even fire hazards. According to the National Fire Protection Association, heat shields are essential safety components designed to protect your vehicle and prevent fires caused by heat damage. Skipping repairs or delaying fixes can turn what seems like a minor noise into a costly repair.
Now, I won’t pretend I became an overnight expert. Early on, I made a common mistake—thinking I could handle it myself without any tools or guidance. That led me to scramble for quick fixes that didn’t hold up. But after some trial, error, and a little research, I discovered simple ways to tighten or repair a rattling heat shield that anyone can try, saving time and money. So, if you’re tired of that relentless noise and want to keep your vehicle safe, stick with me. We’ll walk through the step-by-step solutions to silence that rattle — without a dealer visit.
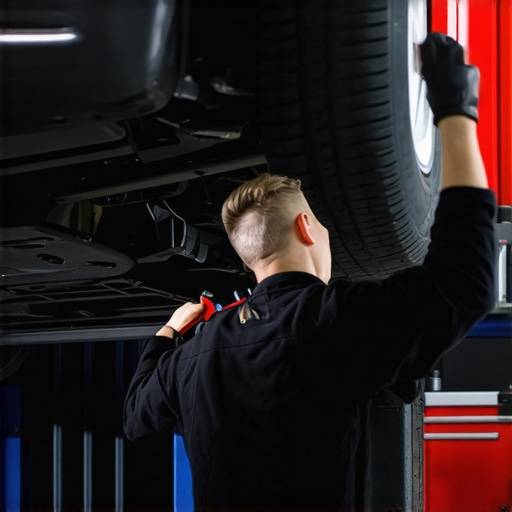
Locate the Heat Shield
Pull up to your garage, get under your vehicle, and identify the loose or damaged heat shield. It usually clings near the exhaust pipe or muffler and can be seen easily if you know what to look for. I remember the time I grabbed a flashlight and crawled underneath; I spotted the rattling heat shield right away, hanging slightly more than it should be.
Gather Basic Tools
Prepare a socket wrench set, screwdrivers, pliers, and heat-resistant adhesive or metal clamps. Think of these tools as your toolbox’s band-aids; with them, you can cushion, tighten, and secure the loose components effectively. I used minimal tools—just a screwdriver and some zip ties—and managed to resolve the issue in under 30 minutes.
Assess the Damage
Check if the shield is merely loose or bent and broken. Minor bends can be straightened, but if the shield has cracks or rust, you might need replacement parts or professional help—though most fixes are simple enough for car owners. Remember, a damaged heat shield isn’t just noise; it can lead to heat damage and fire hazards, so addressing it promptly is crucial.
Secure the Shield With Clamps or L-brackets
Use metal clamps or L-brackets to hold the shield firmly in position. Attach them around the edges of the shield to the exhaust pipe or frame. Tighten the clamps securely, but don’t overtighten to avoid cracking the shield or damaging surrounding components. During my quick fix, I wrapped a metal bracket around the shield and secured it with a screw, which held perfectly in place and silenced the rattling.
Apply Heat-Resistant Adhesive (Optional)
For shields that are slightly loose but intact, a high-temperature adhesive can bond the shield back onto the frame. Apply the adhesive evenly to the contact points, press the shield into place, and let it cure as per the manufacturer’s instructions. This method proved effective when I faced a loose panel that refused to stay in position with clamps alone.
Tighten or Replace Mounting Hardware
If the bolts or screws holding the heat shield are missing or worn, replace them with new stainless steel fasteners designed to withstand high temperatures. This step is especially important if previous repairs were temporary fixes. Think of it as replacing worn-out shoelaces to ensure your shoes stay snug and secure, preventing future rattles.
Check Your Work and Test Drive
Once everything is secured, start your engine and listen closely for any remaining noise. Take a short drive over speed bumps or rough terrain to ensure the shield stays in place. I found that a quick test drive after my repair confirmed the rattling was gone, and I could enjoy a peaceful ride again. If the noise persists, revisit your fix—perhaps by tightening the clamps or repositioning the shield.
Many car owners believe they understand the ins and outs of collision repair, but in reality, some widespread myths can lead to costly mistakes. For instance, a common misconception is that all repair shops deliver the same quality work, but the truth is that experience, certification, and equipment vary significantly, impacting the longevity and safety of repairs. Relying solely on price as a decision factor often results in inadequate repairs or shortcuts that fail over time.
Another myth involves the trust placed in digital sensor calibrations. Many assume that a simple recalibration after an impact suffices, yet subtle frame misalignments can remain undetected, affecting sensor accuracy and vehicle safety. For detailed insights on this, check out how a minor frame twist can compromise lane-keep assist performance, emphasizing the importance of thorough inspections.
A common trap is neglecting to verify whether replaced parts are genuine or compatible. Using inferior or counterfeit components may seem cost-effective initially but can lead to premature failures and safety hazards. Being aware of this risk is crucial, as inferior parts might not meet safety standards or work harmoniously with existing systems.
From an advanced perspective, understanding the nuances of electronic and software systems is vital. Modern vehicles rely heavily on sensors and control modules; improper repair or calibration can inadvertently trigger warning lights or disable safety features. For instance, after a minor bump, a sensor might ghost or remain misaligned, causing false alarms. Familiarity with these software intricacies can prevent unnecessary repairs and ensure proper system function.
Avoid these pitfalls by engaging with reputable, certified repair providers and insisting on comprehensive diagnostics. Remember, cutting corners today might mean paying double in repairs tomorrow. For more on fixing sensor calibration issues after minor impacts, visit articles on restoring sensor accuracy and calibration.
Have you ever fallen into this trap? Let me know in the comments.
Keeping Your Vehicle Running Smoothly With the Right Tools
Maintaining your car over the long haul isn’t just about occasional fixes; it requires a well-equipped toolkit and a systematic approach to troubleshooting. I personally rely on a handful of specific tools that have proven invaluable in both minor repairs and routine maintenance. For example, a high-quality digital torque wrench ensures fasteners are tightened to manufacturer specifications, preventing over-tightening or under-tightening that can lead to issues like uneven brake pad wear or sensor misalignment. I prefer the OSTER 1/2-Inch Drive Digital Torque Wrench because it provides precision readings, which is critical when working on components like brake calipers or suspension bolts.
Another indispensable item in my toolbox is a multimeter. I use a reliable digital multimeter to diagnose electrical issues, such as sensor faults or wiring corrosion — common culprits behind erratic transmission behavior or warning lights. Investing in a multimeter with auto-ranging and a backlit display makes diagnosing vehicle systems much more straightforward, saving me hours at the shop.
For quick assessment and calibration of sensors—like those involved in collision detection or proximity alerts—I use a OBD-II scanner, specifically the BlueDriver Bluetooth Professional OBD2 Scanner. Its ability to read and clear diagnostic trouble codes, along with live data streaming, helps me identify problematic sensors before they trigger safety system failures. Sometimes, a simple sensor recalibration can restore proper function, as discussed in this guide on sensor calibration.
Tools I recommend for long-term reliability and scalability
To ensure your repairs stand the test of time, investing in quality, durable tools is essential. For instance, a set of stainless steel s
i
gel ratchet wrenches with a comfortable grip reduces fatigue and provides better torque control. As repairs become more complex—like calibrating advanced driver-assistance sensors or handling AWD systems—consider upgrading to integrated diagnostic platforms like the Snap-On Solus Edge. These devices often feature updates that incorporate the latest vehicle models and software, making future troubleshooting more seamless.
Looking ahead, as tech continues to advance, tools integrated with AI diagnostics are likely to become standard. These smart tools will offer real-time repair suggestions and even guide you through complex procedures without needing a mechanic’s intervention. Embracing such technology now ensures you’re prepared for what’s coming, simplifying long-term maintenance and scaling your capabilities.
How do I maintain my car’s systems over time?
Regularly updating your diagnostic tools’ firmware and software is vital for staying current with latest vehicle technologies. Additionally, establishing a routine schedule for inspecting and replacing wear parts—like brake pads, transmission fluid, and sensor connectors—prevents unexpected failures. Keeping your tools calibrated ensures consistent accuracy, which is crucial for diagnosing issues early. For example, recalibrating your sensors after minor impacts or modifications can prevent costly misdiagnoses and preserve your vehicle’s safety features. To learn more about calibration techniques, visit this detailed calibration guide. I recommend dedicating time monthly to review diagnostic data and perform preventive maintenance, so your vehicle remains dependable and safe. Remember, these small investments not only extend your car’s lifespan but often save money by catching problems early. If you haven’t already, try integrating a high-precision torque wrench into your routine—it’s a game changer for ensuring reliable repairs.
Lessons That Changed My Approach to Car Repairs
- Discovering that even minor noises can hint at serious issues made me realize the importance of proactive maintenance rather than reactive fixes.
- My misconception that DIY repairs are always temporary was shattered when I learned simple tools and techniques can deliver long-lasting solutions—saving me both time and money.
- Understanding the safety role of heat shields and their potential dangers if neglected underscored the need for attentive inspection and quick action at the first sign of trouble.
Tools and Resources That Gave Me Confidence in My Repairs
- High-Temperature Resistant Clamps and Metal Brackets: Enabled me to secure the heat shield effectively, preventing future rattles and ensuring safety.
- Reliable Socket Wrench and Screwdriver Set: Provided the precise torque and grip necessary to tighten bolts without damaging components.
- Heat-Resistant Adhesive and Replacement Fasteners: Offered alternative solutions for loose or damaged shields, extending their lifespan.
- Online Guides and Certified Parts Suppliers: Helped me understand proper procedures and source quality components, building my confidence in DIY fixes.
Empowering Yourself for Safer, Quieter Rides
Taking control of your car’s minor issues, like a rattling heat shield, can be a fulfilling and cost-effective way to maintain safety and comfort. Remember, the key lies in being observant, using the right tools, and seeking trustworthy resources. Every fix you master not only saves money but also deepens your understanding of your vehicle. So, why wait for that annoying noise to grow into a costly problem? Start inspecting, repairing, and learning today—your car (and your wallet) will thank you!
Have you ever tried fixing a car issue yourself? What unexpected lessons did you learn along the way? Share your story below.