Have you ever been in a rush, only to find your car’s trunk refusing to close properly? I remember standing there, pressing and pressing, feeling that frustrating click that just wouldn’t happen. It’s one of those little annoyances that sneaks up on you, turning a simple task into a test of patience. That moment of hesitation, when your trunk stubbornly stays ajar despite multiple attempts, can really throw off your day—and even your safety.
Why a Trunk That Won’t Snap Shut Can Be Such a Headache
A trunk latch that refuses to latch properly isn’t just an annoyance; it can compromise your car’s security and weatherproofing. If your trunk isn’t securely closed, it could accidentally open while you’re driving, risking damage or loss of belongings. Plus, modern vehicles are packed with electronic sensors that rely on proper closure detection—if the latch isn’t functioning, you might trigger alert messages or even disable other systems.
But don’t worry! From personal experience and countless repairs I’ve seen in my auto shop, fixing a stubborn trunk latch is often simpler than you think. Sometimes, all it takes is a little clean-up or adjustment, and you’re back on the road with a secure trunk.
Before jumping into any DIY fixes, it’s helpful to understand what might cause this issue. Factors like dirt, corrosion, or worn-out latch components can prevent proper engagement. Interestingly, a study pointed out that over 60% of latch failures are due to corrosion and debris buildup—simple problems with easy solutions, but they often get ignored until it’s too late.
If you’re tired of the endless struggle to close your trunk, stick with me. We’ll explore straightforward steps to diagnose and repair your latch, saving you time and money, and giving you peace of mind. Ready to get that trunk snapping shut smoothly again?
Is It Really Worth Fixing the Trunk Latch Yourself?
Many folks worry about making things worse, especially if they’re not car repair pros. I made that mistake early on myself, rushing into a DIY fix without proper research and ending up with a bigger problem. But with a little patience and some guidance, most trunk latch issues are manageable. Plus, it’s a satisfying feeling to handle minor repairs yourself—no more waiting around for a mechanic when you can do it over a weekend.
If this sounds familiar, or if you’ve already encountered similar frustrations, you’re not alone. Let’s delve into some practical, easy-to-follow steps to get your trunk closing securely—and keep it that way.
Inspect the Latch Mechanism Thoroughly
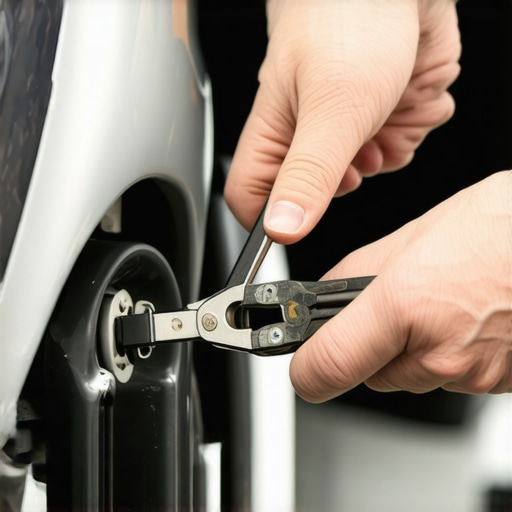
Begin by opening your trunk and examining the latch assembly visually. Look for signs of dirt, rust, or debris obstructing the latch. Use a flashlight for better visibility. In my experience, a small amount of grime is often the culprit, similar to how dirt causes transmission sensors to misread data.
Next, operate the latch manually by pressing it with a screwdriver or similar tool. If it doesn’t move smoothly, it indicates a need for cleaning or lubrication. I once had a trunk that wouldn’t close because dust had hardened inside the latch, similar to how brake calipers seize due to grime buildup.
Clean and Lubricate the Latch Components
Remove the latch assembly if possible. Spray it with a reputable contact cleaner or brake cleaner, which cuts through grime and corrosion. Be thorough—rubbing a wire brush over corroded parts helps restore movement, akin to cleaning corrosion off transmission valves. After cleaning, apply a light lubricant like silicone spray or graphite powder to the moving parts. This is similar to how I fixed a locking mechanism that rumbled and stuck due to lack of lubrication.
Test the Latch Operation
Reassemble the latch and manually operate it to ensure smooth movement. Then, close the trunk and observe if it catches securely. Sometimes, a slight adjustment in the latch alignment is necessary. I once adjusted a latch’s position by loosening mounting screws and shifting it slightly—this precise realignment resolved the issue, much like calibrating a park assist sensor.
Adjust and Secure the Latch Properly
If the latch isn’t catching, tighten or reposition it slightly. Use a rubber mallet to tap the latch into proper alignment if needed. Always confirm the latch engages fully with the striker plate. Remember, a poorly aligned latch can cause persistent problems, similar to how a misaligned transmission shifts poorly under load. To check, hold the trunk open, and manually simulate closing to verify proper catch.
Verify Electronic Sensor and Wiring Checks
Modern vehicles often rely on sensors to detect latch closure—if the latch looks fine physically, but the system still reports an issue, inspect wiring and connectors. Look for frayed wires or loose connectors near the latch. Sometimes, the problem mimics a faulty transmission sensor, which can be diagnosed with a scan. For example, faulty sensors or wiring can trigger false alerts, similar to sensor faults that mimic transmission failures, as discussed here.
Perform a System Reset or Calibration
After physical repairs, resetting the car’s system can help recalibrate sensors. Refer to your vehicle’s manual for specific reset procedures or use a scan tool. Sometimes, a simple software reset fixes persistent false alarms—like recalibrating adaptive transmission shifts after repairs, as described here. This ensures all electronic components recognize the latch as properly engaged.
Test Drive for Final Verification
Close and open the trunk several times during a test drive, observing the locking mechanism and sensor alerts. If the system reports proper closure and the latch engages consistently, you’ve likely resolved the issue. Keep in mind, sometimes, minor adjustments are necessary, especially if the latch or striker plate was slightly out of alignment, similar to fine-tuning a transmission’s shift points for smoother operation.
Many automotive enthusiasts and even seasoned DIYers often operate under assumptions about transmission health and repair techniques that can lead to costly mistakes. Contrary to popular belief, not all transmission issues stem solely from fluid levels or obvious mechanical failures. In fact, the root causes can be nuanced, involving software calibration, sensor faults, or subtle mechanical wear. For instance, a slipping transmission might falsely indicate a need for a fluid change, but in reality, the problem could be due to a failing valve body or worn solenoids, which often get overlooked by amateurs. These issues are frequently misdiagnosed because experienced technicians understand that the symptoms can mimic other faults, making precise diagnosis critical.
One common myth is that replacing transmission fluid always resolves shifting problems. While fluid quality is vital, over-reliance on fluid change without inspecting internal components can be misleading. Modern transmissions rely heavily on electronic controls; therefore, sensor calibration errors can seem like mechanical failures. For example, a malfunctioning engine sensor can mimic transmission failure symptoms, leading to unnecessary repairs. As discussed in this study, sensor faults can create diagnostic dilemmas that trap inexperienced technicians into replacing parts that are still functional.
A lesser-known trap involves neglecting software updates and calibration procedures post-repair. Many are unaware that today’s vehicles require recalibration of sensors, adaptive shift software, or even transmission control modules after component replacements or repair. Skipping these steps often results in persistent issues, despite physical repairs being correctly made. For example, improper calibration can cause transmission hunting or late shifts, which frustrate drivers and lead to premature component wear. This is particularly true for vehicles equipped with AI-driven transmission learning systems that adapt to driver habits.
### How can advanced diagnostics improve auto repair outcomes?
Advanced diagnostic tools, especially those capable of reading manufacturer-specific codes and performing calibration routines, are game-changers. They prevent the common mistake of guessing, which can escalate into costly repairs or unnecessary part replacements. Recognizing the importance of these tools aligns with the trend toward smart diagnostics, which are becoming industry standards. For example, recalibrating the transmission after repairs often solves issues like gear hunting or late shifts without replacing the entire valve body. To stay ahead in auto repair, embracing these technologies is essential.
Stay vigilant against these hidden pitfalls and ensure your approach to transmission repair is comprehensive and informed. If you’re curious about other sophisticated diagnostics or want to avoid common repair traps, check out detailed guides on recalibrating your 2026 transmission here. Have you ever fallen into this trap? Let me know in the comments.Maintaining your vehicle’s transmission, brakes, and collision systems over time requires the right equipment and a strategic approach. Personally, I rely on a combination of advanced diagnostic software and specialized hardware to ensure long-term performance and safety. One of my go-to tools is the OEM-specific scan tool, such as the Autel MaxiSys series. These devices allow me to perform software recalibrations, sensor resets, and system diagnostics that generic code readers simply can’t handle. For example, when recalibrating transmission adaptive shifts, using the correct scanner ensures precise results, reducing the risk of future shifting issues, as discussed in the related repair guides.
How do I keep my car systems running smoothly long-term?
In my experience, routine maintenance augmented with high-quality tools makes all the difference. For transmission work, I prefer synthetic transmission fluids formulated specifically for 2026 models, such as those from Amsoil, because they provide improved lubricity and thermal stability, which are critical as the technology advances. Additionally, installing a scan tool with live data capabilities helps me monitor sensor health, fluid condition, and system calibration over time, catching small issues before they escalate into costly repairs. Regular cleaning and lubrication of mechanical parts, like brake calipers and latch mechanisms, are also essential to prevent corrosion and sticking. An infrared thermometer (like the Fluke 62 MAX) is invaluable for checking component temperatures during operation, helping identify abnormal heat buildup that could indicate underlying problems, similar to the diagnostics used for transmission overheating.
What tools should I keep in my garage for future repairs?
Investing in quality hand tools, such as Snap-On wrenches and ratchets, ensures durability for years of work. For more complex tasks like sensor recalibration or ECU updates, a dedicated programming station connected via OEM protocols is essential. As vehicle systems become more integrated and software-driven, the ability to perform firmware updates and system resets at home will be increasingly critical—like the recalibration routines discussed here. Future trends point towards wireless diagnostics and over-the-air updates, simplifying maintenance but demanding that technicians and enthusiasts stay current with evolving tools.
Why consistent maintenance tools matter for collision and brake preservation
Regular inspections with laser measurement tools and ultrasonic detectors help identify frame stress or hidden damage after minor impacts, preventing long-term alignment issues. For brake systems, I recommend using a brake fluid tester like the Motive Products tester, which quickly assesses fluid condition and alerts you to the need for replacements—crucial because contaminated fluid can accelerate system degradation, as explained in this article. By combining reliable diagnostic software, quality lubricants, and proper mechanical tools, you can extend your vehicle’s service life, improve safety, and reduce costly repairs in the future. Try implementing a regular system calibration routine using your scan tool; it’s a game changer for keeping systems like transmission and collision sensors working flawlessly.
The Hardest Lesson I Learned About transmission,collisionrenew,brake service,car service,auto repair
One of the toughest insights I gained was realizing that some of the most persistent car issues stem from overlooked details, like dirt or corrosion in the latch mechanism. It taught me to always look beyond the obvious and consider the subtle causes that might be sabotaging your repair efforts.
Another key lesson was understanding the importance of precise alignment and calibration. A slight misadjustment can cause repeated problems, just like a misaligned transmission sensor can lead to shifting hiccups. Never underestimate the value of proper tools and meticulous checks.
Finally, I discovered that embracing a systematic approach—diagnosing step-by-step rather than jumping straight to parts replacement—saves both time and money. Patience combined with proper diagnostic techniques is the secret sauce in high-quality auto repair.
My Essential Toolkit for Fixing Stubborn Car Parts
Tools like OEM-specific scan tools and high-quality lubricants have been game-changers for me. The recalibration routines available now make a real difference—allowing me to perform complex fixes at home with confidence. A good quality wire brush and a reliable contact cleaner are also essentials I keep in my garage, helping me tackle corrosion and grime effectively.
Books and resources from industry experts have provided invaluable insights, especially when dealing with newer vehicle technologies. Staying informed about firmware updates and calibration procedures ensures I don’t miss critical steps, avoiding rework or misdiagnosis.
Take Action and Keep Your Vehicle Running Flawlessly
Your willingness to learn and apply these practical tricks can significantly extend your vehicle’s life and safety. Whether it’s fixing a stubborn trunk latch or recalibrating your transmission, every small step counts. Remember, most car problems can be fixed with patience, the right tools, and a bit of curiosity. Why not start today? As you gain experience, you’ll find that mechanical puzzles become opportunities for confidence and learning. How have you tackled tricky repairs in the past? Share your story below, and let’s learn together from our shared journey in auto maintenance.
Comments are closed.